The Essential Guide to Embalming Tools
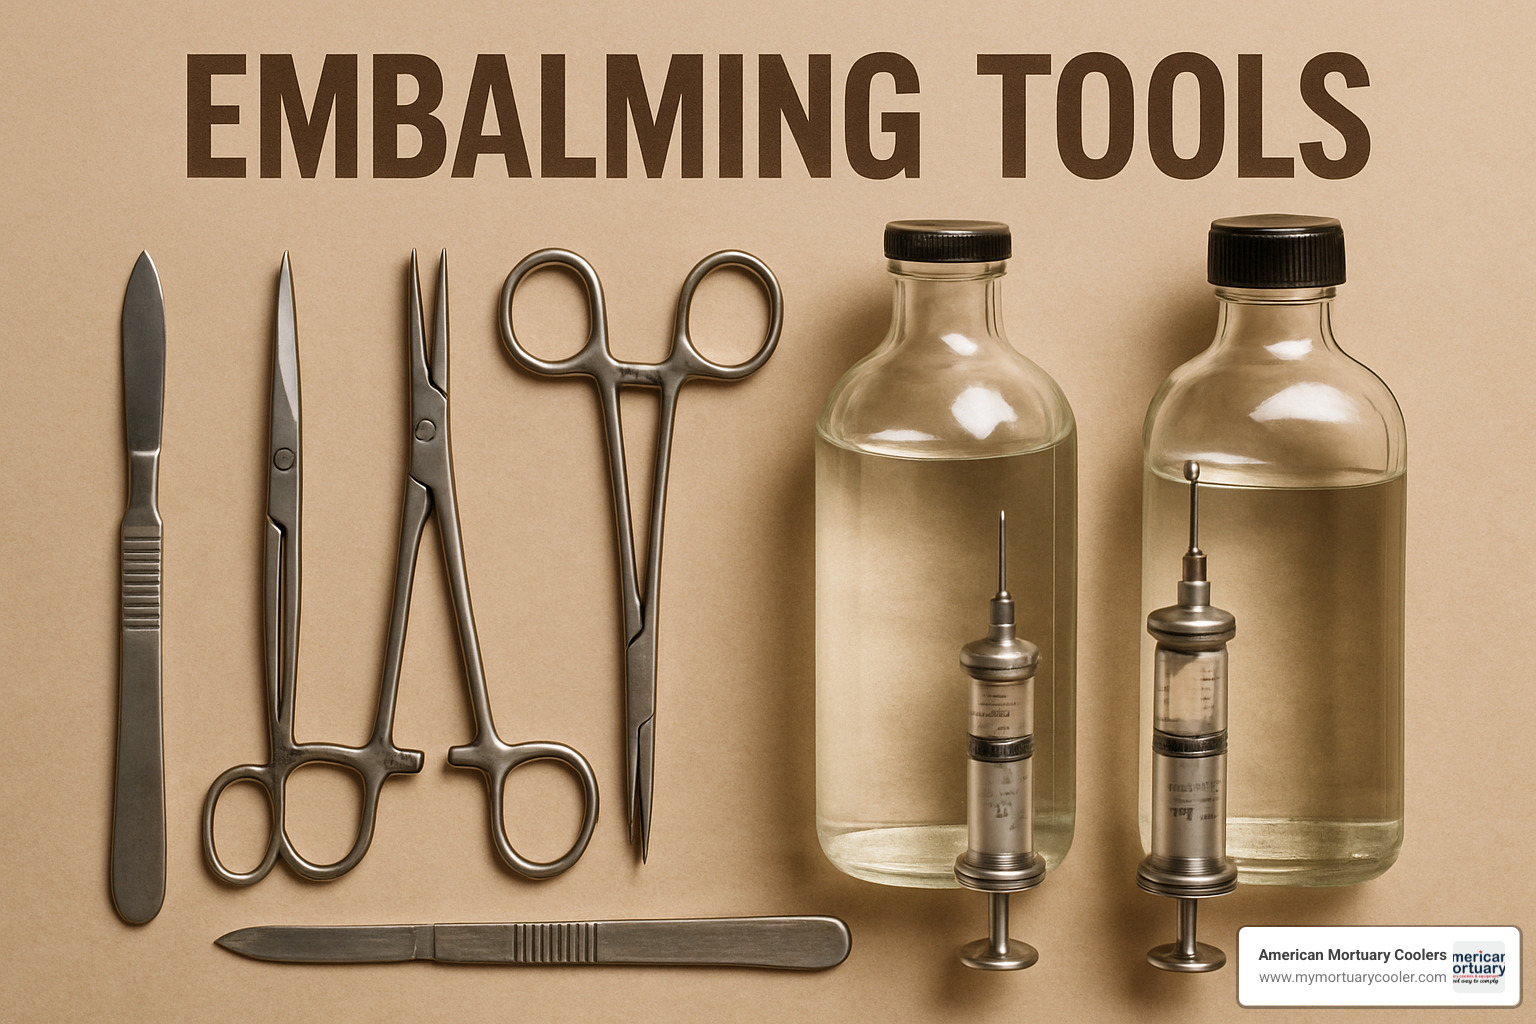
Embalming tools are specialized instruments used to sanitize, preserve, and restore deceased bodies for viewing or transport. Below is a quick reference guide to the most essential tools in a modern embalming kit:
| Tool Category | Key Examples | Purpose |
|---|---|---|
| Arterial Tools | Arterial tubes, aneurysm hooks, vessel forceps | For fluid injection through arteries |
| Cavity Tools | Trocars, aspirators, cavity injectors | For treating internal organs and cavities |
| Suturing Tools | S-shaped needles, C-shaped needles, fixation forceps | For closing incisions and setting features |
| Feature Setting | Eye caps, mouth formers, needle injector | For preparing natural-looking facial features |
| Cosmetic Tools | Wax spatulas, combs, razors, makeup | For final restoration and presentation |
The modern practice of embalming gained prominence during the American Civil War, when families wanted to transport deceased soldiers home for burial. Today, these specialized instruments allow funeral professionals to create dignified, lifelike presentations for viewings and services.
What makes embalming tools unique is their specialized design. For example, aneurysm hooks feature slotted cradle handles that allow embalmers to both locate and hold vessels in place, while S-shaped suture needles provide leverage for closing larger incisions by using one curve to grab tissue and the other as a fulcrum.
The price of individual embalming tools ranges from as little as $0.69 for a basic suture needle to over $100 for specialized instruments like drain tubes and vein expanders. A complete set of basic embalming instruments typically costs between $200 and $1,000, depending on quality and specialization.
I'm Mortuary Cooler, a national-level supplier of mortuary equipment with extensive experience helping funeral directors select and maintain the proper embalming tools for their specific needs. My background in providing durable, customizable mortuary equipment has given me unique insight into how the right embalming tools can improve both efficiency and dignity in funeral service.
Must-know embalming tools terms:
Why This Guide Matters
The history of embalming is rich with innovation driven by necessity. During the American Civil War (1861-1865), the need to transport fallen soldiers home led to rapid advancements in preservation techniques. Dr. Thomas Holmes, often called the "father of modern embalming," embalmed over 4,000 soldiers during this period, establishing practices that would evolve into today's standards.
Public misconceptions about embalming tools often stem from horror movies or outdated information. Many people imagine crude, medieval-looking instruments, when in reality, modern embalming tools are precision instruments designed with both function and dignity in mind.
"Morbid curiosity is completely healthy and helps lessen the fear of death," notes one professional embalmer. "Understanding the purpose behind these specialized tools can explain the process and highlight the care that goes into preparation."
The evolution of embalming instruments reflects changing needs and technological advances. Early embalmers used primitive syringes and basic surgical tools, while today's professionals have access to specialized instruments designed specifically for arterial injection, cavity treatment, and cosmetic restoration.
What You'll Learn
In this comprehensive guide, we'll walk you through the step-by-step embalming process and explain the function of each specialized tool. You'll learn how arterial tubes differ from drain tubes, why S-shaped needles are preferred for certain suturing tasks, and how electric needle injectors help create natural facial expressions.
We'll also cover essential safety protocols, maintenance requirements, and buying considerations to help you select the right embalming tools for your funeral home's specific needs. Whether you're a seasoned funeral director looking to update your equipment or a mortuary student seeking to understand the fundamentals, this guide provides practical insights into this specialized field.
The Purpose and Fundamentals of Embalming
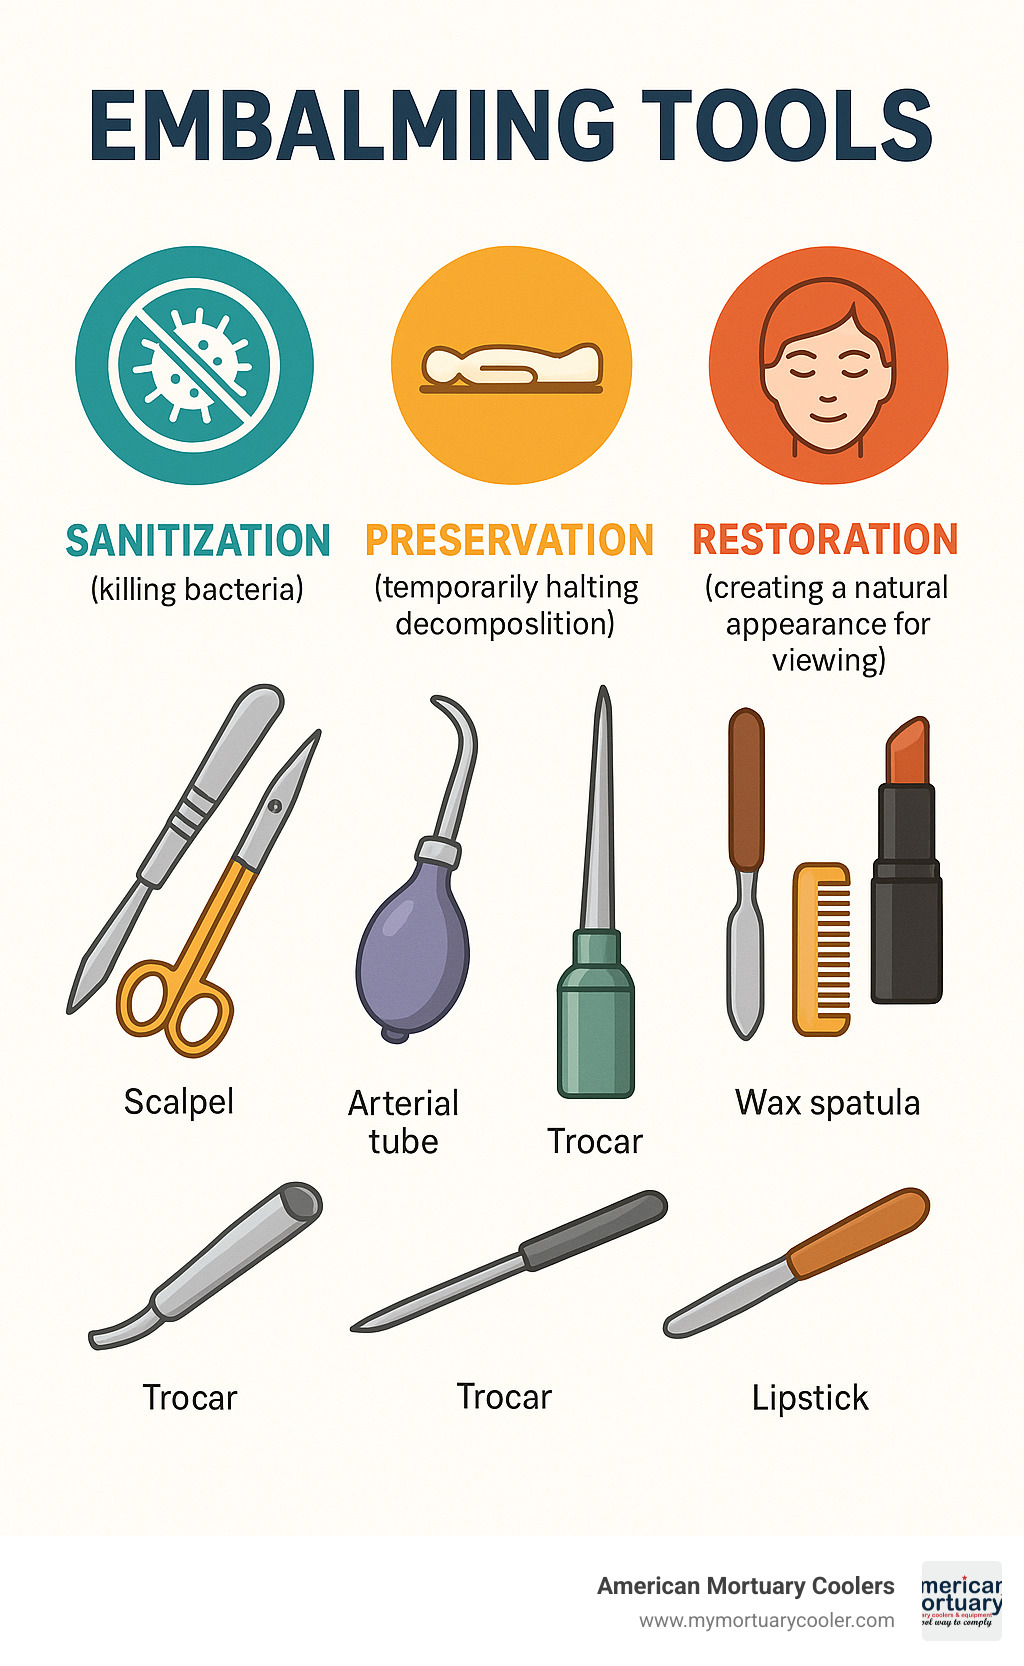
When you hear the word "embalming," you might think of ancient Egyptian mummies or mysterious chemical processes. But at its heart, embalming is about three simple goals: cleaning, preserving, and restoring a person's body after death.
Think of embalming as a final act of care. First, we sanitize the body to remove harmful bacteria. Next, we temporarily preserve the tissues to slow natural changes. Finally, we restore a natural appearance so families can say goodbye in a meaningful way.
There are three main ways embalmers accomplish these goals, each requiring specific embalming tools:
Arterial embalming works through the body's own circulatory system. Embalmers inject preservation fluids through the arteries while draining blood from the veins - like replacing oil in a car.
Cavity embalming focuses on internal organs. Special instruments remove gases and fluids from body cavities, replacing them with preservative chemicals.
Hypodermic embalming targets specific areas through direct injection, reaching places that arterial embalming might miss.
The law doesn't always require embalming, but it's typically needed when transporting bodies across state lines, planning public viewings, or when burial will be delayed. Religious traditions also influence these decisions - Orthodox Judaism and Islam traditionally avoid embalming, while other faiths have their own specific practices.
For a deeper scientific understanding, the research on Modern Embalming from the University of Michigan provides fascinating historical context.
From Ancient Egypt to Formaldehyde
The story of preservation begins in ancient Egypt, where embalmers developed elaborate methods to prepare pharaohs for the afterlife. They removed organs, dried bodies with salt, and wrapped them in linen. Their tools were simple but effective - bronze hooks for brain removal and flint knives for precise incisions.
Fast forward to the 1800s, when embalmers used arsenic-based fluids. These worked well for preservation but were dangerously toxic to the living. By the 1890s, formaldehyde revolutionized the field, creating the foundation for modern embalming chemistry.
The American Civil War created an unexpected turning point. With soldiers dying far from home, families wanted their loved ones returned for proper burial. Dr. Thomas Holmes, sometimes called "the father of modern embalming," preserved thousands of Union soldiers, helping establish practices we still use today.
In 1878, the publication of "The Undertaker's Manual" by Auguste Renouard marked another milestone - America's first embalming textbook. This helped transform embalming from folk practice to professional science, documenting proper use of embalming tools and techniques.
3 Core Goals Every Embalmer Targets
When I speak with funeral professionals, they always emphasize three essential outcomes they aim for with every case:
Disinfection comes first and foremost. The embalmer thoroughly sanitizes the body inside and out, eliminating bacteria that accelerate decomposition and could pose health risks. Modern disinfectant solutions work through both external application and internal circulation through the arterial system.
Temporary preservation provides the necessary time for transportation, funeral services, and viewings. While embalming isn't permanent like ancient mummification, it effectively preserves the body for days or weeks. The effectiveness varies based on the body's condition, environmental factors, and the methods used.
Cosmetic presentation might be the most visible aspect for families. This includes setting facial features, addressing discoloration, and creating a peaceful appearance. As one embalmer told me with a smile, "We transform the prep room from what looks like a science lab during embalming to a beauty parlor during cosmetic work!"
Each of these goals requires specific embalming tools designed for the task at hand. The right instruments not only make the process more efficient but significantly impact the quality of the final presentation - and ultimately, the family's experience during their time of grief.
Essential Modern Embalming Tools
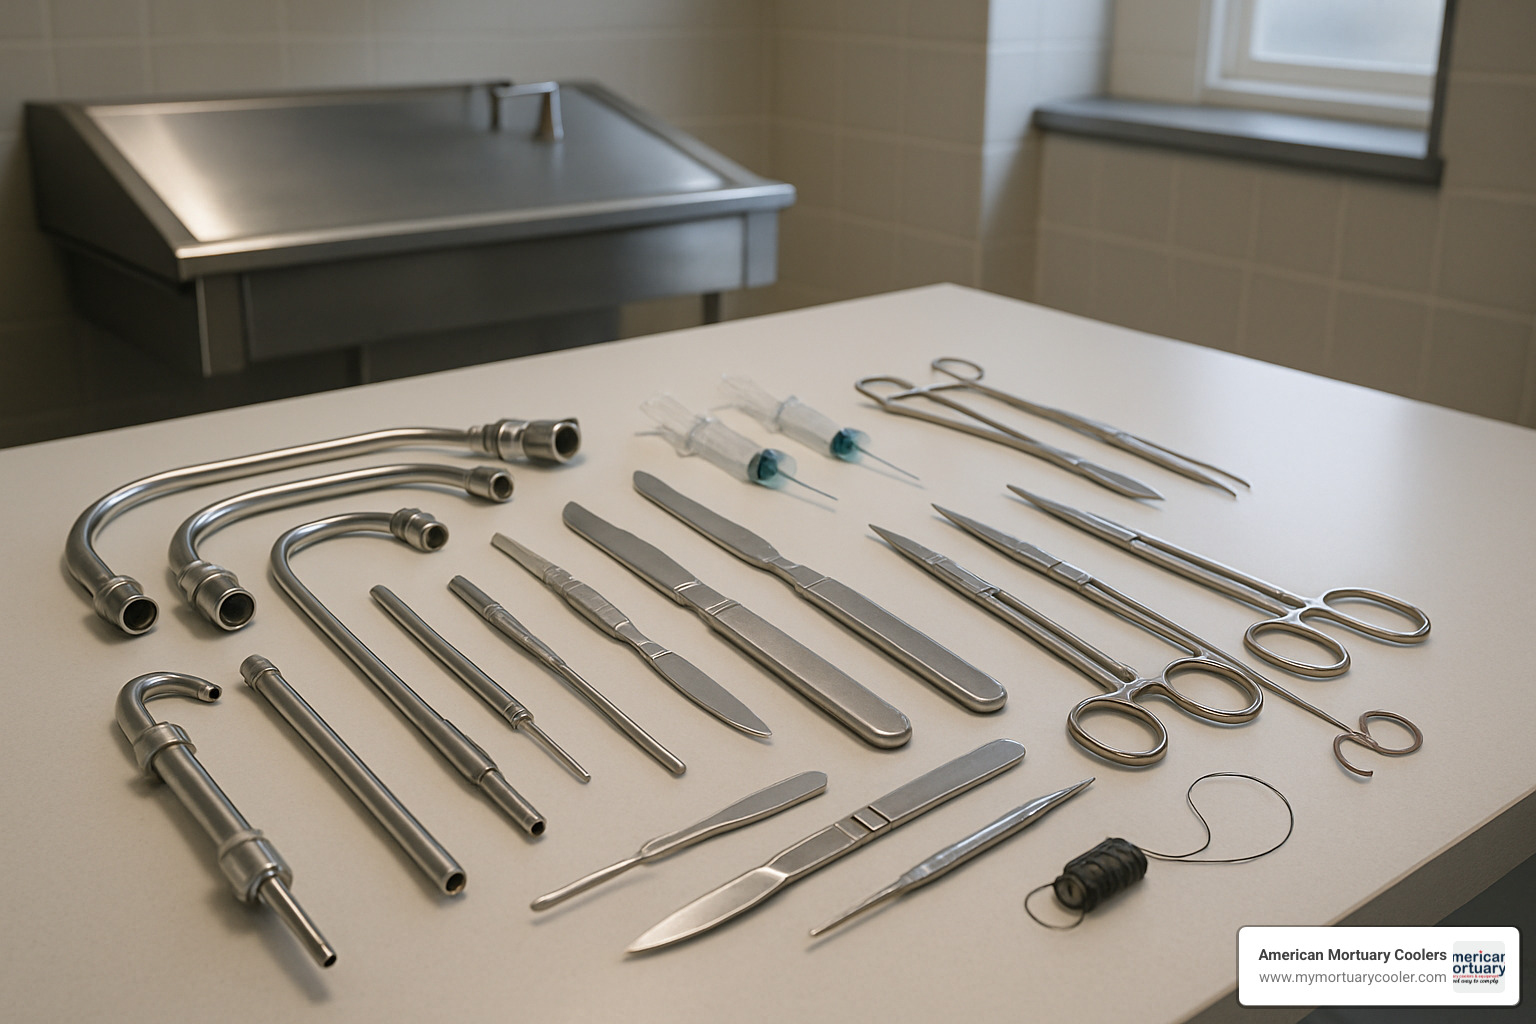
When you peek inside a professional embalmer's toolkit, you'll find more than 30 different specialized instruments—each with its own unique purpose and design. These embalming tools have come a long way since the 19th century, with today's versions offering better grip, improved durability, and improved safety features.
Think of the embalmer's toolkit as similar to a master carpenter's collection—every tool has been thoughtfully designed for a specific task. The heart of any modern embalming kit includes arterial tubes (both straight and curved) for fluid injection, drain tubes for blood removal, trocars for cavity work, and various forceps and scalpels for precise tissue handling.
I once spoke with a veteran embalmer who told me, "The black-handled fabric shears look like 'the lousiest scissors' to the untrained eye, but they're actually the most effective tool for removing clothing from the deceased." It's these kinds of practical insights that highlight just how specialized this profession truly is.
For those new to funeral service, learning about embalming tools can seem overwhelming at first. Let's break down the essentials by their primary functions to make it easier to understand.
Embalming Tools for Arterial Procedures
The arterial embalming process—where preservative fluids are introduced through the arteries while blood is drained from the veins—forms the backbone of modern embalming. This delicate procedure requires several precision instruments.
Arterial tubes are the workhorses of embalming, available in various diameters to accommodate different vessel sizes. A curved arterial tube (priced between $13-$20) might be your best friend when navigating tricky vascular pathways, while straight tubes work perfectly for more direct access points.
When an embalmer needs to distribute fluid to multiple sites simultaneously, Y-connectors ($10-$15) become invaluable. These simple but essential tools ensure more even distribution of embalming fluid throughout the body.
Precision matters tremendously in embalming, which is why stopcocks ($15-$25) are so important. These valve-like instruments give embalmers fingertip control over fluid flow and pressure—critical for achieving natural tissue appearance and preventing over-embalming.
Finding and securing blood vessels is made easier with aneurysm hooks ($7-$10), which feature clever slotted cradle handles. As one professional embalmer explained to me, "These hooks are genius—they let you both locate and hold vessels steady in one motion, which makes the whole process more efficient."
Completing the arterial toolkit are various vessel forceps ($9-$17), including angular vein forceps for grasping and manipulating blood vessels during the embalming process. The angular design gives embalmers better access in tight spaces—a thoughtful feature that demonstrates how these tools have evolved to meet practical needs.
Embalming Tools for Cavity and Hypodermic Work
After arterial embalming, embalmers turn to cavity work to address internal organs and spaces that might not be fully treated through the vascular system. This procedure calls for a different set of embalming tools.
The trocar ($40-$100) is perhaps the most recognizable cavity instrument—a long, pointed tool used to access the abdominal and thoracic cavities. It serves double duty: first removing gases and fluids, then allowing for the introduction of cavity fluid. One clever innovation is the "Vertilizer" (trocar sterilizer), which lets embalmers sterilize the entire trocar without disassembly by simply standing it in a chemical solution.
Working hand-in-hand with trocars are hydro-aspirators ($75-$150), which create the suction needed to remove fluids and gases. These clever devices connect to water sources to generate vacuum pressure, with anti-clogging heads that make the process more efficient and less frustrating.
Once aspiration is complete, cavity injectors ($25-$45) take center stage. Available in various lengths (3", 5", and 7") to reach different areas within the body, these chrome-plated or Delrin injectors attach to the trocar for introducing cavity fluid. The material options give embalmers choices based on their preferences for weight, feel, and durability.
For targeted treatments of specific areas, hypodermic syringes ($15-$30) provide the precision needed. These instruments allow embalmers to address localized issues that might not respond adequately to arterial or cavity embalming, ensuring a more complete preparation.
You can learn more about these specialized supplies from our detailed guide on embalming supplies.
Needles & Suturing: S-, C-, Straight
Once the preservation work is complete, embalmers need to close incisions and set features—and that's where suturing tools come into play. The shape of the needle dramatically affects its function and best use.
S-shaped needles (double-curved) are marvels of practical design. Priced at $1-$2 each or about $20 for a set of 10 mixed needles, these specialized tools provide superior leverage for closing larger incisions. The genius is in the double curve—one curve grabs the tissue while the other acts as a fulcrum, giving embalmers better control with less effort.
For everyday suturing tasks and smaller incisions, C-shaped needles (about $0.69 each) are the go-to choice. Their gentle curve strikes a perfect balance between control and visibility, making them ideal for standard closure work.
While less commonly used, straight needles remain important for specific applications where direct penetration is needed. They complete a well-rounded suturing kit, giving embalmers options for every situation they might encounter.
Most professionals keep a variety of needle types and sizes on hand, along with different suture materials including silk, nylon, and specialized mortuary threads ($5-$15 per package). This variety ensures they're prepared for different tissue types and incision locations.
At American Mortuary Coolers, we understand that having the right tools makes all the difference in providing dignified care. While we specialize in custom mortuary coolers, we appreciate the craftsmanship and thought that goes into every aspect of funeral service equipment.
How Embalming Tools Are Used Step-by-Step
The embalming process follows a careful, methodical approach that transforms a science-focused procedure into an art form. Each stage requires specific embalming tools and techniques working together to achieve dignified, natural results.
When an embalmer prepares for their work, they begin by positioning the body using specialized devices like the Saniblock – a flexible clear vinyl positioning aid with self-impaling spurs that securely holds limbs while allowing proper air circulation. From there, they locate blood vessels using aneurysm hooks before beginning the technical work of arterial injection and drainage.
"It is pretty funny to see the room go from what looks like a science lab for embalming to a beauty parlour for cosmatizing!" one embalmer shared, highlighting the fascinating transition that occurs during the preparation process.
Step 1: Pre-Embalming Preparation
Before the actual embalming begins, careful groundwork must be laid. The embalmer first dons appropriate personal protective equipment – gloves, apron, face shield, and sometimes respiratory protection. As one professional humorously noted, "Latex gloves in 'Fierce Beige' match my personality," showing that personality still shines through even in this technical profession.
The body receives a thorough washing with specialized disinfectant solutions to reduce surface bacteria. This initial sanitization step is crucial for both safety and effective preservation. Next comes preliminary feature setting, where eye caps are gently placed beneath the eyelids using an ocular speculum (eye spreader) to maintain a natural shape and appearance.
"An eye spreader is used to open eyelids for inserting eye caps," explains one embalmer, highlighting how each tool serves a specific purpose. Mouth formers or cotton may be positioned to create a natural, relaxed expression.
Proper body positioning follows, with arms placed at the sides and hands typically resting on the lower abdomen or hips. The Extremities Positioner with its 1"-wide Velcro strap helps maintain this positioning even in challenging cases. Throughout this preparation phase, the embalmer carefully assesses the body's condition to determine the appropriate approach, fluid strength, and injection points needed for optimal results.
Step 2: Arterial Injection & Drainage
The heart of the embalming process involves arterial injection – introducing preservative fluid into the body while simultaneously removing blood from the venous system.
Using an aneurysm hook with its distinctive slotted cradle handle, the embalmer skillfully locates and raises the selected artery (typically the right carotid) and vein (usually the jugular). The hook's design cleverly allows them to hold one vessel in place while searching for another.
With a precise incision made using a scalpel (handle #3, around $4.99), the vessels are accessed and prepared using arterial forceps ($9.79) that help manipulate these delicate structures. The arterial tube (typically $13.00) is then carefully inserted into the artery and secured with arterial fixation forceps.
"They are arterial fixation forceps used to clamp and stabilize arterial tubes during fluid injection," notes a professional. Similarly, a drain tube (around $42.95) is placed in the vein to allow blood to exit as the preservative fluid enters.
Once everything is properly positioned, the arterial tube connects to the embalming machine, which pumps preservative fluid into the body at controlled pressure and flow rates. "That black rubber tube gets placed onto the arterial tube and the embalming fluid is pumped into the arterial system," an experienced embalmer explains.
Throughout this critical phase, the embalmer carefully monitors fluid distribution, adjusts pressure as needed, and observes drainage to ensure proper fluid exchange throughout the body's tissues.
Step 3: Cavity Treatment
After arterial embalming comes cavity treatment, addressing the internal organs and spaces that arterial fluid might not fully reach.
The embalmer inserts a trocar (a specialized long, pointed instrument) through the abdominal wall, typically near the navel. This creates an access point for both aspiration and injection of the body cavities.
Connected to an aspirator via tubing, the trocar removes gases and fluids from the thoracic and abdominal cavities. The hydro aspirator creates suction through water pressure, while the anti-clogging aspirator head prevents frustrating blockages during this delicate process.
After thorough aspiration, the trocar connects to a cavity fluid injector to introduce cavity fluid – typically stronger than arterial fluid – to preserve the internal organs. "Cavity embalming uses a trocar and cavity fluid to treat the stomach, lungs, and other organs," explains one professional.
Once cavity treatment finishes, the trocar puncture is carefully sealed with a trocar button or suture. "Seal trocar puncture sites securely with trocar buttons," advises an experienced embalmer, highlighting the importance of this final step in cavity treatment.
Step 4: Hypodermic & Surface Treatment
Even the most thorough arterial and cavity embalming may leave certain areas needing additional attention. The hypodermic and surface treatment phase addresses these specific regions.
The embalmer first identifies areas requiring extra treatment – perhaps discolored spots, swollen regions, or areas showing poor fluid distribution. Using hypodermic needles and syringes, they inject preservative solution directly into these problem areas, ensuring comprehensive preservation throughout the body.
Surface applications might include cautery chemicals to seal small leaks or treat surface tissues, while sealing powders help address any persistent leakage points. For specific challenging conditions like tissue gas or advanced decomposition, specialized chemical treatments may be necessary.
These supplementary treatments ensure consistent preservation throughout the body and address any issues that might affect the final presentation. With the right embalming tools for this phase – precision hypodermic needles, specialized applicators, and appropriate chemical formulations – the embalmer can overcome almost any preservation challenge.
Step 5: Cosmetic Restoration & Dressing
The final change phase is where science truly becomes art. This is when, as one professional colorfully describes, the embalming room shifts from "a science lab for embalming to a beauty parlour for cosmatizing."
Feature setting often begins with an electric needle injector to secure facial features by driving wires into the jaw bones. "It's an electric needle injector used to set facial features by driving wires into jaw bones," explains an embalmer, highlighting this specialized tool's unique purpose.
Using specialized wax spatulas, the embalmer applies mortuary wax to fill any sunken areas or address imperfections. The tissue dryer set with its three heated attachments helps dry specific areas during this delicate process, ensuring proper application and setting of restoration materials.
Hair preparation follows, with combs, brushes, and styling products used to arrange the hair in a natural, dignified manner. For male decedents, razors provide a clean-shaven appearance if desired or requested by the family.
Mortuary cosmetics, specially formulated to work with embalmed tissue, are applied with artistic skill to create a natural skin tone and address any discoloration. This isn't everyday makeup – these specialized products are designed specifically for this purpose.
Finally, the deceased is dressed in clothing provided by the family, completing the preparation for viewing. This restoration phase requires both technical skill and artistic ability, with the right embalming tools supporting this delicate work to create a peaceful, natural appearance that provides comfort to grieving families.
The artistry in this final phase truly showcases why quality embalming instruments make all the difference – they help create the lasting memory families will carry with them after saying their final goodbyes.
Specialized, Cosmetic, and Emerging Instruments
When you walk into a modern prep room, you'll find far more than just the basic embalming kit. Today's funeral professionals have access to an impressive array of specialized tools that help create the most natural, dignified presentation possible.
Those cosmetic spatulas with their precise tips? They're perfect for applying restoration wax with almost artistic precision. Heated tissue dryers might look a bit like hair dryers, but their specialized attachments allow embalmers to target specific areas that need drying before cosmetic application.
"I couldn't live without my ocular speculum," one embalmer told me. "It gently holds the eyelids open while I place eye caps, which is crucial for creating that natural, peaceful expression families remember." Similarly, mouth formers help create natural lip positioning that avoids the dreaded "grimace" that can distress families.
The evolution of embalming tools tells a fascinating story of innovation driven by necessity. Just look at how far we've come:
| 19th Century Tool | Modern Equivalent | Key Improvements |
|---|---|---|
| Manual injection pump | Electric embalming machine | Precise pressure control, consistent flow |
| Basic trocar | Comfort-grip trocar with safety cap | Ergonomic design, reduced injury risk |
| Simple arterial tube | Quick-connect arterial tube | Faster setup, secure connections |
| Basic scalpel | Disposable scalpel with safety features | Reduced contamination risk, consistent sharpness |
| Crude suture needles | Precision S-curved needles | Better leverage, easier handling |
These improvements aren't just about convenience – they've fundamentally improved both the efficiency of embalming and the quality of the final presentation for grieving families.
Green & High-Tech Add-Ons
The funeral industry isn't stuck in the past – far from it! Today's professionals are embracing both environmental sustainability and cutting-edge technology.
Many funeral homes now offer biodegradable fluids with reduced formaldehyde content or plant-based alternatives. These eco-friendly options still provide effective preservation but with less environmental impact. "Families are increasingly asking about green options," one funeral director shared. "Having the right embalming tools to work with these newer formulations shows we're listening."
Quick-connect adapters have transformed the preparation process, allowing embalmers to make rapid, secure connections between tubes, machines, and fluid containers. At $15-$30, these simple devices save precious time during setup.
Perhaps most impressive are the digital pressure monitors now available. Rather than relying on experience and intuition alone, these high-tech additions provide precise control over fluid injection, preventing tissue damage while ensuring thorough distribution. For challenging cases – like those with compromised vascular systems – this technology can make a significant difference in the final result.
Less-Common Embalming Tools Worth Knowing
Not every tool makes it into the standard kit, but seasoned professionals know the value of having specialized instruments on hand when unusual challenges arise.
Vein expanders are a perfect example. When collapsed veins make drainage difficult during arterial embalming, these precision instruments (which can cost over $100) prove their worth by helping dilate the vessels. Similarly, three-wire drain tubes provide superior drainage capacity for cases requiring extensive fluid exchange. They're a significant investment at approximately $100, but can be invaluable for challenging cases.
I particularly appreciate the thoughtful design of angular incision spreaders. Unlike standard spreaders, they're specifically engineered to avoid obstructing drain or arterial tubes during the embalming process. It's a small detail that makes a big difference in workflow efficiency.
As one veteran embalmer told me, "You might only need some of these specialized embalming tools once in a blue moon, but when that challenging case comes in, you'll be grateful to have them in your arsenal."
Training Tools & Education Aids
The days of learning embalming purely through apprenticeship are long gone. Modern education combines hands-on training with sophisticated learning aids.
Plaster faces provide realistic practice surfaces for cosmetic application and wax modeling techniques. These training aids allow students to develop confidence and skill before working on actual cases. "Making mistakes on a plaster face is how you learn not to make them when it really matters," explains one mortuary science instructor.
Today's textbooks bear little resemblance to Auguste Renouard's 1878 "The Undertaker's Manual." Modern resources offer detailed illustrations and step-by-step procedures for proper tool usage, replacing the trade magazines that once served as primary educational materials.
Perhaps most exciting is the emergence of virtual reality simulators as cutting-edge training tools. These systems allow students to practice embalming techniques in a realistic but consequence-free environment. While not yet widespread, these high-tech systems represent the future of embalming education.
Proper training in the use of embalming tools isn't just about technical proficiency – it's about honoring the deceased through skilled, respectful care. At American Mortuary Coolers, we understand that quality equipment is a crucial part of that mission, which is why we're committed to providing durable, customizable solutions for modern preparation rooms.
Safety, Sanitation, and Maintenance of Embalming Instruments
Working with embalming tools isn't just about skill—it's about safety too. Every preparation room should follow OSHA's guidelines for formaldehyde exposure, with proper ventilation systems that provide at least 12 air exchanges per hour. This keeps both you and your colleagues breathing easier during long preparation sessions.
Personal Protective Equipment isn't optional in this line of work. One embalmer I know jokes that his "Latex gloves in 'Fierce Beige' match my personality," but beneath the humor lies an essential truth—proper protection creates a barrier between you and potential hazards. A complete PPE setup includes gloves, eye protection, fluid-resistant clothing, and respiratory protection when needed.
When it comes to keeping your embalming tools clean, you have several effective options. Chemical immersion works well for most instruments, while autoclave processing provides hospital-grade sterilization for heat-resistant tools. For everyday cleaning between cases, cold-soak disinfection offers a practical solution that won't damage delicate instruments.
After cleaning, storing your tools in dedicated instrument trays not only keeps your workspace organized but also protects your investment. These trays, typically costing around $30 for quality stainless steel versions, provide individual spaces for each tool, making it immediately obvious if something is missing before you begin your next case.
Infection-Control Best Practices
The golden rule of preparation room safety is straightforward: treat every body as potentially infectious. This universal precaution approach ensures consistent safety practices regardless of known medical history.
Sharp objects require special attention. Keep dedicated sharps containers within easy reach, and develop the habit of immediately disposing of used scalpel blades, needles, and other sharp embalming tools rather than setting them aside "for just a minute"—that minute is when accidents happen.
Room cleanliness goes beyond just appearance. Thorough surface disinfection before and after each case prevents cross-contamination and creates a professional environment. Pay special attention to high-touch areas like embalming machine controls, light handles, and faucets.
Perhaps most important is something we learned long before mortuary school: wash your hands thoroughly and often. Proper handwashing facilities should be readily available, and hand hygiene should become second nature before gloving up, after removing gloves, and anytime contamination might have occurred.
Cleaning & Sharpening Checklist
The longevity of your embalming tools depends largely on how you treat them after each use. Begin with an immediate rinse to prevent blood and chemicals from drying on instruments—once dried, these substances become much harder to remove and can permanently damage fine instruments.
Choose your cleaning products wisely. Specialized detergents designed for surgical instruments will effectively remove biological materials without causing corrosion. Household cleaners might seem convenient, but many contain chemicals that can damage the fine metals in quality embalming instruments.
Different materials require different care approaches. Stainless steel instruments resist corrosion better than their carbon steel counterparts, but they still benefit from occasional treatment with instrument milk or similar protective solutions. Carbon steel instruments need more vigilant attention to prevent rust, especially in humid environments.
Keep cutting tools sharp with regular maintenance. Dull scalpels and scissors not only make your job harder but can also cause tissue damage that's difficult to repair. Establish a regular sharpening schedule based on your usage patterns, and don't hesitate to replace disposable blades whenever they show signs of dulling.
Always inspect your embalming tools before sterilization. Look for signs of damage, loose parts, or excessive wear that might compromise function. This quick check can prevent mid-procedure failures and ensure effective sterilization.
Long-Term Storage Tips
Between cases, proper storage protects your investment in quality embalming tools. Instrument trays with designated places for each tool prevent damage from tools bumping against each other and make inventory checks quick and simple. A missing tool becomes immediately apparent when its space remains empty.
Moisture is the enemy of metal instruments. Place silica packs in storage areas to absorb ambient humidity, especially in naturally damp environments or during humid seasons. These inexpensive desiccants create a drier microenvironment around your tools, but remember to replace or regenerate them regularly to maintain their effectiveness.
For carbon steel instruments, consider additional protection with anti-rust wraps or solutions. These specialized products create a protective barrier against moisture and oxidation, particularly important for instruments that might go weeks between uses.
The storage environment itself matters too. Aim for climate-controlled conditions when possible, avoiding extreme temperature fluctuations that can stress metal and cause microscopic expansion and contraction. A cool, dry cabinet or drawer provides ideal conditions for long-term storage.
Finally, schedule regular inventory checks and inspections of stored embalming tools. This practice ensures you'll find any developing issues before they compromise an instrument's function during a critical procedure. With proper care and storage, quality embalming instruments can provide decades of reliable service, making them a sound investment for any funeral home.
Buying and Selecting the Right Embalming Tool Set
When it's time to invest in embalming tools, there's quite a range to consider. I've seen funeral directors start with basic kits around $200-$400 that cover essential needs, while experienced professionals often prefer comprehensive sets in the $700-$1,000+ range with every specialized tool imaginable.
But here's the thing about embalming instruments - price shouldn't be your only consideration. I've watched morticians struggle with cheaper tools that fail during critical moments, while others have had the same quality instruments serving them faithfully for decades.
"I still use my grandfather's aneurysm hook from the 1960s," one funeral director told me. "They just don't make them like that anymore - though thankfully, some companies still prioritize quality."
Look for surgical-grade stainless steel that resists corrosion and maintains a sharp edge. Good tools have a certain balance and feel in your hand - they're an extension of your skills, after all. Premium manufacturers typically offer warranties of 5-10 years because they stand behind their craftsmanship.
At American Mortuary Coolers, we've partnered with funeral professionals nationwide and seen how the right tools transform both efficiency and the dignity of service. Based in Tennessee, we deliver our durable, customized solutions throughout the contiguous 48 states, focusing on quality that lasts.
Matching Tools to Case Conditions
Different preparation challenges call for specialized approaches and equipment. When working with autopsied remains, you'll appreciate having three-wire drain tubes that can handle increased fluid volume. The vascular reconstruction becomes particularly challenging, making specialized forceps and vessel clamps essential for addressing severed vessels.
Trauma cases present their own unique demands. I remember one funeral director explaining, "With significant facial trauma, my feature-setting tools become the most important items in my kit." These cases often require tissue builder injections, specialized suture materials, and a variety of restoration waxes to achieve a viewable appearance.
Edematous conditions (where the body retains excessive fluid) benefit from specialized drainage approaches. Higher-gauge needles help distribute embalming fluid through swollen tissues, while hypodermic treatments target problem areas directly.
Perhaps the most specialized tools are needed for infant cases. These delicate procedures require miniaturized versions of standard embalming tools - smaller arterial tubes, more delicate aneurysm hooks, and specifically designed infant eye caps and mouth formers that accommodate the unique proportions of young children.
Adapters, Connectors, and Machine Compatibility
The connections between your tools and equipment might seem like small details, but they make a huge difference in daily practice. Quick-connect fittings ($15-$30) eliminate fumbling with tubes during critical moments of the embalming process. One embalmer told me these simple adapters "saved me at least 10 minutes per case - that adds up to hours every month."
Bottle adapters ($10-$20) reduce chemical spillage and exposure while improving workflow efficiency. These simple devices connect chemical containers directly to your embalming machine, minimizing handling of potentially hazardous fluids.
Water control units like the popular 1036-1R model provide consistent pressure for hydro-aspirators. As one funeral director put it, "Good water pressure control is the difference between a smooth aspiration process and a frustrating mess."
Before purchasing new embalming tools, always check compatibility with your existing equipment. I've seen too many funeral directors invest in beautiful instruments that don't quite fit their embalming machine connections or require additional adapters.
Where to Shop & What to Ask
When shopping for quality embalming tools, ask vendors these important questions:
"What's your warranty coverage?" Some offer limited 90-day warranties while others stand behind their products for years.
"What's your return policy?" Even the best tools sometimes don't work for your specific needs or techniques.
"How available are replacement parts?" Nothing's more frustrating than having an excellent instrument become useless because a small component fails and can't be replaced.
Many suppliers offer bulk discounts of 5-15% on larger orders or complete kits. This can represent significant savings when outfitting a new preparation room or upgrading your entire tool collection.
At American Mortuary Coolers, we believe in straight talk about our products. When funeral directors call about our custom mortuary coolers and related equipment, we're happy to discuss compatibility issues, maintenance requirements, and which tools might best serve their specific community needs. We understand that these aren't just purchases - they're investments in your professional capability and the service you provide to families during their most difficult times.
Frequently Asked Questions about Embalming Tools
What's the difference between an arterial tube and a drain tube?
When I first started working with funeral directors, this was one of their most common questions. The answer lies in both function and design.
Arterial tubes deliver embalming fluid into the body's arterial system. They're typically more slender (1/8" to 3/16" diameter) with a tapered tip that slides easily into arteries. You'll find them in both straight and curved designs - those curved ones (about $13 each) are particularly handy when you're navigating around tricky vascular pathways.
Drain tubes, on the other hand, do exactly what their name suggests - they drain blood from veins during the arterial embalming process. These tubes are noticeably larger (5/16" to 3/8" diameter) to handle efficient drainage. Many embalmers prefer the three-wire design that prevents tissue from blocking the tube during drainage. A quality super drain tube typically runs around $42.95.
Think of it this way: arterial tubes are your "in" system (bringing fluid in under pressure while maintaining a tight seal), while drain tubes are your "out" system (collecting displaced blood while keeping drainage paths clear).
How do I choose between S-shaped and C-shaped needles?
This choice comes down to the specific suturing job you're facing. I've found that having both in my toolkit gives me flexibility for different situations.
S-shaped needles (double-curved) excel at handling larger incisions because of their unique leverage advantage. One experienced embalmer explained it perfectly: "They are double-curved needles used for suturing larger incisions, providing leverage for stitching." At about $1.19 each, these specialized needles use one curve to grab and pull tissue while the other curve acts as a fulcrum - ingenious design for those bigger closures we often face during embalming.
C-shaped needles (half-curved) are your go-to for smaller, more delicate work. Priced around $0.69 each, their gentle curve gives you excellent control while keeping your suture line visible. They're perfect for cosmetic closures and finer detail work where precision matters more than leverage.
Most preparation rooms keep both types on hand, with embalmers selecting the appropriate needle based on the specific situation - considering incision size, tissue type, and location on the body.
Are single-use disposable embalming tools reliable?
In my experience working with funeral homes across the country, I've seen a growing shift toward disposable embalming tools - and for good reason. Today's single-use instruments offer several compelling advantages.
First, there's the guaranteed sterility factor - each instrument comes factory-sealed and ready to use. You also get consistent sharpness every time; no more wondering if that scalpel was properly sharpened after the last case. And let's not forget the time saved by eliminating cleaning and sterilization steps.
Modern disposable scalpels, for instance, come with factory-honed blades that make precise incisions without any maintenance headaches. Disposable arterial tubes completely eliminate cross-contamination concerns between cases.
That said, many embalmers note that disposables don't always provide the same comfortable feel or durability as their reusable counterparts. There's also the environmental impact to consider - disposables create more waste than reusable options.
I've noticed many funeral homes taking a practical hybrid approach: using disposable tools for items that directly contact bodily fluids (like scalpels and arterial tubes) while investing in high-quality reusable instruments for other applications (forceps, scissors, aneurysm hooks).
The good news is that the reliability of disposable embalming tools has improved dramatically in recent years. They've become a genuinely viable option for many applications in today's modern preparation room - offering convenience without compromising on performance.
Conclusion
The journey through embalming tools reveals just how essential these specialized instruments are for providing dignified care. Each tool, from the basic arterial tube to the most specialized restoration instrument, plays a crucial role in creating a meaningful final presentation for families.
At American Mortuary Coolers, we've seen how quality tools transform preparation work. Based in Tennessee, we're proud to deliver durable, customized mortuary solutions throughout the contiguous 48 states. We understand that reliable equipment isn't just about efficiency—it's about honoring lives with respect and dignity.
"I've always believed that our work speaks for the families we serve long after we've finished," shared one veteran embalmer. "The tools we choose reflect our commitment to excellence."
The field continues to evolve in exciting ways. Today's funeral professionals can choose from eco-friendly options that reduce environmental impact, digital monitoring systems that improve precision, and ergonomically designed instruments that reduce fatigue during long preparations. These innovations represent not just technological progress, but a profession that continually seeks improvement.
For those in funeral service, learning never stops. As one professional noted with a smile, embalming might be "a dying art," but it remains vital to families seeking meaningful goodbyes. The fundamentals established generations ago still guide us, even as new techniques and tools expand our capabilities.
When funeral homes invest in quality embalming tools and maintain them with care, they make a statement about their values. This commitment honors both the deceased in their care and the families who entrust them with their loved ones. It's a responsibility that connects today's funeral professionals with generations past while looking forward to serving families in the future.
Whether you're building your first embalming kit or updating tools you've had for years, each instrument represents an opportunity to provide comfort during life's most difficult moments. That's the true value of embalming tools—not just what they do, but what they help you provide for others.
For more information about mortuary cooler awareness and other essential equipment for your funeral home, visit our mortuary cooler awareness page.


