Why Proper Scalpel Blade Removal is Critical for Safety
How to remove scalpel blade safely is a fundamental skill that every funeral home director and mortuary professional must master. Improper blade removal causes thousands of preventable injuries each year, with research showing that "negligence in handling scalpels can lead to lacerations and the introduction of blood-borne pathogens into the bloodstream."
Quick Answer: Safe Scalpel Blade Removal Steps
- Prepare workspace - Place sharps container within reach
- Use proper tools - Grip blade with artery forceps, never bare fingers
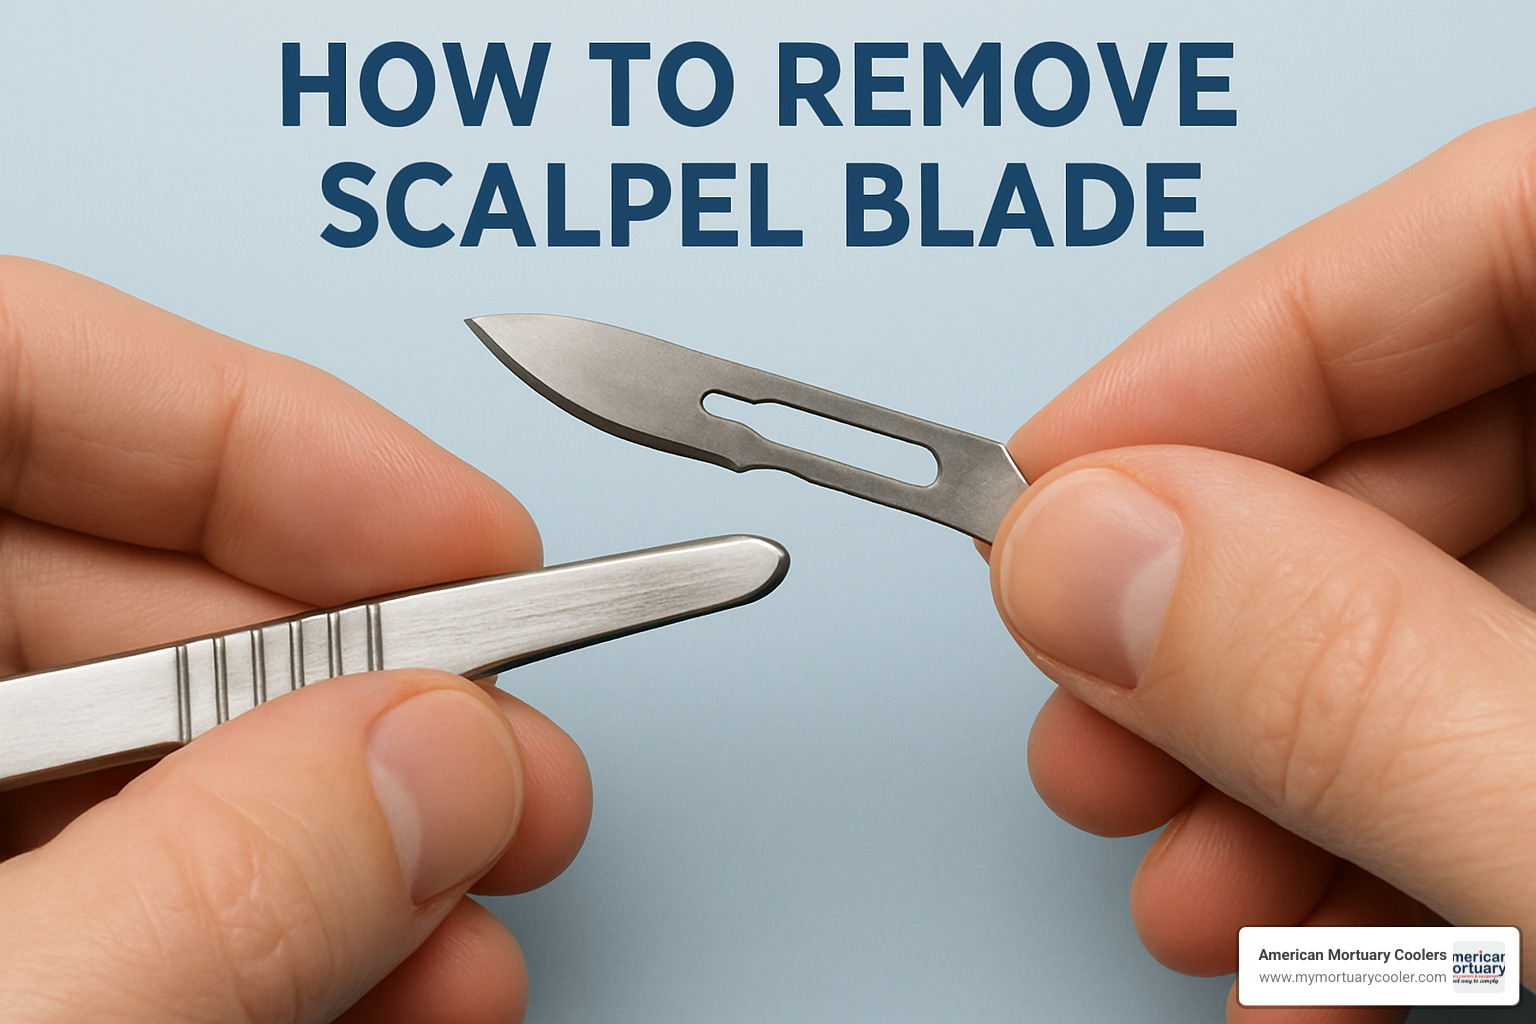
- Lift and slide - Lift bottom of blade to open up, slide forward off handle
- Dispose immediately - Drop blade directly into sharps container
- Never force - If stuck, use pliers or dedicated blade removal tool
The stakes are high in mortuary work. Unlike medical settings where blades get changed frequently, funeral home environments often involve prolonged procedures where blade removal becomes routine. Yet many professionals develop unsafe habits that put them at serious risk.
As one clinical instructor notes: "Scalpel blades are extremely sharp" and require specific techniques to avoid injury. The research is clear - using the wrong removal method or skipping safety steps leads to cuts, contamination, and compliance violations.
I'm Mortuary Cooler, and I've spent years helping funeral home directors steer equipment safety challenges, including proper techniques for how to remove scalpel blade without injury. My experience with mortuary professionals has shown that most blade removal accidents happen due to simple, preventable mistakes that can be easily avoided with the right knowledge.
Why Safe Scalpel Blade Removal Matters
Learning how to remove scalpel blade safely isn't just about following protocol—it's about protecting yourself and your career from preventable disasters that happen far too often in our industry.
Every year, healthcare and mortuary professionals suffer thousands of preventable injuries from improper scalpel handling. Blood-borne pathogen exposure represents the most serious risk we face. When a scalpel blade cuts through your skin, it creates a direct pathway for dangerous pathogens to enter your bloodstream. In mortuary work, where we handle deceased individuals who may have had infectious diseases, this risk becomes absolutely critical to understand.
The consequences of a single blade removal accident extend far beyond a simple cut. You're looking at immediate laceration requiring emergency medical care, potential exposure to hepatitis B, hepatitis C, or HIV, and weeks of post-exposure prophylaxis treatment. Then there's the psychological stress, legal liability for your funeral home, and workers' compensation claims.
Scientific research on scalpel safety emphasizes that "scalpel blades are often replaced after just one or several cuts due to the need for sharpness and safety." This means you're performing blade removal dozens of times per week, multiplying every opportunity for something to go wrong.
OSHA and CDC guidelines specifically address sharps safety because regulatory agencies understand the serious nature of these injuries. Compliance isn't optional—it's essential for keeping your funeral home operating legally and safely.
Main Components of a Scalpel
Understanding your scalpel's anatomy makes how to remove scalpel blade safely much easier. A scalpel has two main parts: the reusable handle and the disposable blade.
Scalpel handles come in standardized sizes. Handle No. 3 fits blades numbered 9-18 and is the most common choice in mortuary work. Handle No. 4 accommodates larger blades 18 and up for bigger procedures.
The handle features a groove mechanism with diagonal alignment marks that must line up properly. These marks need to be parallel when you attach a blade, and understanding this locking system is your key to safe removal later.
Blade numbers run from 9 to 26, with each number indicating a specific shape and size designed for different tasks. No. 10 blades give you that large curved edge perfect for initial incisions, while No. 15 blades offer a smaller curved blade for detailed work. No. 11 blades provide that pointed tip for precise cuts, and No. 21 blades deliver a large straight edge for long incisions.
The blade locks into the handle through a tension-slot mechanism. The narrow slot fits into the front of the handle, while the larger slot snaps over the rear locking mechanism. This design keeps the blade secure during use but requires proper technique for safe removal.
Risks & Hazards When Removing a Blade
Lacerations happen most often when people try to remove blades with their bare fingers. The blade's cutting edge stays razor-sharp even after use, and the small size makes it easy to accidentally grab the sharp edge instead of the safe area.
Stuck blade injuries occur when you apply too much force trying to remove a blade that won't slide off easily. The blade can suddenly release, causing cuts or sending the blade flying across your workspace.
Splash contamination becomes a real concern when removing blades from contaminated procedures. Body fluids on the blade can splash onto your eyes, mouth, or any broken skin during removal, creating exposure risks you didn't plan for.
Wrong PPE choices give you false confidence that can be dangerous. Regular latex gloves provide zero protection against scalpel cuts, yet many professionals assume they're adequately protected and handle blades more carelessly than they should.
How to Remove Scalpel Blade: Step-by-Step Guide
Learning how to remove scalpel blade safely is like learning to drive - it seems scary at first, but with the right technique, it becomes second nature. The key is understanding that you're working with a precision tool, not wrestling with it.
Think of blade removal as a gentle conversation between you and the scalpel. You're asking the blade to release, not demanding it. This mindset shift makes all the difference in your safety and success.
Preparing Your Workspace Before You Learn How to Remove Scalpel Blade
Before you even touch that scalpel, take a moment to set up your workspace properly. This isn't busy work - it's your safety net.
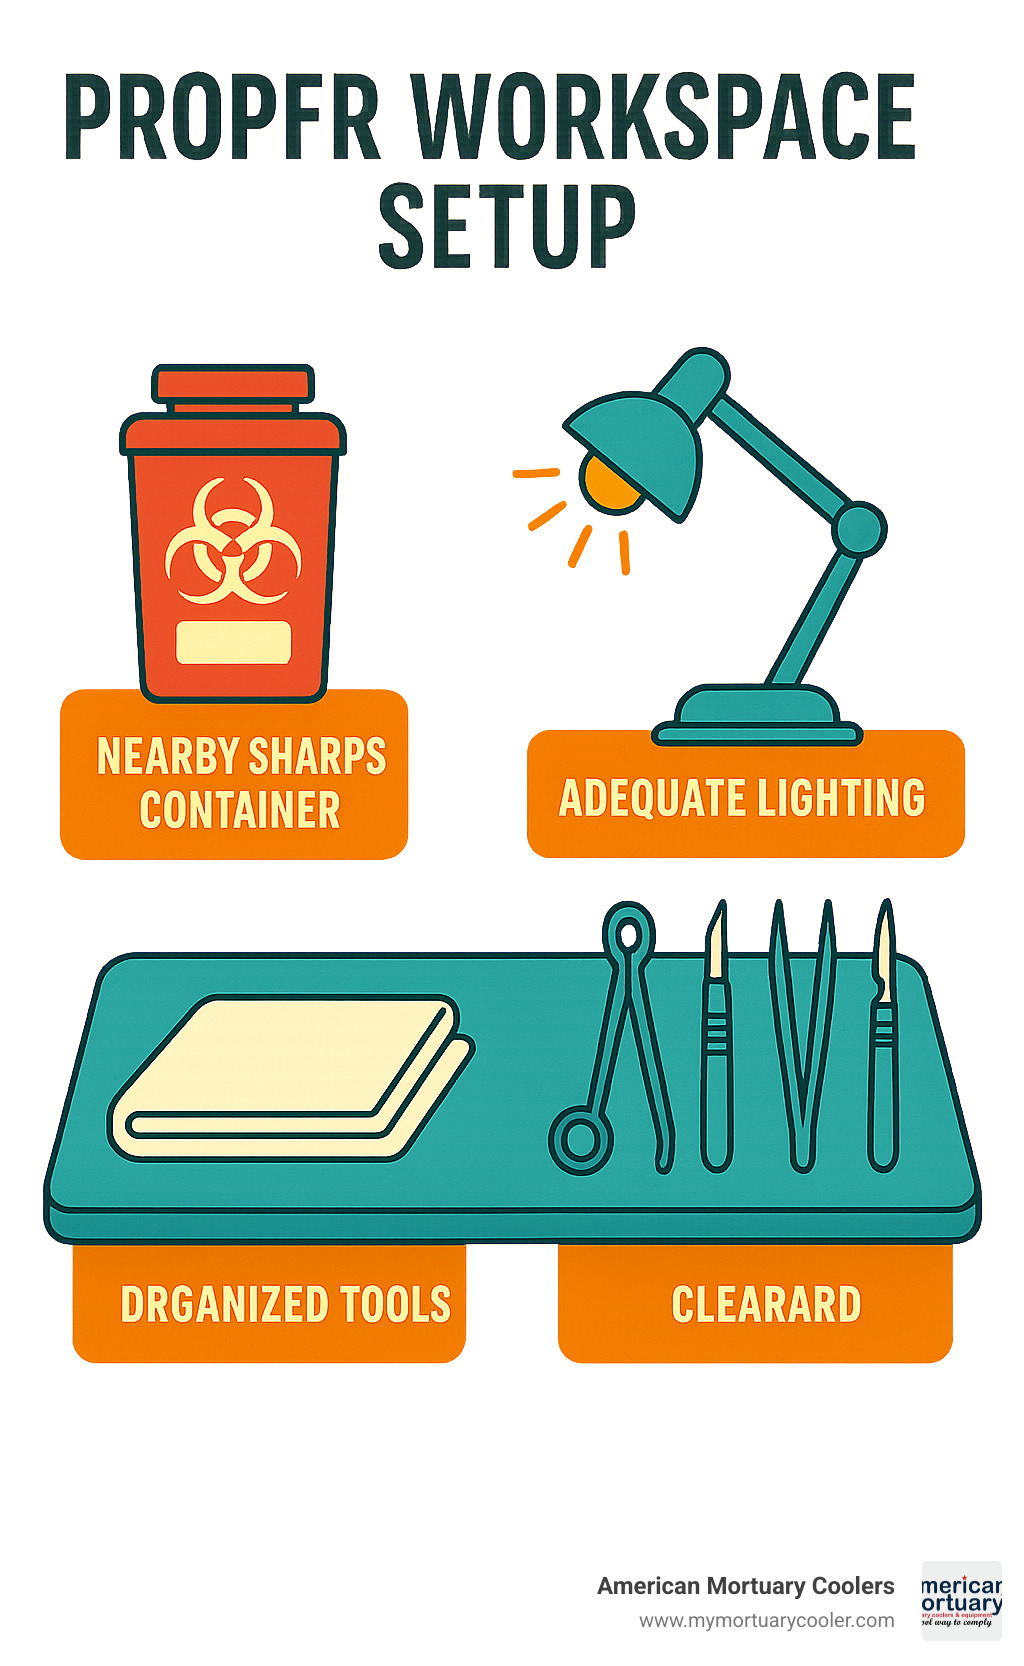
Start by clearing your bench space completely. You'd be surprised how many accidents happen because someone reached across clutter and knocked their hand into a blade. Keep only what you absolutely need within arm's reach.
Your sharps container should be close enough that you could drop a blade into it without stretching. Research confirms that "it is advised to have a sharps container placed nearby during use for easy disposal, and to never leave an open blade scalpel unattended." Make sure it's less than three-quarters full - an overstuffed container is a hazard waiting to happen.
Good lighting isn't optional. You need to see exactly where that blade sits in the handle and how the locking mechanism works. Squinting at a scalpel in dim light is asking for trouble.
Keep disinfectants and clean towels handy for immediate cleanup. If something goes wrong, you want to be able to address it instantly.
Consider wearing cut-resistant gloves while you're learning. They won't stop a scalpel completely, but they'll give you a bit more confidence as you develop your technique.
How to Remove Scalpel Blade Safely in 7 Steps
Here's where the rubber meets the road. Follow these seven steps every single time, and you'll develop muscle memory that keeps you safe.
Step 1 involves positioning the scalpel with the blade pointing away from your body and anyone else nearby. Hold the handle firmly with your non-dominant hand - this gives you better control with your dominant hand for the actual removal.
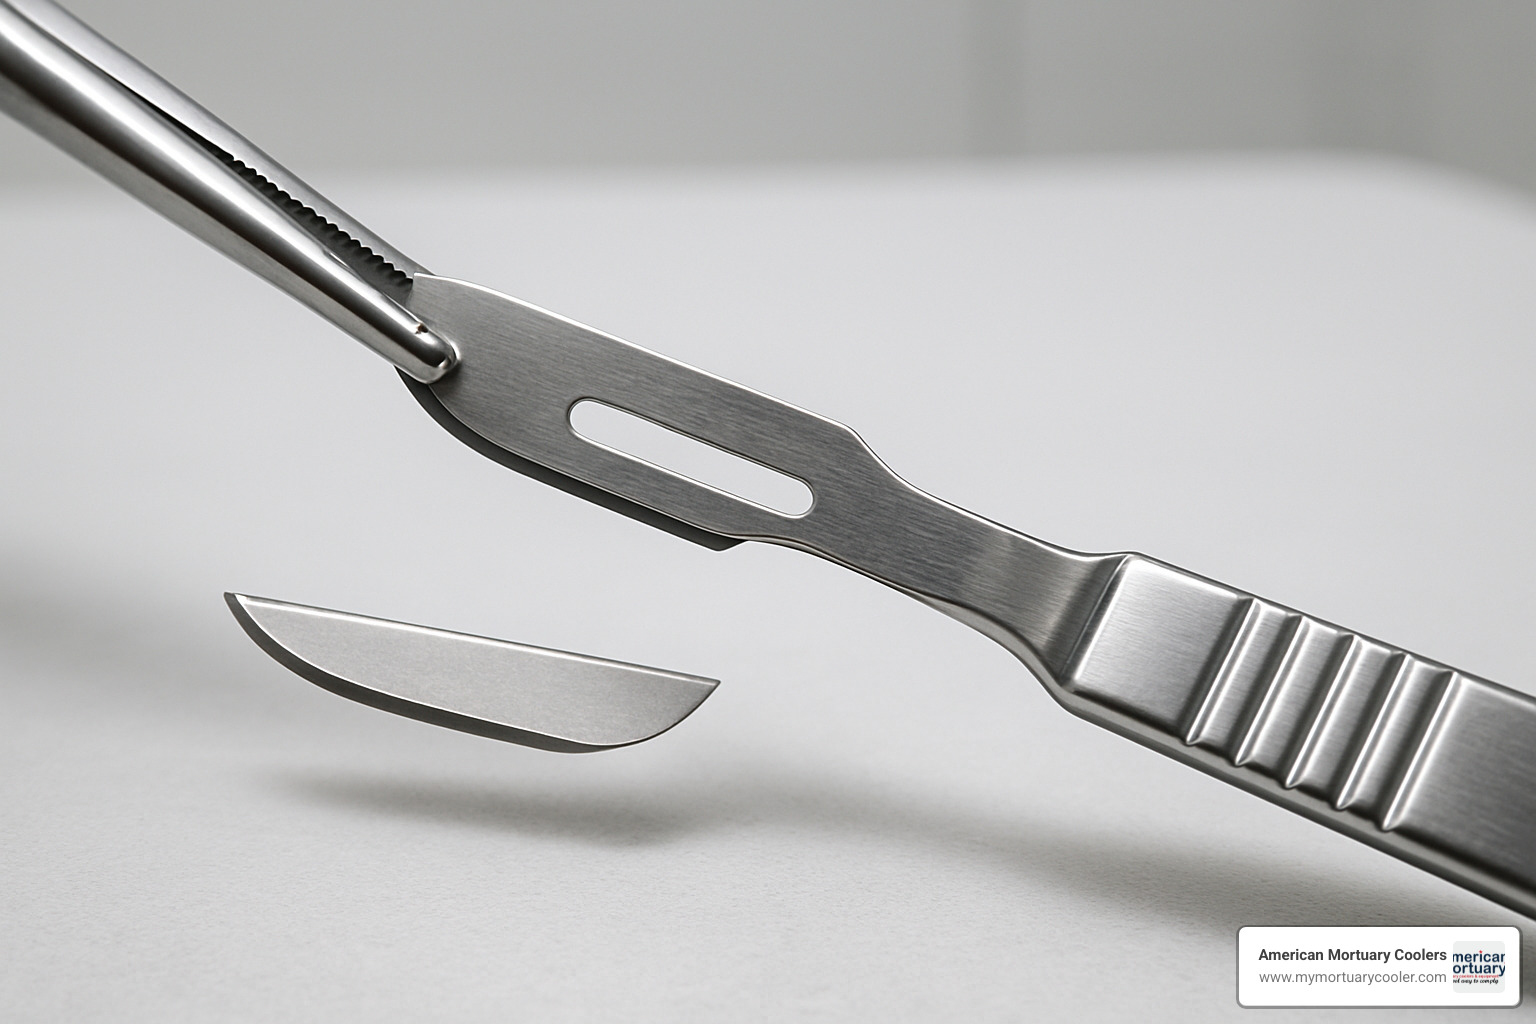
Step 2 requires gripping the blunt edge using artery or tissue forceps. This is crucial - never use rat-toothed forceps because they can slip off the smooth blade surface. Grab the blade near the handle where the blunt edge is thickest and most stable.
Step 3 is about lifting the base of the blade slightly. You're disengaging the locking mechanism here. When you do this correctly, you'll actually feel the blade loosen in the handle - it's a subtle but noticeable change.
Step 4 involves sliding the blade forward with smooth, steady pressure. No jerking, no sudden movements. Think of it like sliding a drawer closed - controlled and deliberate.
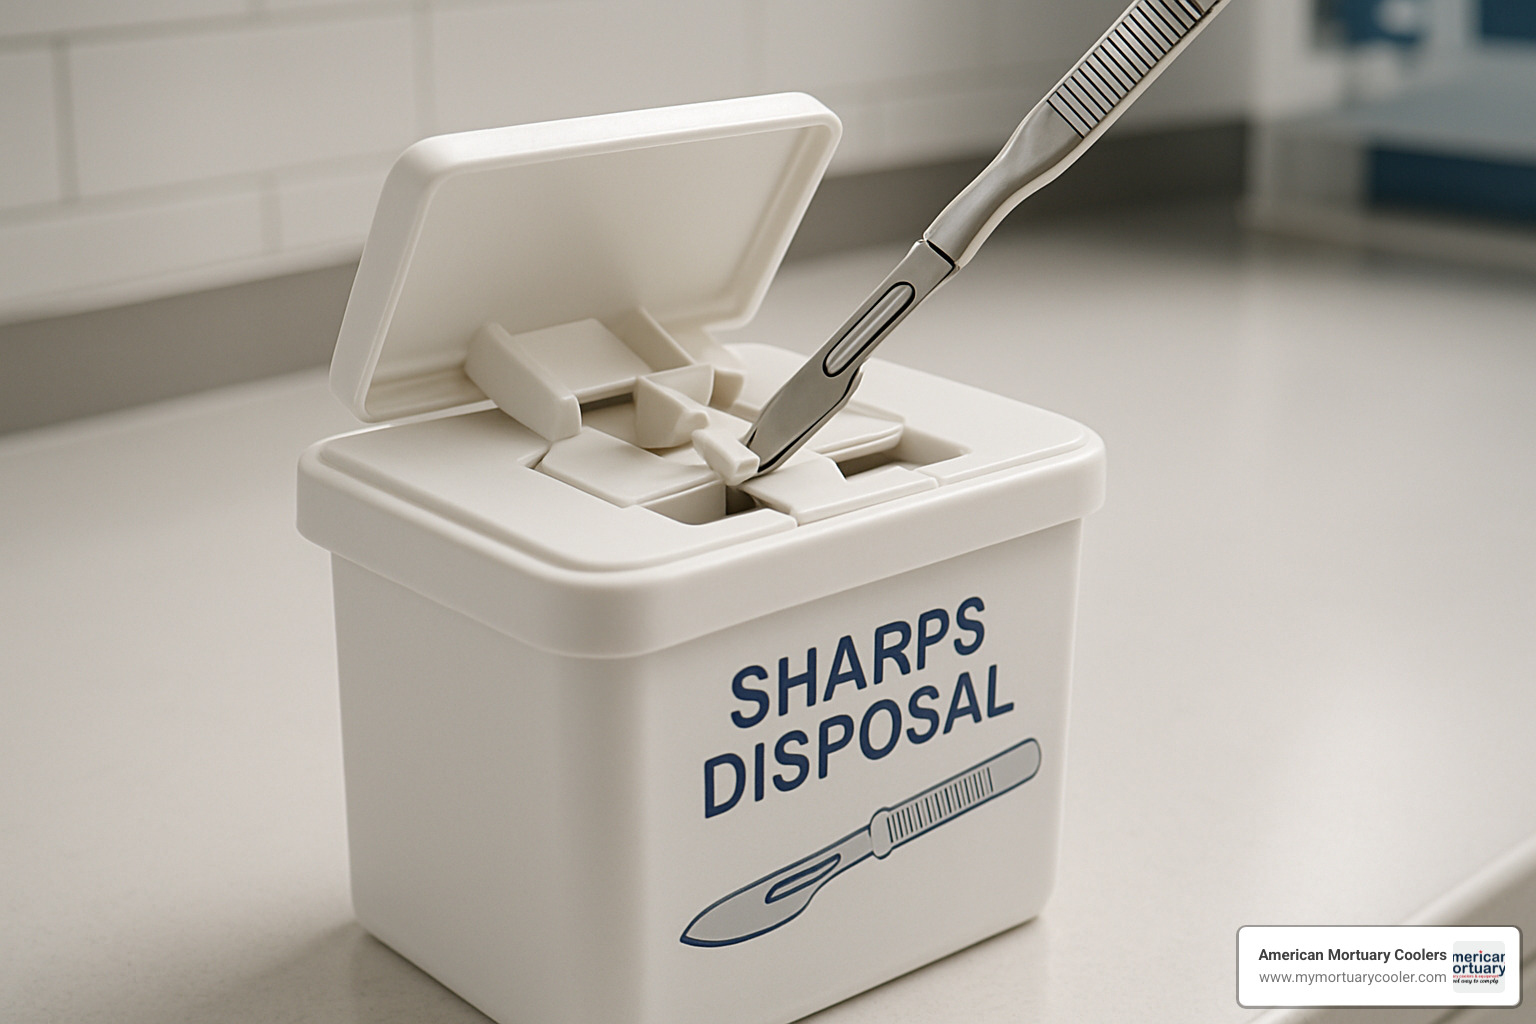
Step 5 means dropping the blade directly into your sharps container. Don't set it down somewhere "safe" first, don't try to clean it, just let gravity do its job and drop it straight in.
Step 6 requires checking your handle for any blade fragments or damage to the locking mechanism. Sometimes tiny pieces break off, and you need to know about it before using the handle again.
Step 7 wraps up with sanitizing your tools and logging the disposal according to your facility's protocols. This documentation isn't just paperwork - it's part of maintaining a safe workplace.
More info about choosing a blade handle can help you select equipment that makes this process even safer and more efficient.
Troubleshooting: What If the Blade Is Stuck & How to Remove Scalpel Blade Without Forcing It
Sometimes blades decide they're not ready to leave the handle. This happens more often than you'd think, especially after procedures involving body fluids that can dry and create adhesion.
The golden rule here is simple: never force it. A stuck blade that suddenly releases under pressure can cause serious injury.
Start by checking the locking groove more carefully. Sometimes what feels stuck is just incomplete disengagement. Make sure you're lifting that blade base far enough to fully release the mechanism.
If gentle lifting doesn't work, try using a hemostat for better grip strength. The serrated jaws give you more purchase on the blade than smooth forceps, but still use controlled pressure.
Warming the handle slightly with your hands can help. Metal expands with heat, and sometimes that tiny bit of expansion is enough to free a stuck blade. Don't use external heat sources - just your body warmth.
For truly stubborn blades, a blade removal box is your best friend. These clever devices use a lid mechanism that engages the blade and strips it from the handle automatically. The used blade drops safely into the box, and you never have to wrestle with it manually.
As one manufacturer explains, their blade removal box "lid mechanism engages the blade to strip it from the handle" and "used blades are stored inside the same box for safety." It's like having a mechanical assistant that handles the tricky removals for you.
Beginner Mistakes & Pro Tips
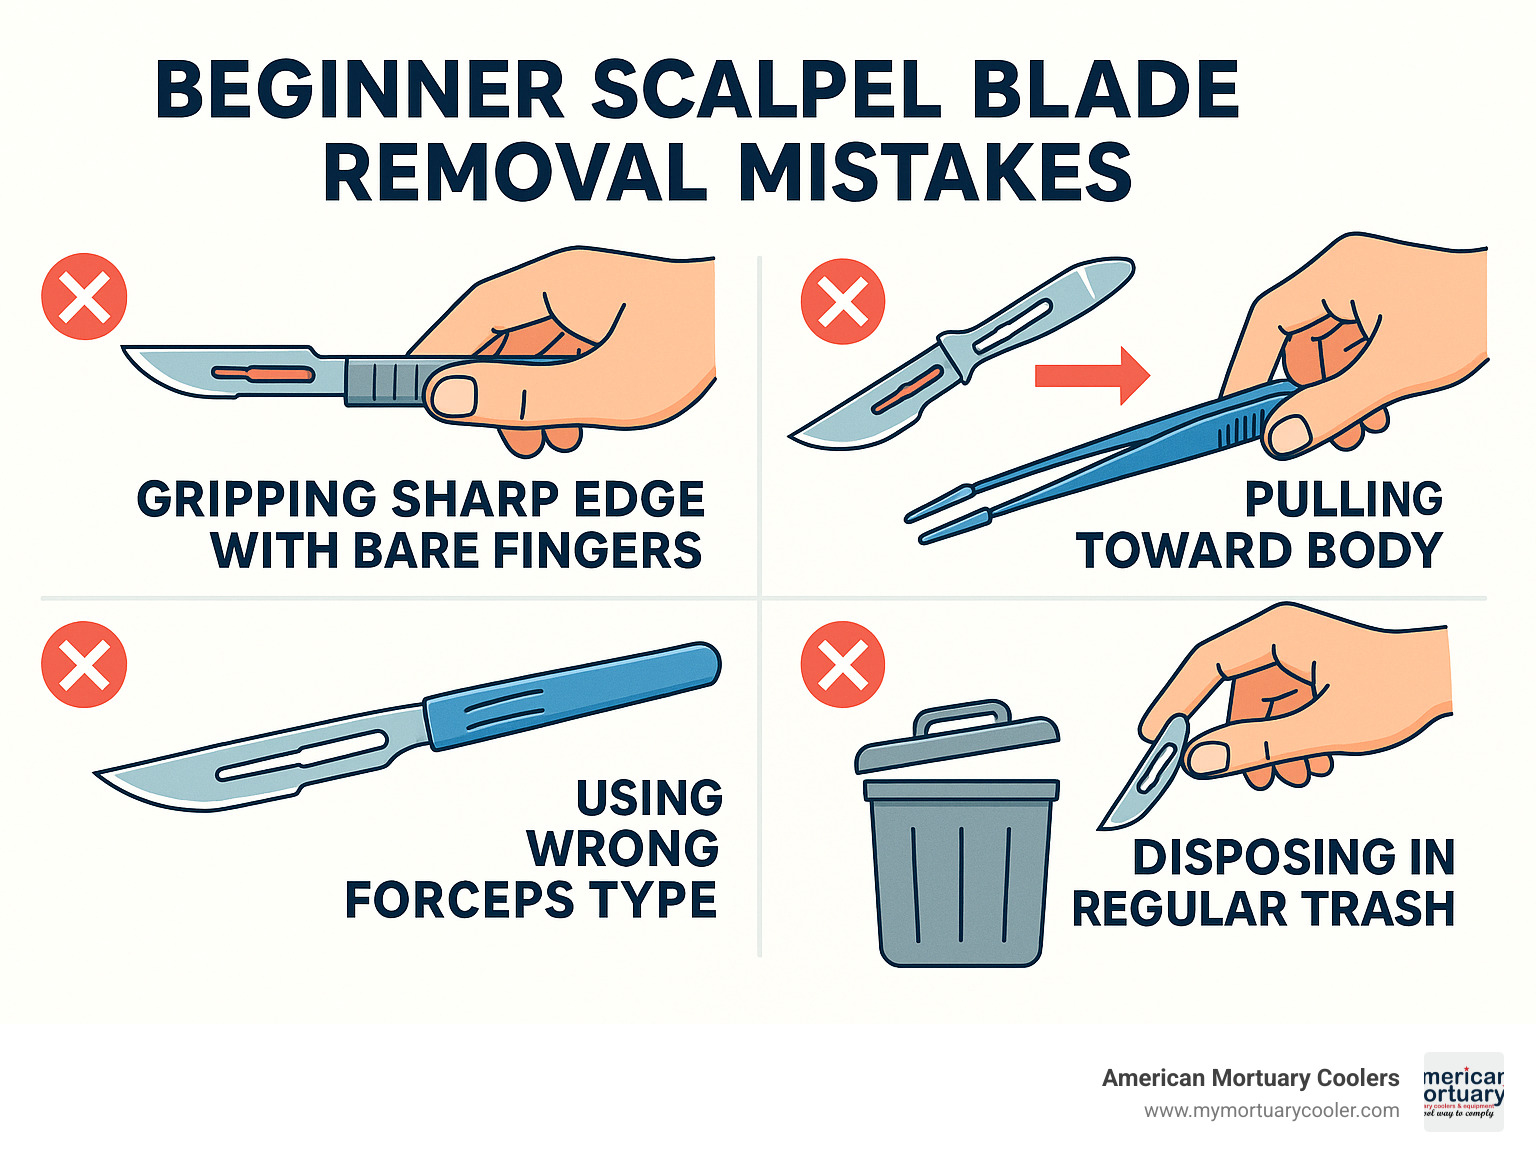
Most blade removal accidents happen because of the same predictable errors that are easy to avoid once you know what to watch for. Using bare fingers is the fastest way to end up in the emergency room. That razor-sharp edge doesn't care how gentle you think you're being.
Another common habit is pulling the blade toward your body during removal. It feels natural, but it's incredibly dangerous. Always direct that blade away from yourself and anyone else nearby.
Wrong forceps selection can be just as dangerous as using the wrong tool entirely. Those rat-toothed forceps might look similar to artery forceps, but they can slip right off a smooth blade surface when you least expect it.
Over-reaching happens more often than you'd think, especially in busy preparation rooms. When that sharps container is just a little too far away, you end up in awkward positions that reduce your control.
And please, don't skip eye protection just because you're in a hurry. Contaminated fluid splashing into your eyes is a risk that's just not worth taking.
Common Mistake #1: Wrong Tool Choice
The tool you choose makes all the difference between a safe procedure and a potential accident. Research shows that using proper instruments reduces injury risk by over 80%.
Pliers versus artery forceps confuses a lot of people. Both can grip a blade, but artery forceps are specifically designed for handling medical instruments. They give you better control and a more secure grip.
Dedicated blade removers are worth considering if your facility does high-volume work. These tools eliminate direct blade contact entirely.
| Tool Type | Safety Rating | Best Use | Risk Level |
|---|---|---|---|
| Bare fingers | Never safe | None | Extremely high |
| Regular pliers | Poor | Emergency only | High |
| Artery forceps | Good | Standard removal | Low |
| Dedicated remover | Excellent | High volume | Very low |
Common Mistake #2: Poor Disposal Practice
Poor disposal habits create dangers that go way beyond just the person removing the blade. Your housekeeping staff, waste handlers, and even delivery personnel can get hurt by improperly disposed blades.
Tossing blades in regular trash is not only dangerous - it violates OSHA regulations and creates serious liability for your funeral home. Those regular waste containers simply can't safely contain sharp objects.
Overfilled sharps bins are another hazard I see too often. When containers get more than three-quarters full, blades start sticking out or can fall out during handling.
Improper labeling might seem like a minor detail, but it confuses waste handlers and can result in dangerous mishandling down the line.
Most of these mistakes happen because people are in a hurry or think they can skip "minor" safety steps. But taking those extra few seconds to do things right protects not just you, but everyone else who works in your facility.
Legal Guidelines & Best Disposal Practices
When it comes to how to remove scalpel blade safely, following legal guidelines isn't just good practice - it's the law. OSHA's Bloodborne Pathogens Standard doesn't mess around when it comes to sharps handling, and funeral homes that ignore these rules face serious consequences.
The federal standard is crystal clear: "sharps shall be disposed of immediately or as soon as feasible in containers that are closable, puncture-resistant, leakproof on sides and bottom, and labeled or color-coded." This isn't a suggestion - it's a legal requirement that protects everyone in your facility.
Local biohazard laws often pile additional requirements on top of federal standards. Some states treat mortuary waste differently than regular medical waste, with stricter rules about storage, labeling, and disposal methods. Always check with your state's health department about specific mortuary waste regulations.
Container specifications aren't negotiable either. Your sharps containers must meet strict federal standards including puncture-resistant construction, leak-proof design, proper biohazard labeling, and secure closure mechanisms.
Recordkeeping requirements vary depending on where you operate, but most jurisdictions want to see disposal logs, waste manifests, and training documentation. Keep these records organized and easily accessible.
Handle sterilization between procedures is crucial. Most facilities autoclave reusable handles after each use to prevent cross-contamination.
Scientific research on sharps disposal regulations provides detailed guidance that can help you stay compliant with evolving requirements.
Institutional Protocols & PPE Checklist
Every funeral home needs written protocols for blade removal - it's not just about safety, it's about protecting your business from liability.
Required PPE forms the foundation of safe blade removal. At minimum, your team needs nitrile or latex gloves, safety glasses or face shields to prevent splash contamination, and lab coats or protective gowns for additional barrier protection. Cut-resistant gloves aren't required but they're smart insurance for new employees.
Workspace requirements matter more than most people realize. Adequate lighting prevents mistakes. A clear work surface eliminates distractions and reduces accident risk. Keep that sharps container within arm's reach - research shows injuries spike when people have to stretch awkwardly during disposal. Emergency first aid supplies should be immediately accessible.
Training documentation protects you legally and ensures consistent safety practices. Document initial safety training completion for every employee who handles scalpels. Schedule annual refresher training and make sure everyone knows your incident reporting procedures and post-exposure protocols.
When an Accident Happens
Even with perfect protocols, accidents sometimes happen. How you respond in those first few minutes can make the difference between a minor incident and a major medical emergency.
Immediate first aid starts with staying calm. For minor cuts, allow brief bleeding to help flush out potential contaminants. Clean thoroughly with soap and water, then apply antiseptic and a sterile bandage. Seek medical attention immediately for deep cuts or any situation where contamination is suspected.
Documentation requirements kick in right away. Complete incident report forms while details are fresh. Some facilities require photographing injuries for insurance purposes. Preserve the involved blade if possible for investigation, and document all witnesses and circumstances thoroughly.
Post-exposure protocols can be complex. Depending on the situation, you might need blood testing to establish baseline pathogen levels, prophylactic treatment if exposure risk is high, follow-up medical monitoring for weeks or months, and workers' compensation claim filing to cover medical costs.
Tetanus and hepatitis B follow-up should already be current for everyone on your team. These vaccinations provide crucial protection against the most common exposure risks in mortuary work.
Proper accident response protects both your employee and your business. Handle it right, and a scary situation becomes a learning opportunity.
Frequently Asked Questions About Removing Scalpel Blades
These are the questions I hear most often from funeral home directors learning how to remove scalpel blade safely. Let me share what I've learned from years of helping mortuary professionals steer these common concerns.
Do blade numbers affect removal technique?
Here's something that surprises many people - blade size and shape don't really change your removal technique. Whether you're working with a tiny No. 11 pointed blade or a large No. 21 straight blade, you'll still lift the base and slide it forward using forceps.
But here's what does matter: larger blades are actually easier to remove safely. Blades numbered 20-26 give you more surface area to grip with your forceps, which means better control and less chance of slipping. Those smaller blades (numbers 9-15) require more careful tool placement because there's less room for error.
The real difference comes down to handle compatibility. Blades 9-18 fit the standard No. 3 handle that most funeral homes use daily, while those bigger blades need the No. 4 handle. The good news? The locking mechanism works exactly the same way regardless of which blade you're removing.
Can I reuse a removal box?
Absolutely! Blade removal boxes are designed for multiple uses, which makes them cost-effective for busy funeral homes. As one manufacturer puts it, "the box is reusable and can be emptied when full."
The key is knowing when and how to empty it properly. When your removal box reaches capacity, simply empty all the accumulated blades into an approved sharps container. Never try to fish individual blades out of the box - that defeats the whole safety purpose of using the device in the first place.
Think of the removal box as a temporary holding station rather than permanent storage. It keeps you safe during the removal process, then transfers that safety to your final disposal system.
What's the safest way to handle a blade that snaps?
A broken blade during removal can feel scary, but staying calm and following the right steps keeps everyone safe. Blade fragments create unique challenges because they're often small, sharp, and can hide in unexpected places.
Stop everything immediately when you hear or see a blade break. Don't try to continue the removal or rush to clean up. Take a moment to assess what happened and where the pieces ended up.
Use your forceps to collect every visible fragment - never use your fingers, even if you're wearing gloves. Check your workspace carefully, including your gloves and any nearby surfaces where pieces might have landed.
Dispose of all fragments in your sharps container, including the handle if the locking mechanism got damaged. Some broken blades can still look functional, but using a cracked or partially broken blade puts you at serious risk.
The most important thing to remember? Blade breaks happen occasionally, even to experienced professionals. Having a clear plan for handling them safely is just part of being prepared in mortuary work.
Conclusion
Learning how to remove scalpel blade safely isn't just about following steps - it's about protecting yourself and everyone around you from serious, preventable injuries. The techniques we've walked through together, from setting up your workspace properly to knowing what to do when things go wrong, really do make the difference between a safe procedure and a trip to the emergency room.
Here at American Mortuary Coolers, we've been serving funeral home professionals across Tennessee and all 48 contiguous states for years. We know that safety in your facility goes way beyond our refrigeration equipment - it touches every single tool and procedure you use daily. Through our conversations with mortuary professionals, we've seen how the smallest safety habits prevent the biggest accidents.
The core principles we've covered really are that simple: always use the right tools, never force a stuck blade, keep your workspace organized, and follow your disposal protocols every single time. These might feel awkward at first, but they'll become as natural as breathing with a little practice. The key is building these habits correctly from day one.
Think about it this way - investing in proper training and safety equipment actually saves money in the long run. Fewer injuries mean lower insurance costs, less downtime, and staff who feel confident and protected. Most importantly, it keeps the dedicated professionals who serve grieving families safe and healthy.
Your safety education doesn't have to stop here. Our tool talk guide dives deeper into other equipment safety topics that work hand-in-hand with proper scalpel handling.
Every time you remove a blade, you're practicing skills that could literally save your life or someone else's. Stay safe out there, keep learning, and never forget that even the most routine procedures deserve your full attention and respect.


