Why Proper Walk-In Freezer Door Gaskets Are Essential
Walk in freezer door gaskets are critical components that create an airtight seal around your freezer door, preventing cold air from escaping and warm air from entering. Here's what you need to know:
| Quick Facts About Walk-In Freezer Door Gaskets | Details |
|---|---|
| Purpose | Creates airtight seal to maintain temperature |
| Energy Impact | Damaged gaskets can increase energy costs by up to 15% |
| Common Types | Magnetic, wiper, and compression gaskets |
| Replacement Signs | Visible light around door, frost buildup, failed paper test |
| Maintenance | Daily cleaning with mild detergent, regular inspection |
| Materials | Standard vinyl (above 32°F) or low temperature vinyl (down to -40°F) |
A worn or damaged walk-in freezer door gasket isn't just an inconvenience—it's a silent drain on your budget. When these rubber seals fail, your freezer's compressor must work overtime to maintain temperature, dramatically increasing energy consumption and putting unnecessary strain on your equipment.
Beyond energy concerns, compromised gaskets can lead to ice buildup, temperature fluctuations, and even food safety risks. The good news? Gaskets are among the most inexpensive maintenance parts on a commercial unit, and replacing them requires no special refrigeration license.
I'm Mortuary Cooler, a national-level mortuary cooler supplier with extensive experience helping clients select and maintain proper walk in freezer door gaskets for optimal performance in sensitive cooling environments. My background includes years of working with funeral homes to ensure their refrigeration systems maintain consistent temperatures through proper gasket maintenance.
Basic walk in freezer door gaskets terms:
What Are Walk-In Freezer Door Gaskets and Why They Matter
Walk in freezer door gaskets are those flexible vinyl or rubber seals that run all the way around your walk-in freezer door. They might seem like a minor detail, but trust me—these humble components are the unsung heroes of your cooling system.
The doors of walk-in freezers are a crucial point in the equipment, keeping warm air out and cold air in the unit. When these seals fail, careful business owners watch for signs of wear to remedy this situation as quickly as possible.
At American Mortuary Coolers, we've seen how proper gasket maintenance directly impacts performance. From our Tennessee headquarters to serving customers in California, we've learned that these gaskets do much more than just help doors close—they create that essential barrier that maintains precise temperatures in environments where even small fluctuations aren't acceptable.

Key Functions of Walk-In Freezer Door Gaskets
Walk in freezer door gaskets aren't just door trim—they're working components that earn their keep every day. These seals create a thermal barrier that blocks heat exchange between your cold interior and the warmer outside world. This barrier is especially important in sensitive environments like mortuary coolers.
Beyond temperature control, good gaskets manage humidity by preventing warm, moist air from sneaking in and creating frost buildup on your evaporator coils and stored items. This seal also stops condensation that can damage your equipment, create slippery floors, or even promote bacterial growth around door frames.
Energy efficiency is another huge benefit. As one of our technicians in Chicago recently put it, "You can have the most advanced freezer system money can buy, but if your door gaskets are compromised, you're essentially cooling the great outdoors."
By maintaining that perfect seal, your gaskets also protect the structural elements of your freezer from moisture damage and premature deterioration. It's amazing how much work these simple strips of vinyl actually do!
Consequences of Neglected Gaskets
Ignoring worn walk in freezer door gaskets is like throwing money out the door—literally. Our service teams across the Southeast and Southwest regions see the same issues time and again.
Your energy bills can skyrocket—a worn gasket typically increases energy consumption by up to 15%. For commercial operations, that translates to hundreds or even thousands of dollars wasted annually. One funeral director in our Tennessee service area told us they were defrosting their unit weekly before we replaced their deteriorated gaskets.
Temperature fluctuations become a serious problem, which is particularly concerning in mortuary environments where precise temperature control isn't just about efficiency—it's essential for proper preservation. When cold air escapes, your refrigeration system has to work overtime, putting strain on components and leading to premature equipment failure.
"We had a mortuary in our Dallas service area whose monthly electricity bill dropped by nearly $300 after we replaced severely damaged door gaskets," one of our service technicians shared. "They had been living with the problem for so long they didn't realize how much it was costing them."
The ice and frost buildup that comes with poor seals creates additional maintenance headaches. And if you're storing food products, these temperature inconsistencies can create food safety risks and potential health code violations.
Perhaps most expensive of all—the constant strain on compressors and other components from compensating for poor seals can reduce your equipment's overall lifespan by years. That's an expensive consequence for such a relatively inexpensive maintenance item.
Identifying and Sourcing the Correct Replacement Gasket
Finding the right walk in freezer door gasket feels a bit like detective work at first. Trust me, it's not as simple as just ordering a "standard" replacement—your freezer door has its own personality, and the gasket needs to match it perfectly.
Gasket Types and Attachment Styles
When we're helping funeral homes across the country replace their gaskets, we typically encounter three main types:
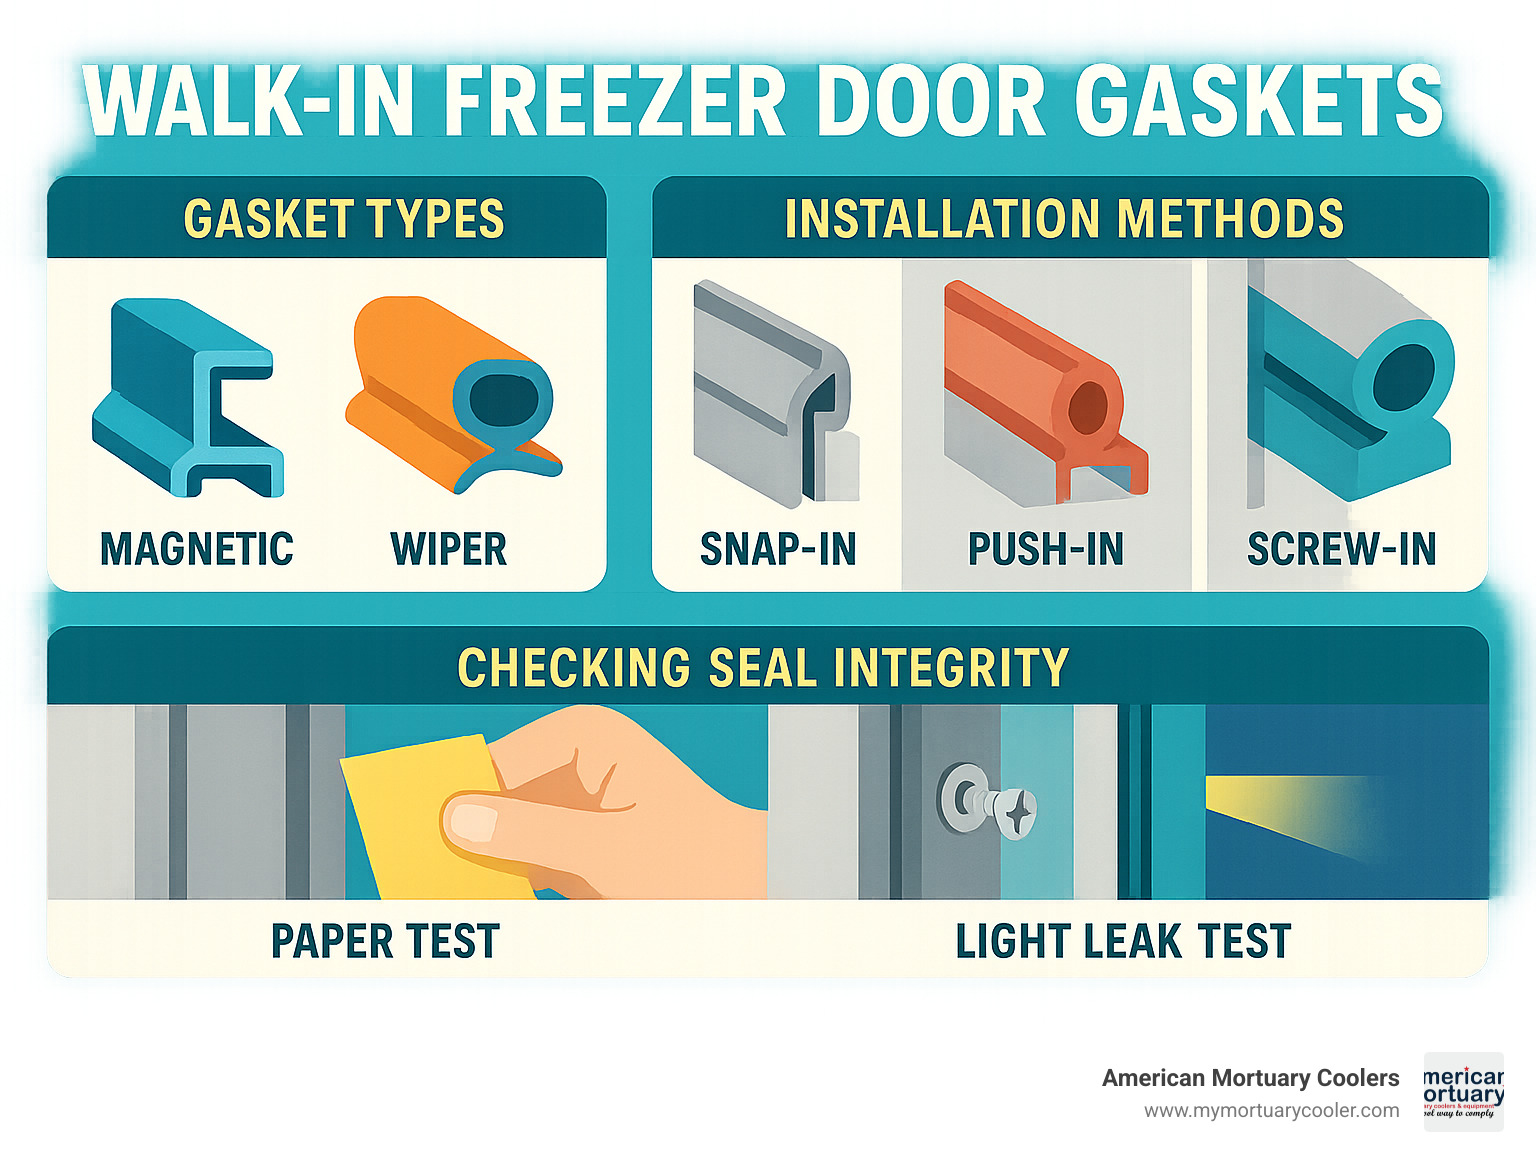
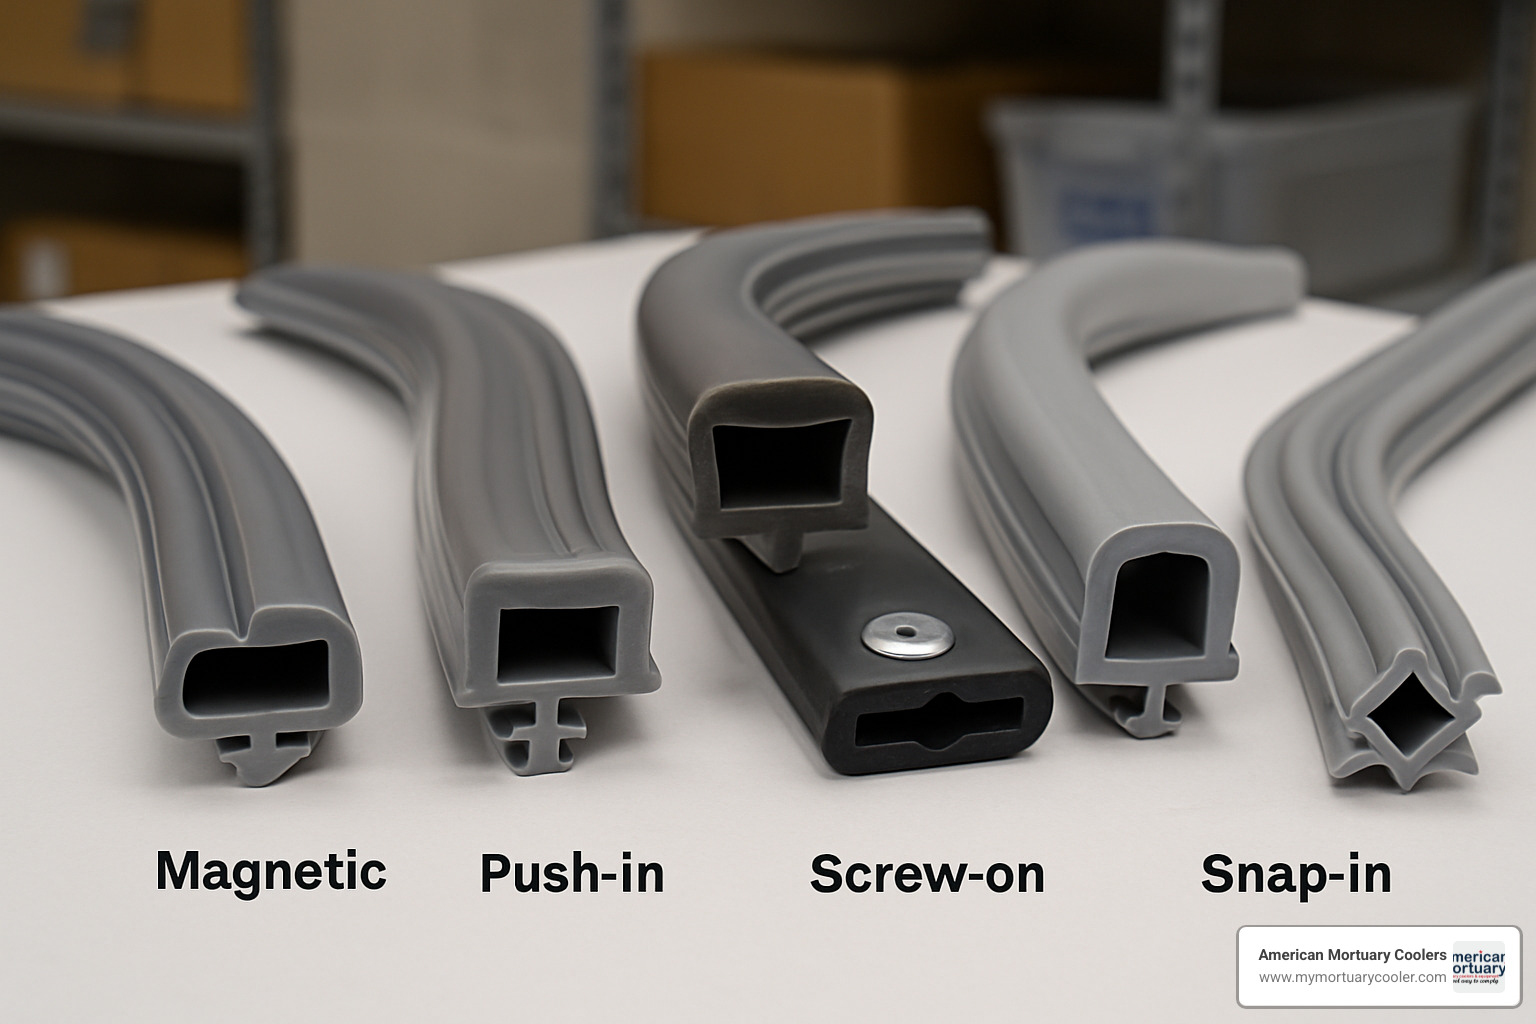
Magnetic Gaskets are the workhorses of modern walk-ins. They have those clever little magnetic strips embedded inside that grab onto metal door frames like a friendly handshake. Our customers love them because they create that satisfying "thunk" when closing and don't need door latches to maintain a tight seal.
Wiper Gaskets are the dynamic duo of the gasket world. Mounted on both the door and frame, they gently brush against each other when the door closes. We often see these working alongside magnetic gaskets for an extra layer of protection in our Tennessee and Midwest installations.
Compression Gaskets are the old-school option. They rely on physical pressure from door latches to squeeze the gasket and create a seal. While they're less common in newer units, many of our customers with legacy systems still use them effectively.
As for how they attach, you'll find quite a variety:
Snap-in/Dart Style gaskets have these little metal "darts" or "tangs" on the back that snap into channels in the door frame. One of our technicians in the Southwest region calls them "the alligator teeth" of the gasket world. They come in single-dart versions for non-FRP frames or triple-dart for FRP frames.
Push-in Style gaskets slide into wider channels (usually bigger than 5/16") and sometimes need a bit of vinyl cement to stay put—kind of like how some of us need coffee to function in the morning.
Screw-in Style gaskets are the most straightforward—they attach with visible screws or retainer strips around the door perimeter.
"I once drove out to a funeral home in rural Alabama that had ordered the wrong style three times before calling us," our service manager told me with a chuckle. "The look of relief when we showed up with the right attachment style was worth the trip."
Measuring & Profiling Walk-In Freezer Door Gaskets
Getting the measurements right is absolutely crucial. Here's how we do it at American Mortuary Coolers:
First, we measure from outside corner to outside corner for both height and width. We actually take measurements at several points because, just like people, doors sometimes get a little warped with age.
Next, we hunt for the manufacturer's name, model, and serial number, usually hiding on the door jamb or inner frame. This information is gold—it helps us identify the exact gasket profile needed.
For dart-style gaskets, we count the darts—seems simple, but mixing up single and triple dart styles is a common mistake we see from DIYers.
With magnetic gaskets, we check whether the magnet rides on one or both sides of the seal. And for push-in styles, we measure the channel width carefully.
"Last winter, a mortuary in Minnesota sent us photos of their existing gasket along with careful measurements," shares our customer service rep. "Their attention to detail saved them from the nightmare of receiving the wrong part during a blizzard when they needed that seal working perfectly."
Choosing Material & Supplier
The material of your walk in freezer door gasket matters tremendously, especially when you're dealing with the extreme temperatures of a mortuary cooler.
Standard Vinyl works fine for temperatures above 32°F, but gets cranky and stiff below 20°F. It's like that friend who refuses to go outside when it's too cold.
Low Temperature Vinyl is our go-to recommendation for freezers. Rated to -40°F, it stays flexible down to -20°F, making it perfect for those critical mortuary environments where temperature stability is non-negotiable.
Santoprene is the premium option—think of it as the luxury car of gasket materials. It offers better durability and temperature resistance, though it does come with a higher price tag.
When choosing where to buy your gasket, look for suppliers offering a "Fits Right Seals Tight" guarantee. This means free exchanges if the gasket doesn't fit perfectly—something we pride ourselves on at American Mortuary Coolers.
Also check that they use genuine food-grade materials appropriate for your temperature range. And of course, verify they can match your specific walk-in freezer brand and model.
For more detailed information about walk-in cooler doors and their components, take a peek at our More info about walk-in cooler doors.
When Custom Ordering Is Necessary
Sometimes your walk-in freezer needs a gasket as unique as it is. This is particularly true for:
Non-standard door sizes or shapes that make off-the-shelf options impossible. We once worked with a historic funeral home in New Orleans that had beautiful but uniquely sized cooler doors that required completely custom gaskets.
Legacy equipment from manufacturers that went out of business decades ago. One of our Pennsylvania customers had a 1960s unit still going strong—except for the gaskets.
Custom-built walk-in units that never had standard dimensions to begin with. We see these frequently in renovated historic buildings where space constraints dictated unusual dimensions.
In these special cases, our process includes taking comprehensive measurements of everything—door, frame, and any remnants of the existing gasket. We help select appropriate materials based on your specific needs, and sometimes even work with manufacturers to create custom extrusions that match your unique profile.
"A small family-owned funeral home in our Northeast Region had a walk-in cooler that was practically an antique," recalls our regional manager with a smile. "We created a template from their existing gasket—which was literally held together with duct tape at that point—and had a perfect match manufactured within two weeks. The owner nearly hugged our installer when it was done."
Replacing Walk In Freezer Door Gaskets: Tools, Materials, and Steps
Replacing walk in freezer door gaskets might sound intimidating, but it's actually a task most facility managers can handle with a little patience and the right tools. Throughout our years of service across the country—from Tennessee to California—we've helped countless mortuary professionals tackle this maintenance job successfully.
Essential Tools and Materials
Before you roll up your sleeves, gather everything you'll need. Trust me, there's nothing more frustrating than being elbow-deep in a gasket replacement only to realize you're missing a crucial tool!
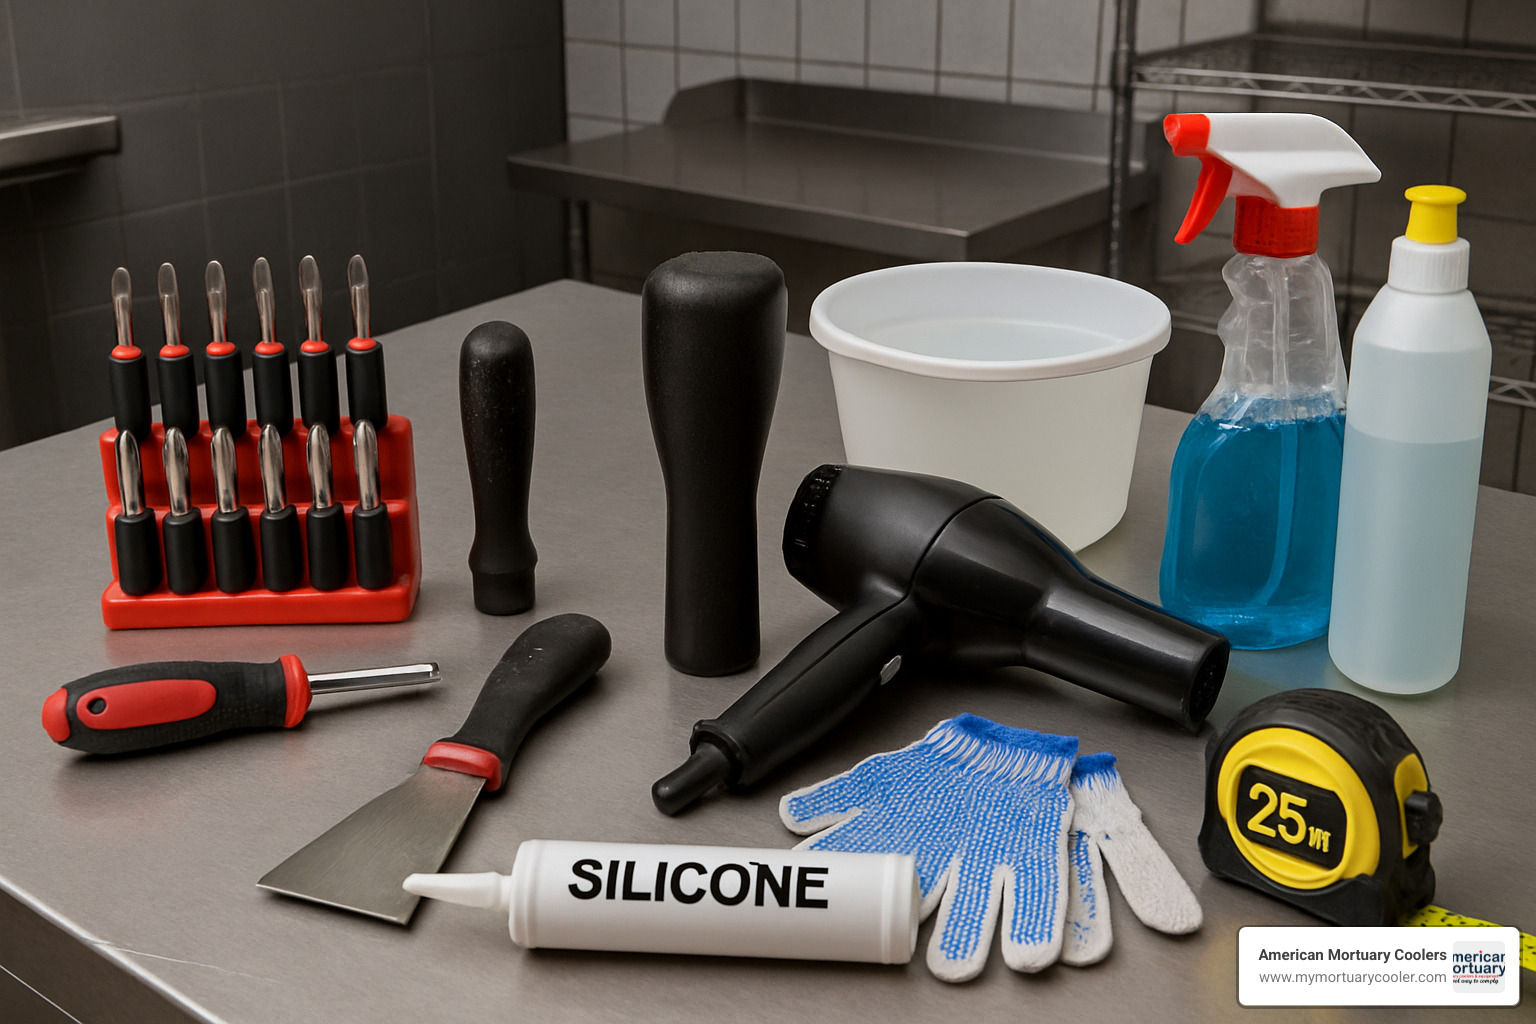
You'll want to have a screwdriver set (both Phillips and flathead), as well as a hex driver or Allen wrench set for those pesky hex-head fasteners that often secure gasket retainers. A good putty knife is invaluable for removing old gaskets without scratching up your door, and don't forget a rubber mallet for tapping those dart-style gaskets neatly into place.
"I always tell customers to have a hair dryer on hand," says Mike, our installation specialist in Atlanta. "When those new gaskets arrive, they can be stiffer than a board in January. A little heat makes them much more cooperative."
Other essentials include a bucket of warm water (for soaking the new gasket to increase flexibility), some NSF-approved silicone caulk, safety gloves to protect your hands, a measuring tape for proper alignment, and cleaning supplies to prep the surface.
Step-By-Step Removal Process for Walk In Freezer Door Gaskets
Removing the old gasket requires a methodical approach. Here's how we tackle it:
First, consider whether you need to power down the unit. If you're planning to remove the door from its hinges (which can make the job easier, especially with heavier doors), turning off the power is a must.
Before you start dismantling anything, grab your phone and take several photos of the existing installation from different angles. You'd be surprised how helpful these references can be when you're putting everything back together!
Next, identify how your current gasket is attached. Screw-in gaskets will have visible screws along a retainer strip. Snap-in gaskets might have screws at the corners or along the perimeter. Push-in styles typically don't have visible fasteners.
"Always start at a corner," advises our Columbia technician, James. "Whether you're working with a snap-in, push-in, or screw-in style, the corner gives you leverage and makes the whole process smoother."
For snap-in gaskets, gently work your putty knife under the dart and pry it from the channel. With push-in styles, get a firm grip and pull evenly away from the channel. For screw-in types, remove all screws first, then lift away both the retainer and gasket.
Once the old gasket is gone, don't skip the cleaning step! Use a mild detergent and a nylon brush to thoroughly clean the mounting surface. Remove all debris, old adhesive, and grime from channels or mounting surfaces, then dry completely.
Installing the New Walk In Freezer Door Gaskets Correctly
Installation day! Let's get that new walk in freezer door gasket properly seated.
Start by preparing your new gasket. Unbox it and let it relax into its natural shape. For snap-in or dart-style gaskets, a five-minute soak in warm water works wonders for flexibility. If it's still being stubborn, a few passes with the hair dryer on low heat will help (just be careful not to melt it).
Always begin installation at the top of the door, preferably at a corner. For snap-in gaskets, align the dart with the channel and give it a gentle tap with your rubber mallet to seat it. With push-in styles, you might want to apply a thin bead of vinyl cement to the channel if the manufacturer recommends it, then press the gasket firmly into place starting at that top corner. For screw-in types, position the gasket with the retainer strip and secure with screws, working from top to bottom.
"The secret is to work in short sections," shares our Rocky Mountain region technician. "Don't try to do too much at once. Make sure each section is properly aligned and seated before moving to the next. And whatever you do, avoid stretching the gasket as you work—that's a recipe for buckling and poor sealing down the road."
Pay special attention to the bottom and corners. You'll need to trim the bottom of the gasket just over the metal sweep if your door has one. For magnetic gaskets, double-check that the magnet is properly seated in its channel. And don't forget to seal any cut ends with NSF-approved silicone caulk for a finished look and better durability.
For a more detailed visual guide on installing a magnetic dart gasket, check out Installing a magnetic dart gasket.
Quick Seal Verification Tests
After all that work, you'll want to make sure your new walk in freezer door gasket is actually doing its job. Here are three simple tests we recommend:
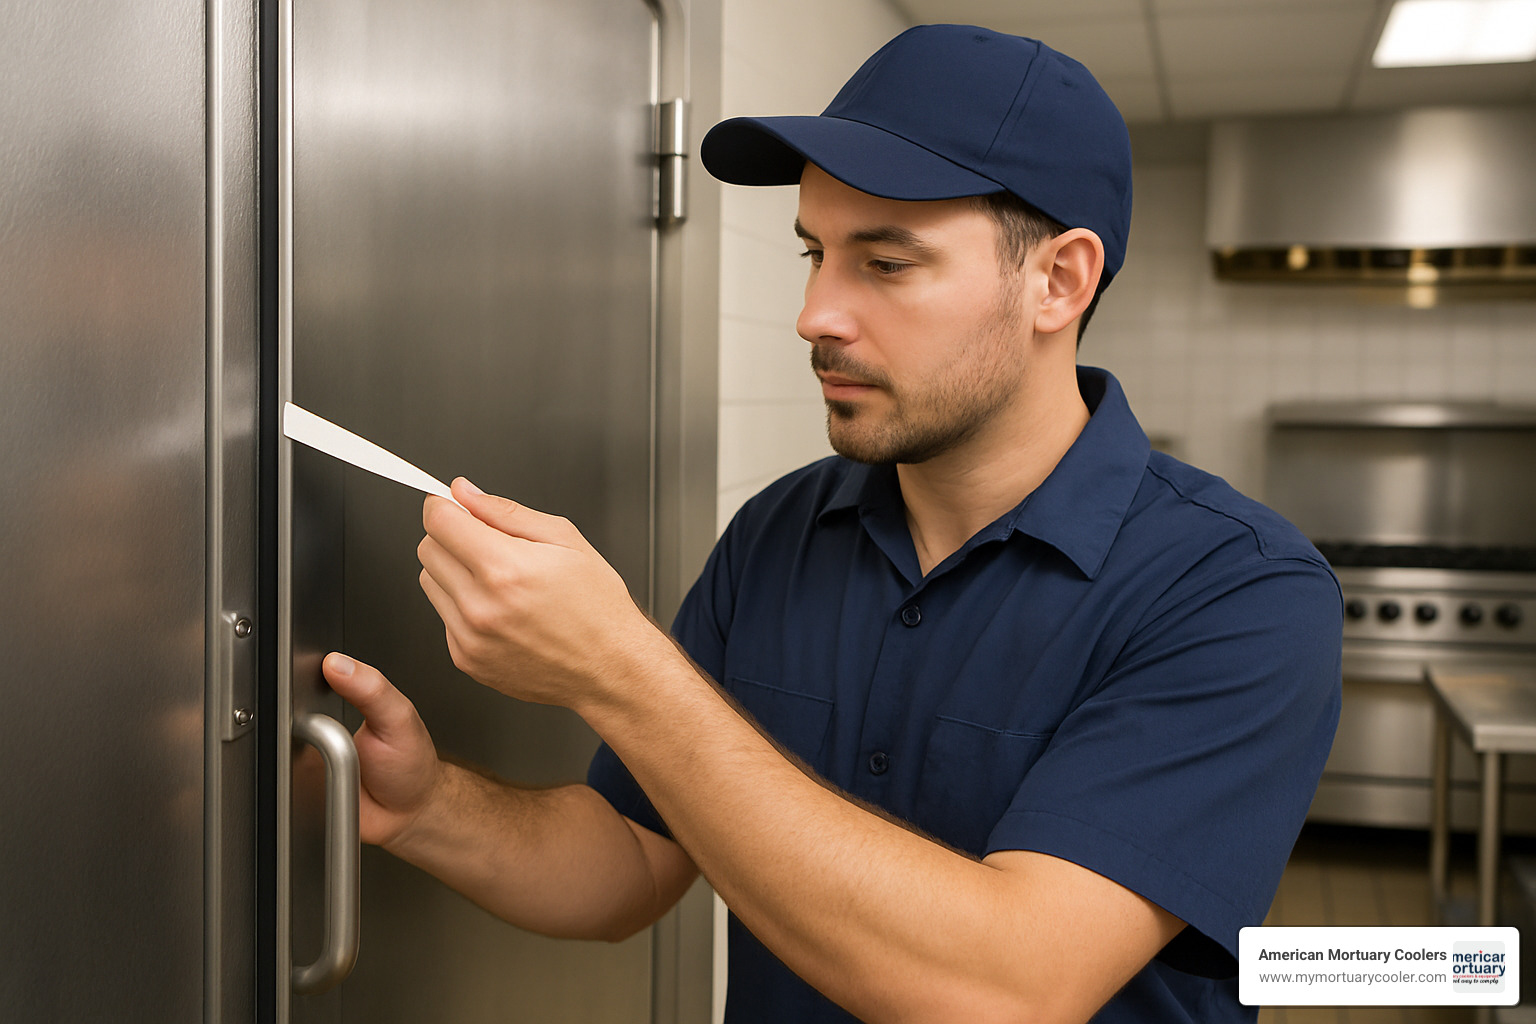
The paper test is a classic for good reason—simply close the door on a strip of paper at various points around the perimeter. If you can easily pull the paper out without resistance, you've got a sealing issue at that spot.
The light test is equally effective. With someone inside the darkened freezer, have another person shine a flashlight around the door perimeter from outside. Any visible light means air (and energy) is escaping.
For the technically inclined, an infrared thermometer check can reveal subtle issues. After the unit has been running for a few hours, scan around the door perimeter. Cold spots on the exterior indicate air leakage.
"Half the time when people think they need a new gasket, it's actually a door alignment problem," explains our Dallas technician. "If your tests show sealing issues, check the hinges, the door closer tension, and look for any warping in the frame before assuming the gasket installation is faulty."
I remember a funeral director in Tennessee who was convinced his new gasket was defective because the door wouldn't seal properly. Turns out, his door closer was adjusted too tight, preventing the door from fully contacting the gasket. A simple adjustment saved him the hassle of another replacement.
With these tools, steps, and verification methods, you'll be well-equipped to tackle your walk in freezer door gasket replacement with confidence. And remember, if you ever feel in over your head, the team at American Mortuary Coolers is just a phone call away.
Ensuring a Perfect Seal and Long-Term Maintenance
You've got your new walk in freezer door gaskets installed—now let's make sure they stay in peak condition for years to come. Think of gasket maintenance as a bit like dental care—a little daily attention prevents painful (and expensive) problems down the road.
Regular Inspection and Cleaning Schedule
At American Mortuary Coolers, we've seen how proper maintenance can double the lifespan of gaskets. Here's what we recommend to our clients from coast to coast:
Every day, take 30 seconds to wipe down your gaskets with a clean, damp cloth. This quick habit removes food particles and debris before they can become embedded in the rubber. One of our funeral home clients in Pittsburgh implemented this simple end-of-shift routine and now replaces their gaskets half as often as before.
"It's like flossing your teeth," jokes our Tennessee service manager. "Nobody wants to do it, but the five-minute investment saves you hours of headaches and hundreds of dollars later."
Weekly, give those gaskets a proper bath with mild soap and warm water. Use a soft nylon brush to gently clean the grooves where mold and grime love to hide. Remember to dry them thoroughly afterward—moisture is not your friend here.
Monthly, run your hand along the entire perimeter and perform the paper test we mentioned earlier. This is also the perfect time to check that your door is closing properly from different positions. If your gasket is showing early signs of stiffening, a thin layer of food-grade petroleum jelly can temporarily refresh it—though this isn't a long-term solution.
Quarterly, schedule a thorough inspection looking specifically for cracks, tears, or permanent compression. These are your warning signs that replacement may be needed soon.
Complementary Components for Improved Sealing
Your walk in freezer door gaskets don't work alone—they have teammates that help maintain that perfect seal:
Door sweeps act as your first line of defense at floor level. These brush or vinyl barriers are particularly important in high-traffic freezers where the bottom seal gets the most abuse. We've installed these for numerous clients across our service regions and seen immediate improvement in temperature stability.
Thresholds create that smooth transition at the bottom of the door while giving the gasket something proper to seal against. Without a good threshold, even the best gasket can't do its job effectively.
Many of our mortuary clients in colder regions like Chicago and New York have found that adding strip curtains inside their walk-ins provides an additional barrier during those moments when the door is open. They're particularly helpful during busy periods when the door might be opened frequently.
Don't overlook your door closers—these mechanical devices ensure the door closes fully every time, allowing the gasket to form a complete seal. A door that doesn't close properly is the number one cause of premature gasket failure we see across all our service territories.
Common Maintenance Mistakes to Avoid
Over our years servicing funeral homes from Los Angeles to Boston, we've seen some recurring mistakes that shorten gasket life:
Using harsh chemicals is a major no-no. Those strong cleaners might make everything sparkle, but they're silently breaking down your gasket material. Stick with mild detergents and avoid anything containing bleach or ammonia.
Ignoring early warning signs is like pretending you don't hear that strange noise in your car engine. Small tears or minor air leaks won't fix themselves—they'll only get worse. One mortuary in our Columbia service area waited too long and ended up with frost-covered evaporator coils and a $3,000 repair bill.
Improper door adjustment puts uneven pressure on your gaskets. If your door doesn't hang perfectly, certain sections of the gasket will wear out much faster than others. This is especially common after years of use when hinges start to sag slightly.
"We had a mortuary in our New York location that was replacing gaskets every six months," shares our Northeast Region manager with a smile. "After we adjusted their door hinges and trained their staff on proper closing techniques, they now get a full two years from each gasket."
Forcing doors closed is a quick way to damage both the gasket and the frame. If your door requires a shoulder check to close, something's wrong—investigate rather than muscle through it.
Staff training might seem obvious, but it's often overlooked. Make sure everyone understands that slamming the door or propping it open for "just a minute" impacts your cooling system's efficiency and gasket lifespan.
For more detailed information about walk-in cooler repair and maintenance beyond just gaskets, visit our guide on how to do walk-in cooler repair, where we cover everything from evaporator issues to compressor maintenance.
With these maintenance practices in place, your walk in freezer door gaskets will provide years of reliable service, keeping your mortuary cooler at perfect temperature while minimizing energy costs.
Frequently Asked Questions About Walk In Freezer Door Gaskets
How often should I inspect and replace my gasket?
Let's face it - nobody wakes up excited to inspect their walk in freezer door gaskets. But this small monthly task can save you thousands in energy costs and prevent those middle-of-the-night emergency calls when temperatures start climbing.
Most commercial gaskets should be replaced every 12-24 months, though this timeline isn't set in stone. Think of gaskets like tires on your car - their lifespan depends entirely on how you use them.
"In our mortuary applications, we typically see gaskets lasting 18-24 months with proper care," notes our technical director. "However, we always recommend replacing at the first sign of compromise rather than waiting for a complete failure."
Heavy traffic takes a toll - doors that open dozens of times daily will wear faster than those used occasionally. If your walk-in sits in wildly fluctuating humidity or temperature conditions (like those steamy Southern summers we experience in Tennessee), expect to replace gaskets more frequently. A gentle, consistent cleaning routine can add months to gasket life, while misaligned doors create pressure points that lead to premature failure.
The bottom line? Don't wait until you can see light around your closed door. By then, you're already losing money and potentially compromising temperature stability.
What tools do I really need for a gasket swap?
While our comprehensive tool list might look intimidating, you can successfully replace most walk in freezer door gaskets with surprisingly few items. Consider this your bare-minimum toolkit:
- Appropriate screwdriver (Phillips or flathead, depending on your particular unit)
- Rubber mallet for gently tapping dart-style gaskets into place
- Putty knife to help remove old gaskets without damaging door surfaces
- Measuring tape to ensure proper alignment during installation
- Bucket of warm water for soaking new gaskets to increase flexibility
- Clean cloth and mild detergent for preparing the mounting surface
One of our Chicago technicians has a great story about this: "I've completed emergency gasket replacements with just a screwdriver and a rubber mallet in a pinch. It's not ideal, but when a mortuary needs their cooler functional immediately, you work with what you have."
If you're feeling uncertain about tackling this yourself, most of our service locations can dispatch a technician quickly. Sometimes paying for professional installation saves money in the long run by ensuring the job is done right the first time.
Can I upgrade to magnetic gaskets on an older compression door?
Yes! This is one of our most common upgrade requests, and for good reason. Magnetic walk in freezer door gaskets offer significant improvements over older compression styles, but there are a few important considerations before making the switch.
First, check that your door frame contains ferrous metal (something a magnet will stick to). Without this, magnetic gaskets simply won't work. The door must also close flush with the frame to create proper contact for the magnetic seal. Your door closer might need adjustment or replacement to accommodate the different closing characteristics of magnetic gaskets - they don't require the same forceful closing that compression styles need.
In many cases, you'll also need new retainer strips designed specifically for magnetic gasket profiles. This isn't as complicated as it sounds, and our team can help determine exactly what you'll need.
The benefits make this upgrade worthwhile for most facilities:
"We upgraded a 1980s-era mortuary cooler from compression to magnetic gaskets last year," recalls our technician from the Los Angeles service area. "The owner reported a 12% drop in their energy bill the very next month."
Beyond energy savings, you'll enjoy easier door operation without heavy latching mechanisms, more consistent temperature control, and typically a longer gasket lifespan. For facilities where staff frequently move between cooled and ambient spaces, the easier operation alone justifies the upgrade.

Conclusion & Next Steps
I've spent my career helping funeral homes maintain their cooling systems, and if there's one thing I've learned, it's that walk in freezer door gaskets are truly the unsung heroes of refrigeration. These humble rubber seals might not be the most exciting part of your mortuary equipment, but they're absolutely essential to your operation.
Think about it – a simple gasket replacement can slash your energy bills, extend the life of your expensive equipment, and ensure the consistent temperatures that your business demands. The best part? The investment typically pays for itself within months through energy savings alone.
At American Mortuary Coolers, we've seen how proper gasket maintenance makes a difference for funeral homes across the country. From our Tennessee headquarters to our service calls in California, we consistently hear from directors who are amazed at the difference a quality gasket makes.
In the funeral industry, reliable refrigeration isn't just about saving money—it's about maintaining dignity and providing exceptional care during life's most difficult moments. A failing gasket that leads to temperature fluctuations can compromise everything you work so hard to provide.
Here's what I recommend based on decades in the business:
Establish a simple monthly inspection routine where someone checks gaskets for signs of wear. Train your staff on proper door handling (no yanking it open or forcing it closed). Keep a spare gasket on hand for critical units – trust me, you'll thank yourself during an emergency. And finally, keep a simple maintenance log to track when gaskets were last replaced.
American Mortuary Coolers is here to help with all your walk-in cooler and freezer needs. Whether you need replacement gaskets, professional installation, or just some advice from people who understand the unique challenges of mortuary refrigeration, our nationwide service network has you covered anywhere in the contiguous 48 states.
For more information about our comprehensive solutions for funeral homes, visit Your one-stop shop for mortuary coolers.
When it comes down to it, your walk in freezer door gasket might seem like a small detail in your operation, but it's actually the foundation of your entire refrigeration system. Invest in quality, maintain it properly, and replace it promptly – your business, your energy bill, and the families you serve will all benefit.


