Why Walk-In Cooler Floor Replacement is Critical for Your Facility
Walk in cooler floor replacement becomes necessary when floors show signs of deterioration, compromising both safety and efficiency in your facility. A failing floor can lead to energy waste, safety hazards, and costly downtime.
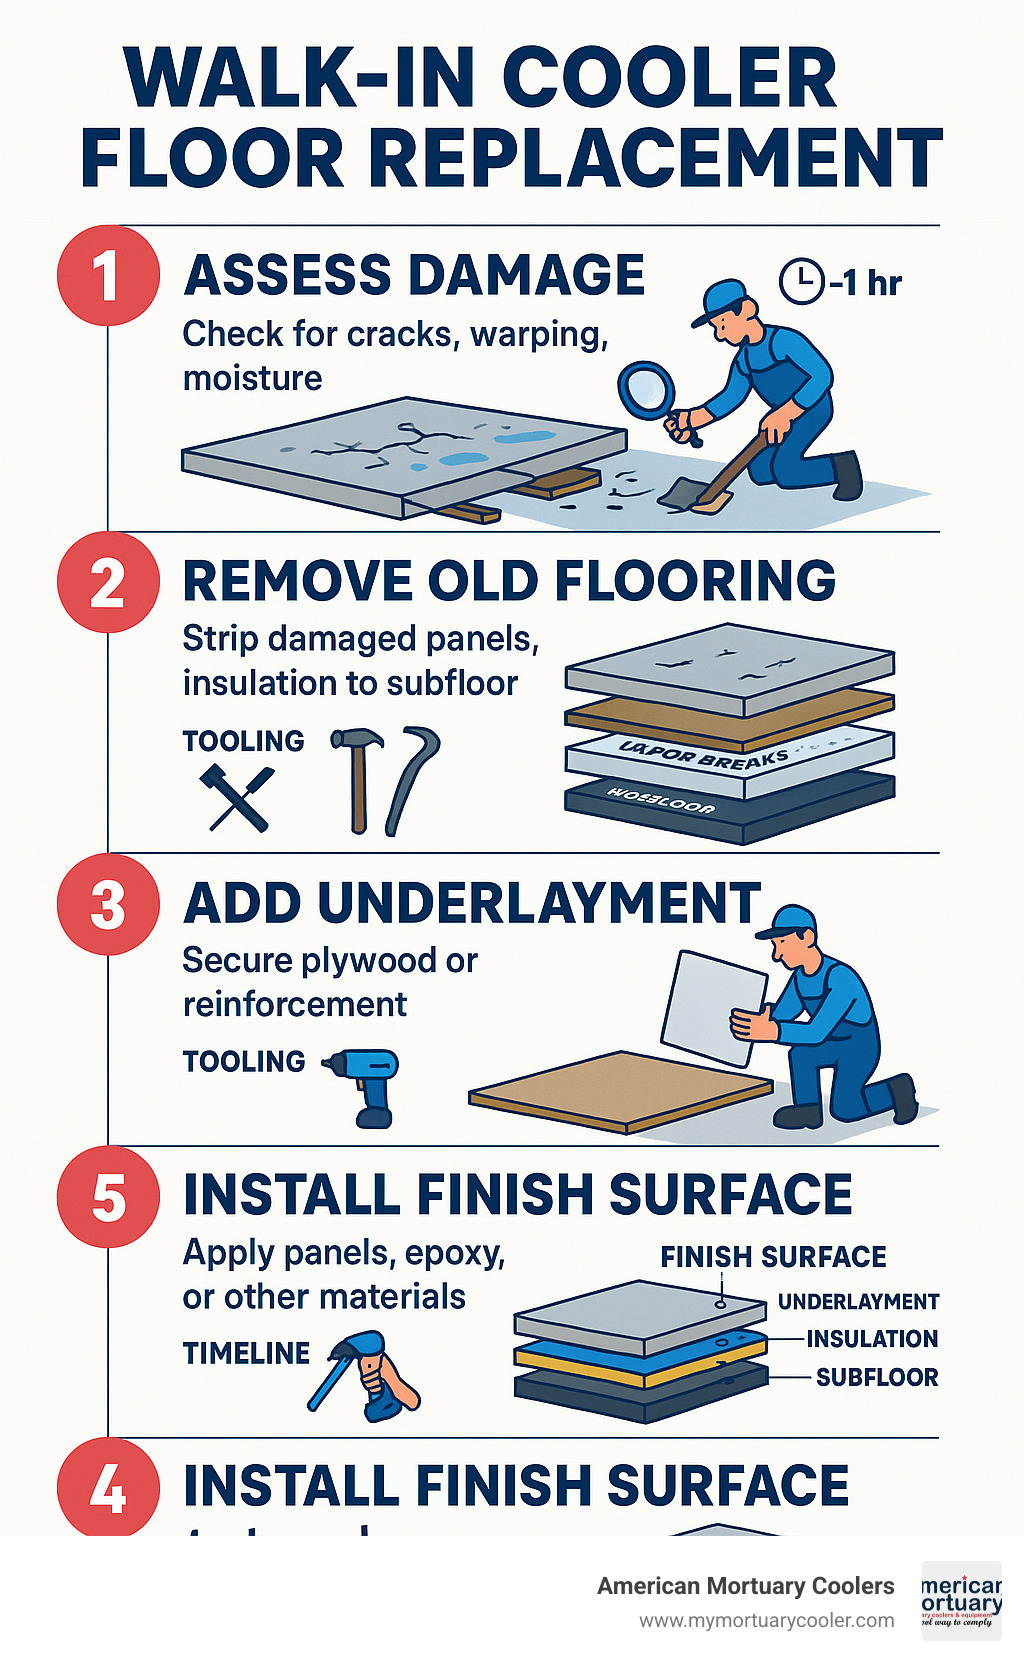
Quick Answer: Walk-In Cooler Floor Replacement Process
- Assess damage - Check for cracks, warping, or moisture intrusion
- Remove old flooring - Strip damaged panels and insulation to subfloor
- Install insulation - Add vapor barrier and thermal breaks
- Add underlayment - Secure plywood or reinforcement layers
- Install finish surface - Apply aluminum panels, epoxy, or other materials
Walk-in cooler floors face extreme temperature fluctuations, heavy equipment loads, and constant moisture exposure. When these floors fail, the consequences extend far beyond appearance.
The hidden costs of damaged floors:
- Energy bills increase by 20-30% due to poor insulation
- Wet floors cause 10% of workplace slip-and-fall injuries
- Bad flooring is the top reason for health inspection violations
Temperature swings, condensation buildup, and structural damage create cascading problems. Mold growth thrives in damaged areas, creating health risks and compliance issues. Meanwhile, your refrigeration system works overtime, driving up costs.
Most walk-in floor replacement work can be completed in one day, minimizing business disruption when done correctly.
At American Mortuary Coolers, we've guided countless facilities through walk in cooler floor replacement projects across our service regions - from Tennessee to California.

Why & When to Replace Your Walk-In Cooler Floor
Nobody wants to think about walk in cooler floor replacement until they absolutely have to. But waiting too long can turn a manageable project into a costly emergency.
Your floor gives warning signs long before complete failure. Those little signs you might ignore - a slight bow in panels, mysterious puddles, or strange smells - are early warnings that could save you thousands.
Temperature swings are often your first red flag. When insulation beneath your floor breaks down, your cooler can't maintain consistent temperatures. Your refrigeration system works overtime, and energy bills creep up month after month. We've tracked facilities where energy costs jumped 18-20% due to compromised floor insulation.
Then comes structural damage. Floors bow when moisture penetrates. Panels separate, creating gaps that let in more moisture. In freezer applications, this moisture freezes and expands, causing frost heave that can buckle your entire floor system.
The serious consequences: According to the National Floor Safety Institute, wet floors account for 10% of workplace slip-and-fall injuries. In commercial food operations, bad flooring is the number one cause of health code violations.
The domino effect is real. Product spoilage, staff injuries, regulatory fines, and insurance premiums can quickly exceed the cost of proactive floor replacement. With proper care, walk-in coolers should serve 15-20 years, but failing floors can cut that lifespan in half.
Early-Warning Indicators You Can't Ignore
Your daily walk-through is your best defense. Most problems announce themselves weeks or months before becoming critical.
Visual and tactile signs: Gouges near door thresholds expose underlying materials to moisture. Loose threshold bars create tripping hazards and compromise thermal seals. Warped metal panels or deep scratches indicate moisture intrusion isn't far behind.
Temperature tells the story: Ice in strange places means warm air is entering. Warm spots on floor surfaces indicate failed insulation. Excessive frost, condensation, or constantly running compressors signal compromised thermal barriers.
Trust your feet: Spongy panels have lost structural integrity. Gaps between wall and floor joints let in moisture. Uneven surfaces that catch cart wheels indicate subfloor deterioration.
Document findings: Take monthly photos of problem areas to track development speed. This creates valuable documentation for insurance claims and warranty issues.
Choosing the Best Flooring Material for Coolers & Freezers
When it comes to walk in cooler floor replacement, material choice makes the difference between a floor lasting decades versus failing within years.
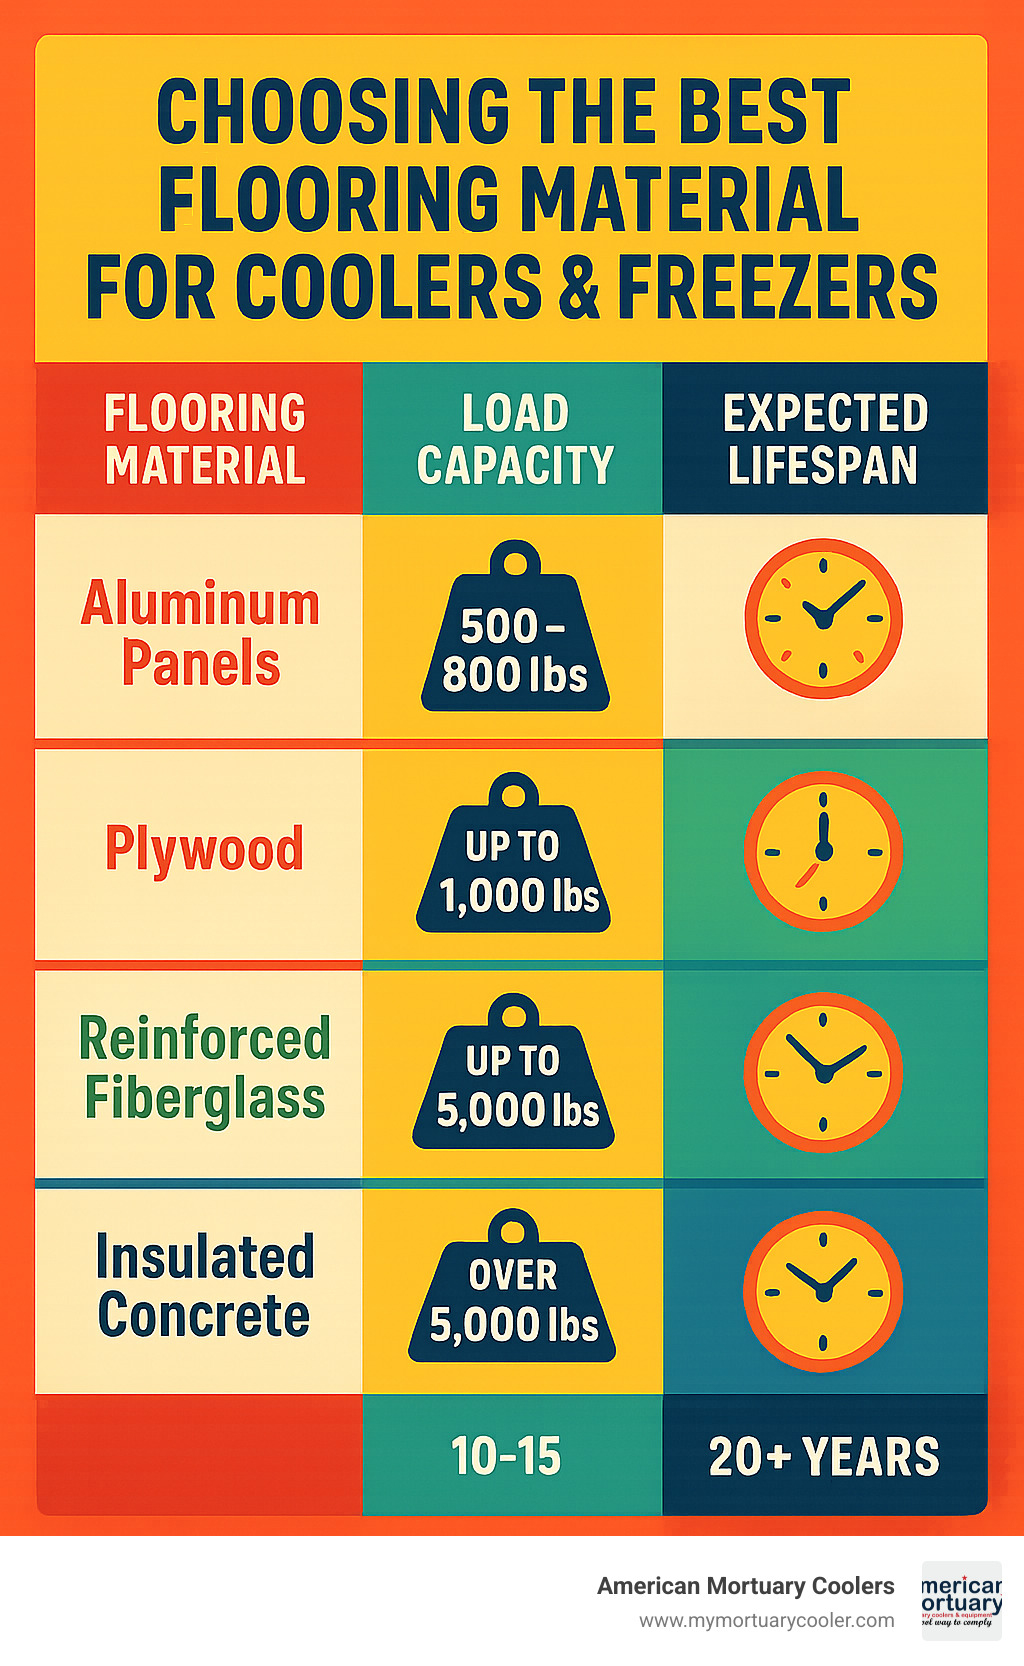
Understanding load capacity is your starting point. Basic aluminum panels handle 500-800 pounds per square foot - fine for foot traffic but inadequate for heavy carts or pallet jacks.
Aluminum panel floors remain the go-to choice for most facilities. They're NSF approved, install quickly, and are cost-effective. The downside? They dent easily and visible seams collect debris.
Plywood underlay systems increase capacity to around 1,000 pounds per square foot, handling lighter carts while providing better insulation.
Reinforced flooring with fiberglass channels handles serious traffic - fully loaded pallet jacks over 2,000 pounds. Higher upfront cost but built for demanding environments.
Epoxy flooring systems offer seamless, antimicrobial surfaces perfect for frequent washdowns. Modern formulations like JetRock cure in 8 hours and are three times stronger than concrete.
Insulated concrete floors provide ultimate load capacity and thermal performance for heavy-duty applications, though installation takes longer.
Diamond tread surfaces add crucial slip resistance, while rubber overlay systems provide excellent grip and comfort.

Pros & Cons at a Glance
Aluminum panels offer quick installation, NSF approval, and reasonable cost but are limited to lighter loads.
Reinforced FRP floors provide highest load capacity and longest lifespan but cost more upfront with slower installation.
Epoxy systems excel with seamless surfaces and antimicrobial properties but can crack in extreme cold if not properly formulated.
Insulated concrete delivers ultimate durability and thermal performance but has highest upfront cost and longest installation time.
Internal Resources to Deepen Your Research
Our More info about cooler flooring basics guide covers fundamentals every facility manager should know.
For broader perspective on flooring integration, check our More info about floor design resource explaining how flooring affects energy efficiency and long-term performance.
The 5-Step Walk In Cooler Floor Replacement Process
Getting your walk in cooler floor replacement done right doesn't have to be overwhelming. We've developed a straightforward process that gets you back up and running quickly while ensuring your new floor lasts for years.
Safety always comes first. We disconnect power to refrigeration units and ensure proper ventilation. Following OSHA guidelines protects everyone involved.
Most floor replacements wrap up in a single day when properly planned - all materials on-site, right tools ready, and experienced technicians who understand both refrigeration and flooring.
Step 1 – Audit & Load Calculations
Before touching anything, we understand what we're working with. This detective work reveals what went wrong and what the new floor needs to handle.
Our inspection covers obvious and hidden issues - surface damage, wall-to-floor connections, concrete condition, refrigeration line locations, and door threshold functionality.
Load analysis inventories everything that rolls, walks, or sits on your floor. A floor perfect for foot traffic might buckle under loaded pallet jacks.
Infrared scanning shows where insulation has failed, where moisture sneaks in, and where heat escapes - often revealing problems invisible during regular walkthroughs.
Step 2 – Demo & Surface Prep
Demolition requires surgical precision. We empty the cooler, disconnect floor-mounted equipment, and map refrigeration line locations before starting.
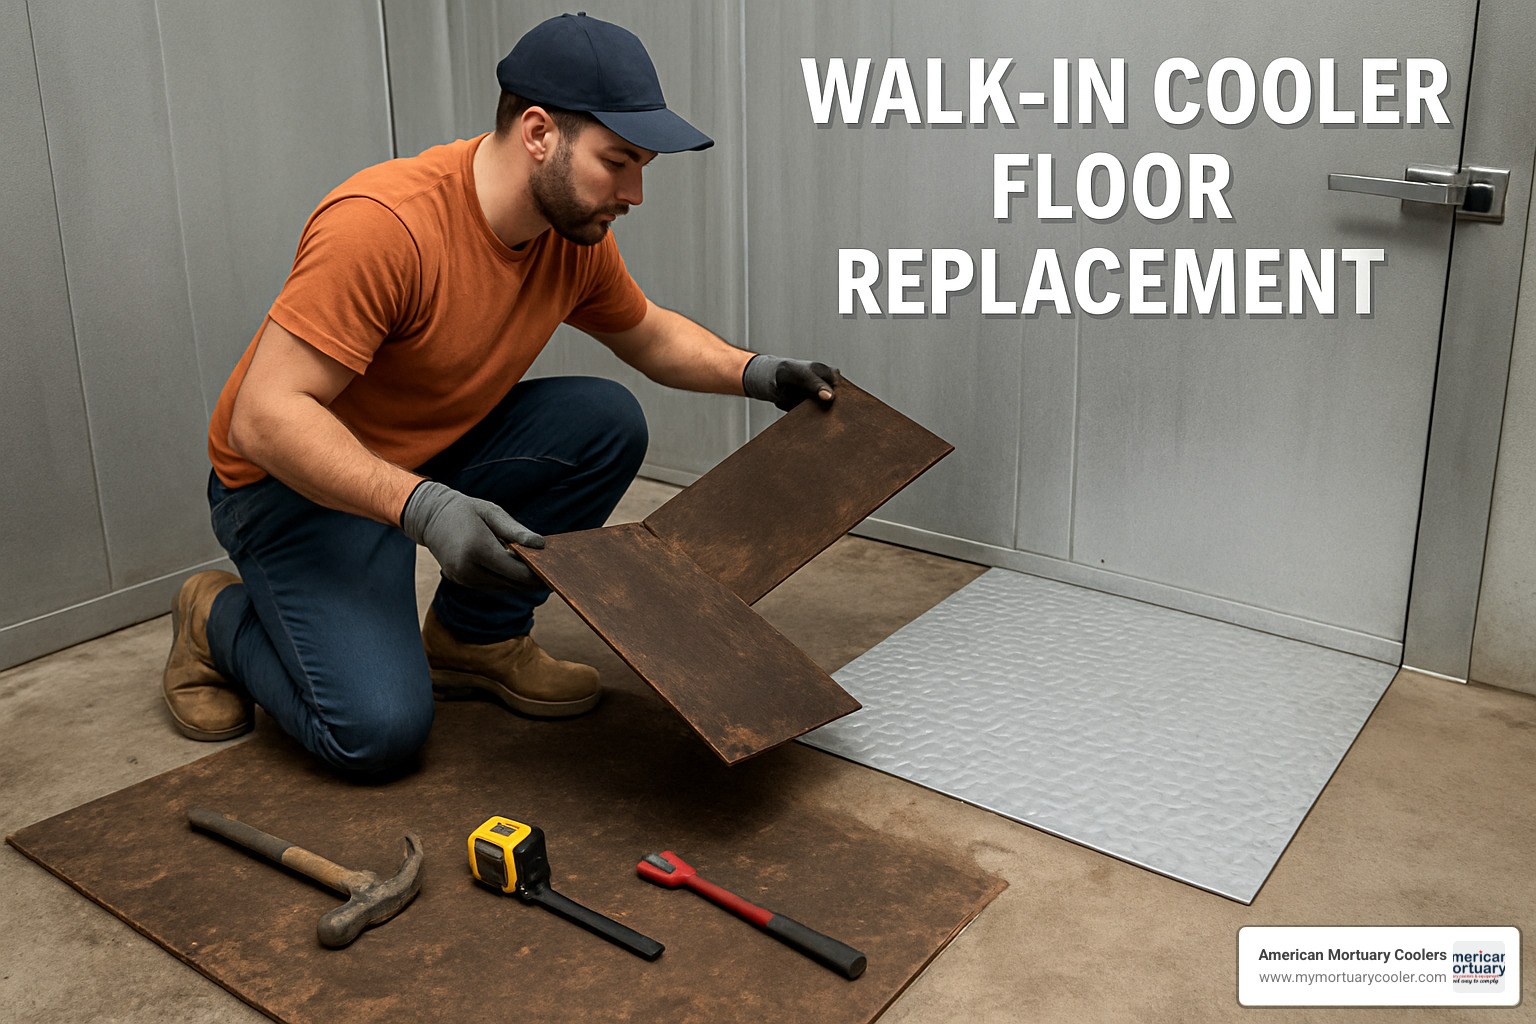
Panel removal follows specific procedures - starting from center and working outward prevents stressing remaining panels. We use proper tools to release cam-locks without damaging wall panels.
Surface preparation is critical. After stripping old materials, we clean the concrete slab thoroughly and repair cracks or rough spots. Uneven subfloors cause premature failure.
Step 3 – Installing Insulation & Underlayment
This step determines energy efficiency. Proper insulation installation requires attention to detail because gaps compromise your entire system.
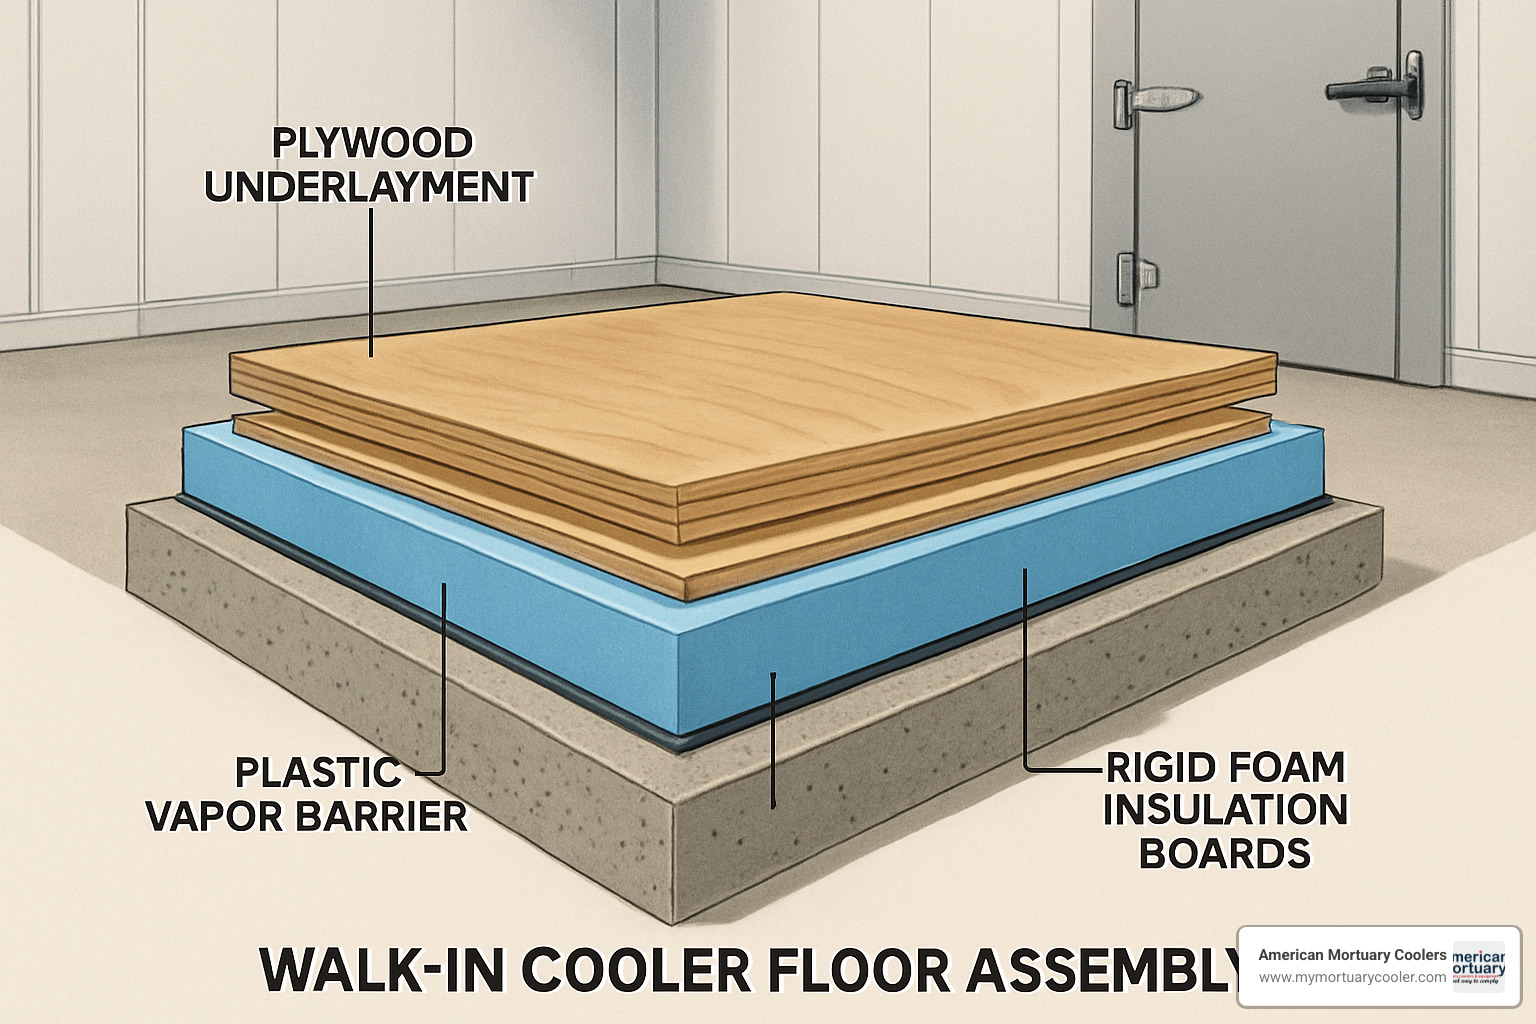
Vapor barrier goes down first - continuous plastic sheeting with 6-inch overlapped seams prevents moisture migration from concrete.
Rigid foam insulation boards create thermal barriers. We use extruded polystyrene boards maintaining 47% of initial R-value over their lifespan. Thickness depends on application - 2-4 inches for coolers, 4-6 inches for freezers.
Plywood underlayment spreads loads evenly. Two layers with staggered joints prevent shearing under heavy loads.

Step 4 – Setting the Finish Surface
The finish surface handles daily reality - spilled liquids, heavy equipment, and strict hygiene requirements.
Aluminum panel installation uses cam-lock systems like giant puzzle pieces. Every cam-lock must engage fully with NSF-approved sealant at joints.
Diamond tread surfaces provide slip resistance when wet. We orient tread patterns to help water flow toward drains.
Epoxy systems demand perfect surface preparation with no room for error. We use specialized primers and follow strict temperature/humidity requirements.
Step 5 – Final Sealing, Curing & Commissioning
Quality control separates professional installations from disasters. We conduct comprehensive testing before handing keys back.
Sealant application uses only NSF-approved materials safe for food environments. Food-grade silicone caulk goes at all joints and transitions.
Temperature pull-down testing verifies thermal performance - monitoring how quickly your cooler reaches target temperature and maintains stability.
Final documentation includes warranty information, maintenance requirements, and care instructions specific to your installed materials.
Installation Best Practices: Insulation, Sealing & Compliance
Getting your walk in cooler floor replacement right means following proven practices ensuring compliance, energy efficiency, and long-term durability.
Regulatory compliance isn't optional. Walk-in coolers in food service must meet NSF/ANSI 7 standards specifying everything from materials to sealing requirements. Understanding these prevents expensive rework.
Vapor barrier continuity is critical. Even tiny gaps create pathways for condensation, leading to mold growth, structural damage, and energy waste. We use specialized tapes and sealants designed for low-temperature applications.
Every joint and penetration can become a thermal bridge - essentially heat transfer highways undermining insulation effectiveness. We eliminate these using thermal break materials at all connections.
For comprehensive technical data on thermal performance, check this Scientific research on insulation benefits explaining why these details matter.
Moisture & Frost Control 101
When warm, humid air contacts cold surfaces, physics takes over - moisture condenses and can freeze, causing structural damage.
We calculate dew points for your specific conditions and design insulation systems accordingly - engineering based on actual temperature and humidity conditions.
Heat-trace lines become necessary at critical points where freezing could cause problems. Door frames, drains, and vulnerable areas may require electric heating elements with proper controls.
Ensuring Long-Term Energy Efficiency
Annual thermal imaging inspections reveal insulation failures before they cause significant energy waste. This proactive approach typically saves far more than it costs.
Regular seal inspection preserves installation performance. We provide maintenance schedules specific to materials and operating conditions.
For detailed maintenance guidance, our More info about cleaning methods resource covers various flooring types with step-by-step instructions.
Costs, Downtime & Post-Installation Maintenance
Walk in cooler floor replacement isn't cheap, but neither is running a facility with a failing floor. The math usually favors quality replacement over patching and hoping.
Material costs: Basic aluminum panels run $8-12 per square foot, heavy-duty reinforced systems $15-25, epoxy systems $10-18, and insulated concrete $20-35 per square foot.
Labor varies by complexity: Simple panel swaps cost $3-5 per square foot in labor, while complex installations requiring specialized skills run $10-15 per square foot.
Don't forget disposal costs - typically $2-5 per square foot for proper handling of contaminated materials.
Downtime costs often dwarf everything else. A busy restaurant losing cold storage might lose thousands in spoiled inventory daily.

Minimizing Business Interruption
Smart scheduling saves sanity and money. Most projects happen during off-hours or weekends when operations are slower. Weekend labor costs more but is usually cheaper than peak-hour shutdowns.
Temporary cold storage keeps you operational through portable refrigeration units or coordination with nearby facilities.
Walk In Cooler Floor Replacement ROI
Energy savings add up fast. Properly insulated floors typically reduce consumption by 15-25%, translating to $500-1500 annually in lower utility bills.
Insurance and liability benefits provide hidden value through reduced workers' compensation claims and potential premium reductions.
Quality floor replacement typically pays for itself within 3-5 years through energy savings, reduced maintenance, and avoided problems.
Frequently Asked Questions about Walk-In Cooler Floor Replacement
What is the typical downtime for a full replacement?
Most walk in cooler floor replacement projects complete in 8-24 hours, depending on cooler size and work complexity.
Simple jobs move quickly - basic aluminum panel replacement in smaller coolers often finishes in a single workday.
Larger projects need more time - big freezers with insulated concrete floors require 2-3 days for proper curing.
Factors affecting timing include cooler size, access difficulty, subfloor condition, and flooring system type. We often schedule installations for nights or weekends when operations are quieter.
Do all walk-in freezers require an insulated floor?
Absolutely yes. Insulated floors aren't optional for freezer applications - they're essential for performance and safety.
Without proper insulation, you're fighting physics. Ground heat constantly warms your freezer from below, forcing refrigeration systems to work overtime and driving up energy bills by 20-30%.
Moisture becomes your enemy when ground moisture migrates up and freezes, creating ice expansion that buckles panels and damages floor structure.
How much weight can my new floor safely support?
Load capacity depends entirely on your flooring system choice:
- Basic aluminum panels: 500-800 pounds per square foot for foot traffic and light equipment
- Plywood underlay systems: 1,000-1,500 pounds per square foot for hand trucks and medium carts
- Reinforced FRP floors: Up to 5,000 pounds per square foot for pallet jacks and industrial equipment
- Insulated concrete floors: Virtually unlimited capacity when properly designed
We analyze your specific equipment and usage patterns before recommending load ratings.
Conclusion
Your walk-in cooler floor is the foundation of your entire refrigeration system. When it fails, everything suffers. Walk in cooler floor replacement protects your investment, products, and peace of mind.
The five-step approach - assessment, demolition, insulation, surface installation, and commissioning - provides a proven roadmap tested in hundreds of facilities nationwide.
Doing it right the first time makes the difference. A properly installed floor system serves faithfully for 10-20 years, quietly saving energy and preventing emergency repair headaches. The upfront investment pays dividends through lower utility bills, fewer safety incidents, and confidence your facility meets the highest standards.
At American Mortuary Coolers, we've helped facilities from Atlanta to Los Angeles solve flooring challenges. Every project teaches us something new, whether working around unique equipment or meeting specific regulatory requirements.
What sets us apart isn't just technical expertise - it's understanding your cooler can't be down long. When we say most walk in cooler floor replacement projects finish in a day, we mean it.
The best time to replace your floor is before you absolutely have to. Those early warning signs - temperature swings, moisture buildup, climbing energy bills - are your floor asking for help.
Don't let a failing floor become an emergency shutdown. Whether you're running a busy funeral home or managing a large mortuary facility, you deserve flooring that works as hard as you do.
Ready to give your cooler the foundation it deserves? Our team will assess your situation, explain options clearly, and help you choose the right solution for your facility and budget.
For more insights into walk-in cooler systems, check our More info about walk-in cooler features & prices guide packed with practical information for informed cooling decisions.


