Why Walk-In Cooler Gaskets Are Critical for Energy Efficiency and Food Safety
Gaskets for walk in coolers are the rubber or vinyl seals that create an airtight barrier around your walk-in door, preventing warm air from entering and cold air from escaping. Here's what you need to know:
Key Types:
- Magnetic gaskets - Thick PVC with embedded magnets for main door sealing
- Wiper gaskets - Thin vinyl strips that block air infiltration at door edges
- Sweep gaskets - Bottom seals that prevent floor-level air leaks
Common Materials:
- PVC (most common, flexible, cost-effective)
- Santoprene (premium durability, add $10)
- Silicone (antimicrobial properties)
Replacement Indicators:
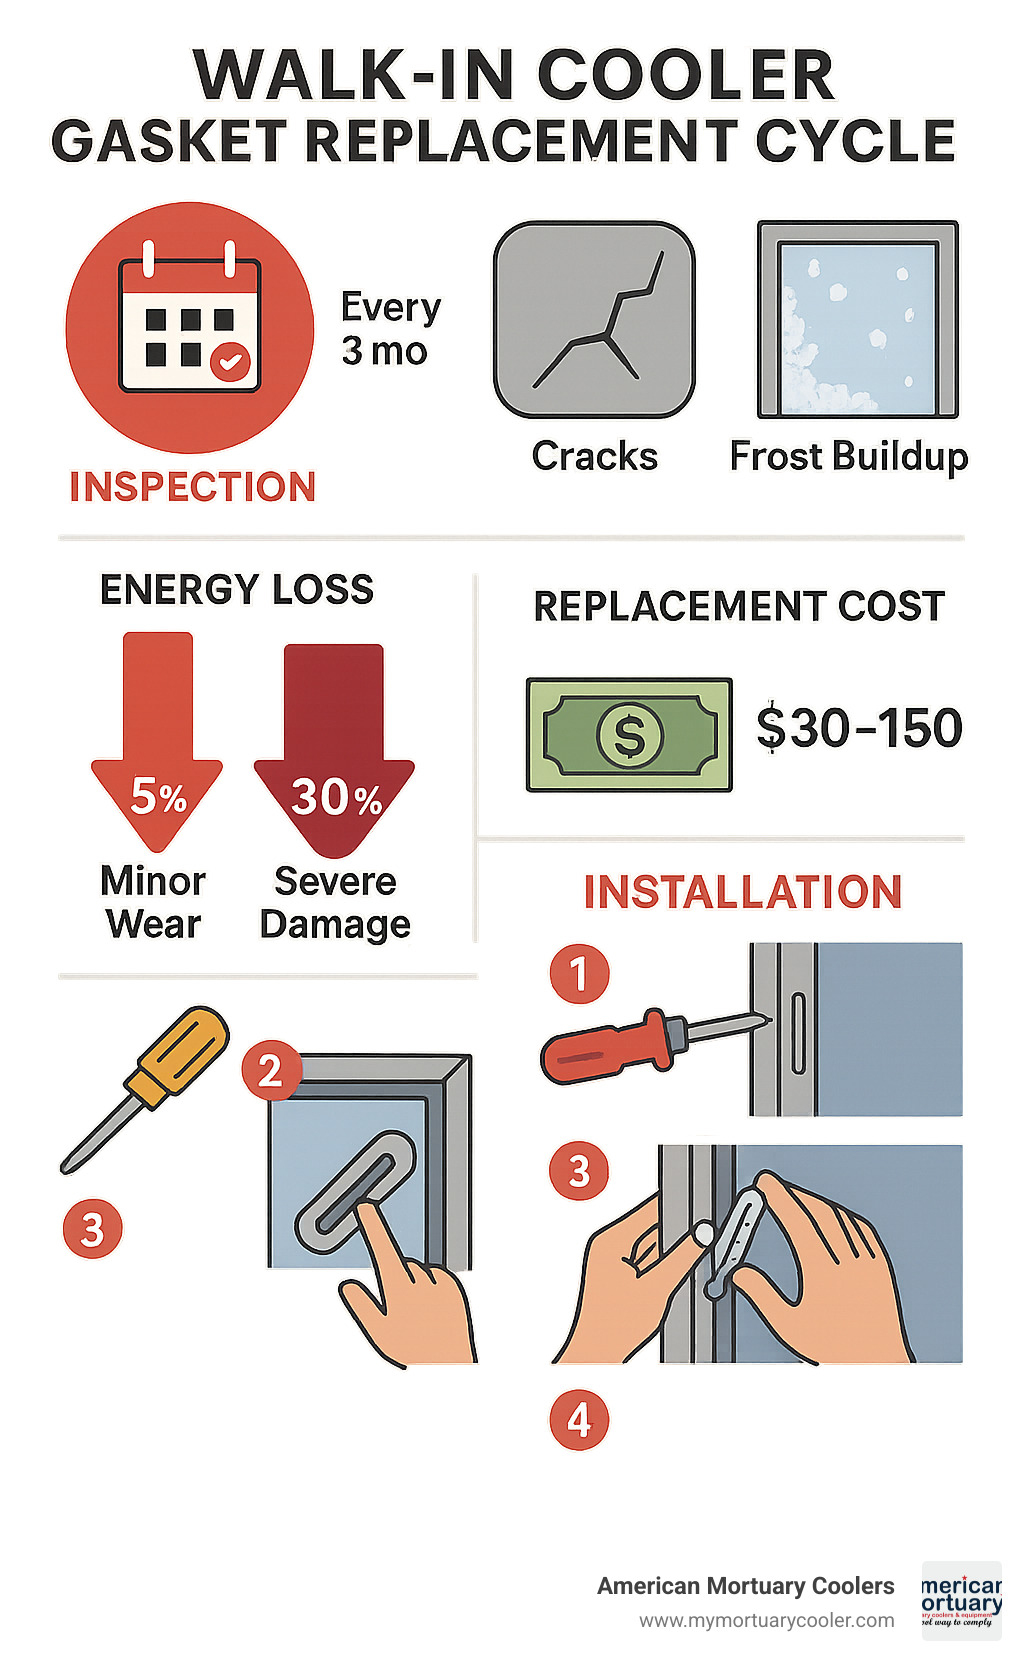
- Visible cracks, tears, or deformation
- Frost buildup on door frame
- Higher energy bills from compressor overwork
- Failed dollar bill test (bill pulls out easily when door is closed)
A damaged or leaking door gasket can waste thousands of dollars in energy costs over time, with faulty gaskets increasing energy consumption by up to 15%. Even small tears allow warm, humid air to enter your cooler, leading to ice buildup, mold growth, and temperature fluctuations that compromise food safety.
I'm Mortuary Cooler, a national-level mortuary cooler supplier with extensive experience helping funeral homes maintain their refrigeration systems, including sourcing and installing gaskets for walk in coolers. My background as a US cooler supplier has shown me how proper gasket maintenance directly impacts both operational costs and service reliability.
Similar topics to gaskets for walk in coolers:
Gaskets for Walk-In Coolers: Functions, Types & Materials
Think of gaskets for walk in coolers as the unsung heroes of your refrigeration system. These aren't just simple rubber strips – they're engineered sealing systems working around the clock to keep your energy bills manageable and your equipment running smoothly.
I've seen too many facilities learn this lesson the hard way. A small tear in what looks like an insignificant piece of rubber can cascade into compressor failure, sky-high energy bills, and food safety headaches. Let's break down what makes these gaskets so important and how to choose the right ones.
What Does a Walk-In Cooler Door Gasket Do?
Your walk-in cooler gasket creates an airtight seal that acts as a thermal barrier between the cold interior and warm outside air. When this seal fails, it's like leaving your front door cracked open during a snowstorm – your heating system works overtime, and you're still cold.
Here's what happens when warm, humid air infiltrates your cooler: Your compressor runtime increases dramatically as the system fights to maintain temperature. That 80°F kitchen air might not seem threatening, but when it hits 90°F, your refrigeration load jumps 18-20%. At 100°F? You're looking at a 30% increase in energy consumption.
The moisture in that warm air creates another problem. It freezes on your evaporator coils and door frames, building up ice that further reduces efficiency. Meanwhile, temperature fluctuations create perfect conditions for bacterial growth – a food safety nightmare.
I've worked with facilities where a single torn gasket led to compressor failure within months. The constant strain of fighting air infiltration literally wore out a $3,000 compressor because they didn't replace a $60 gasket. Don't be that facility.
Magnetic vs Wiper Gaskets for Walk-In Coolers
Understanding the different types helps you order the right replacement parts and avoid the frustration of receiving gaskets that don't fit.
Magnetic gaskets are your heavy lifters. These thick PVC strips contain embedded magnet extrusion that creates the primary seal around your door frame. They're typically 1/2" to 3/4" thick and install using snap-in darts or screw-on mounting systems. You'll pay $52-$89 depending on your door size, but they're doing the bulk of your sealing work.
Wiper gaskets are the supporting cast. These thin vinyl strips (usually 1/8" thick) provide secondary sealing at door edges where magnetic gaskets might not reach perfectly. They're also called wiper strips or door sweeps, and they typically cost $30-$52 for standard lengths.
Sweep gaskets handle the bottom seal, preventing floor-level air leaks that can be surprisingly significant. They often work with aluminum thresholds to maintain proper air curtain at the door bottom.
| Profile Type | Thickness | Material | Best Use | Typical Cost |
|---|---|---|---|---|
| Single Dart Magnetic | 3/4" | PVC + Magnet | Standard doors | $52-65 |
| Triple Dart Magnetic | 1" | PVC + Magnet | Heavy-duty/FRP doors | $65-89 |
| Wiper Strip | 1/8" | Vinyl | Secondary seal | $30-45 |
| Door Sweep | 1/4" | Aluminum/Vinyl | Bottom seal | $30-52 |
Materials That Make or Break Performance
The material your gasket is made from determines how long it lasts, how well it seals, and whether it meets food safety standards. After years of working with mortuary coolers (which face similar challenges to food service walk-ins), I've learned which materials deliver real value.
Low-temp PVC is your workhorse material. It stays flexible down to -10°F, costs less than premium options, and you can find replacements easily. With proper maintenance, expect 3-5 years of reliable service. For most applications, this is your sweet spot between performance and cost.
Santoprene is worth the extra $10 if you're dealing with heavy use or extreme temperatures. This premium material maintains flexibility in brutal cold and typically lasts 5-7 years. The upfront cost pays for itself through reduced replacement frequency and better energy efficiency.
Antimicrobial silicone makes sense for high-humidity environments where mold and bacteria growth are concerns. It's pricier, but the built-in resistance to microbial growth can be invaluable in food service applications. You're looking at 7-10 years of service life.
EPDM excels with outdoor walk-in installations where ozone and weather resistance matter. It costs slightly more than standard PVC but delivers 5-8 years of reliable performance even in harsh conditions.
All these materials can meet National Sanitation Foundation standards for food equipment, but verify certification when food safety compliance is critical.
Based on our experience, I recommend Santoprene for high-use applications where the extra durability justifies the cost, and standard PVC for budget-conscious installations with moderate usage. The key is matching the material to your specific operating conditions and usage patterns.
Choosing & Sizing Replacement Gaskets: Measurement, Attachment & Suppliers
Finding the right gaskets for walk in coolers isn't as simple as grabbing any rubber seal off the shelf. Getting the perfect fit requires a bit of detective work, some careful measuring, and knowing where to look for the best deals.
Think of it like buying a suit - close enough isn't good enough when it comes to keeping your cooler sealed tight. A gasket that's too small leaves gaps that let warm air sneak in, while one that's too large creates wrinkles and poor contact with the door frame.
Identifying Your Existing Gasket Profile
Before you break out the tape measure, you need to figure out exactly what type of gasket system your walk-in uses. This detective work saves you from ordering the wrong part and waiting another week for the right one.
Start by checking the door tag on your walk-in. Most manufacturers stick a metal tag somewhere on the door jamb or frame that tells you everything you need to know. Look for the manufacturer name (like U.S. Cooler or Arctic Industries), the model number, year it was made, and door dimensions.
Next, take a close look at how your current gasket attaches. The most common system uses snap-in darts - those little plastic pieces that push into grooves in the door frame. Some older units use screws along the perimeter, while others have metal or plastic retainer strips holding everything in place.
If you've got a dart-style gasket, count those darts carefully. Single dart gaskets have one mounting point per section and work fine for most applications. Triple dart gaskets have three mounting points and are typically required for heavy-duty doors or FRP (fiberglass reinforced plastic) installations.
How to Measure Outside Corners Like a Pro
Industry standard calls for measuring corner-to-corner sizing using what we call OA dimensions (outside corner to outside corner). After years of helping funeral homes get this right, here's our foolproof approach.
You'll need a steel tape measure (cloth tapes stretch and give you wrong numbers), a notepad, and a flashlight since gasket channels can be surprisingly dark. Start with the width by measuring from outside corner to outside corner across the top of the door frame. Then get the height the same way down the side.
Don't forget to measure the thickness of the gasket material itself - not the mounting channel it sits in. Take a photo of the gasket cross-section while you're at it. Trust me, this little step saves confusion later when you're talking to suppliers.
Here's something we've learned the hard way: always measure twice. Gasket replacement gets expensive when you get it wrong. If you're between standard sizes, round up to the nearest quarter inch. For doors larger than 35.75" x 76.25", you'll need special "tall door" gaskets that cost a bit more but fit properly.
Custom vs Off-the-Shelf: Which Route Saves You More?
The age-old question: spend less on a standard gasket or invest in a custom fit? After working with hundreds of funeral homes, here's what we've seen work best.
Standard gaskets typically run $30-$89 for most walk-in sizes and you can get them shipped out the same day. They work great with major brands and you know exactly what you're getting. Plus, reordering down the road is simple since you already know the part number.
Custom gaskets give you that perfect fit for unusual doors, but expect to pay 20-40% more. A standard magnetic gasket might cost $52-$89, while the same profile in custom sizing runs $75-$125. Need it rushed? Same-day custom orders can hit $100-$175.
Here's our recommendation: try standard sizes first. Many suppliers offer exchange policies if the standard size doesn't seal properly. We've found that about 80% of walk-in coolers use standard gasket profiles, so you've got good odds of finding an off-the-shelf solution.
For those tricky custom doors or unusual profiles, working with a same-day custom shop makes sense. The extra cost pays for itself in energy savings and peace of mind knowing everything fits perfectly.
More info about gasket sizing walks through our complete technical guide with detailed measurements and profile charts.
Replacing & Maintaining Your Walk-In Cooler Gasket for Peak Efficiency
Nothing beats the satisfaction of a perfectly sealed walk-in cooler door. After years of helping funeral homes maintain their refrigeration systems, I've learned that proper installation and maintenance of gaskets for walk in coolers can easily double their lifespan while keeping your energy bills in check.
The key is approaching gasket replacement like a craftsman, not rushing through it like a chore.
Step-by-Step Replacement Checklist
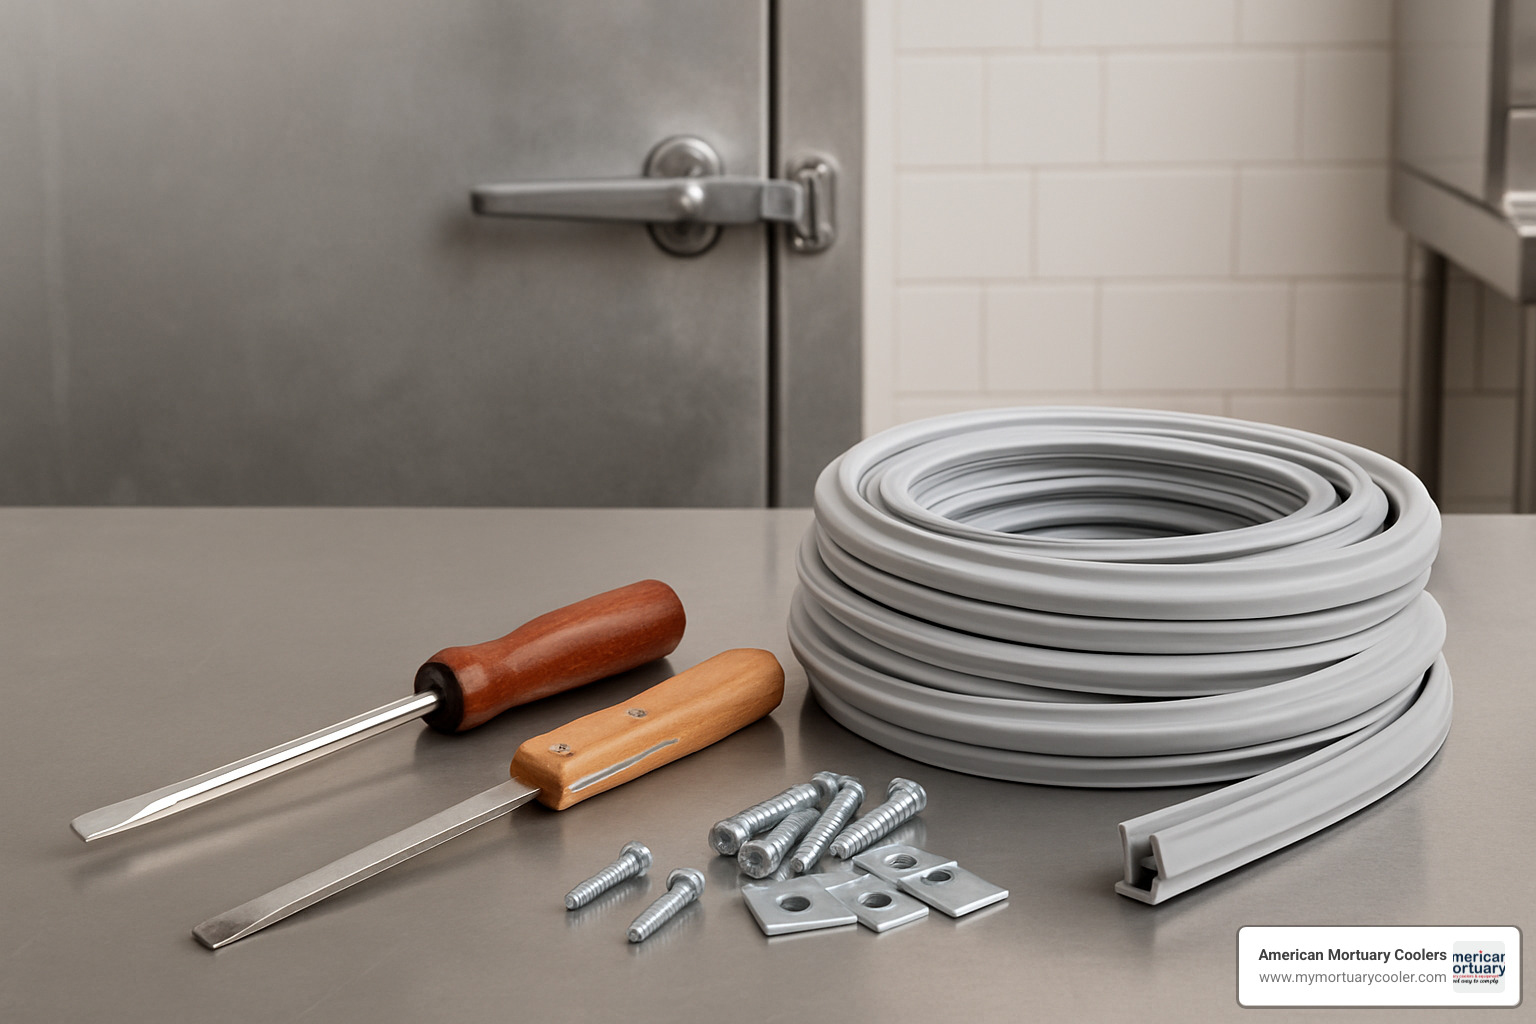
Before you start, gather your tools: a new gasket with mounting hardware, flat-blade screwdriver or specialized gasket removal tool, clean rags with mild detergent, a hair dryer for warming the gasket, petroleum jelly for emergency patches, and a dollar bill for testing your seal.
Pull out the old gasket carefully - this isn't a demolition project. For dart-style gaskets, work each dart section out individually. With screw-on types, remove the screws methodically and lift the gasket from its channel. Rushing this step often damages the door frame, creating bigger problems.
Clean the channel thoroughly because any leftover debris will compromise your new gasket's seal. Remove all old gasket material and adhesive residue, then clean with warm soapy water. Let everything dry completely before moving forward.
Heat and flex your new gasket if it feels stiff - a hair dryer works perfectly for this. Warm gaskets install easier and put less stress on the mounting system. Starting at a corner gives you the best results.
Press fit the new gasket systematically around the door perimeter. For dart-style gaskets, press each dart firmly into its channel until you hear or feel it click. With screw-on gaskets, align everything properly before securing with the provided screws.
Perform a leak test using the dollar bill method - close the door on a dollar bill and try pulling it out. You should feel firm resistance all around the door. If the bill slides out easily anywhere, that spot needs attention.
Finally, check your hinge and door closer operation. Sometimes gasket problems mask underlying door alignment issues that will just destroy your new gasket if left unfixed.
Maintenance Hacks to Extend Gasket Life
Smart maintenance starts with a monthly inspection routine that takes five minutes but saves hundreds in replacement costs. Look for visible cracks, tears, or deformation in the gasket material. Clean your gaskets with simple soap and water, paying special attention to removing food debris and grease buildup that can break down the material.
Check door alignment during these monthly inspections too. A sagging door puts uneven stress on gaskets, causing premature failure in high-stress areas.
Every three months, do a more thorough inspection and cleaning. Perform the dollar bill test on all four sides of the door, inspect your door closer and hinge mechanisms for proper operation, and look for any ice buildup or condensation issues that might indicate sealing problems.
Remove debris from gasket channels regularly - you'd be amazed what accumulates there. Coffee grounds, crumbs, and even small pieces of packaging can prevent proper sealing.
Once a year, have a qualified technician inspect your entire door system. They can check heater wire operation on freezer doors, verify proper refrigeration system operation, and help you plan gasket replacement before failure occurs rather than after.
For emergency situations, small tears can be temporarily patched with petroleum jelly until you can arrange proper replacement. This trick has saved me countless emergency service calls, but remember it's only a bandage - plan for proper replacement within 30 days.
How Faulty Gaskets Drain Energy and Risk Food Safety
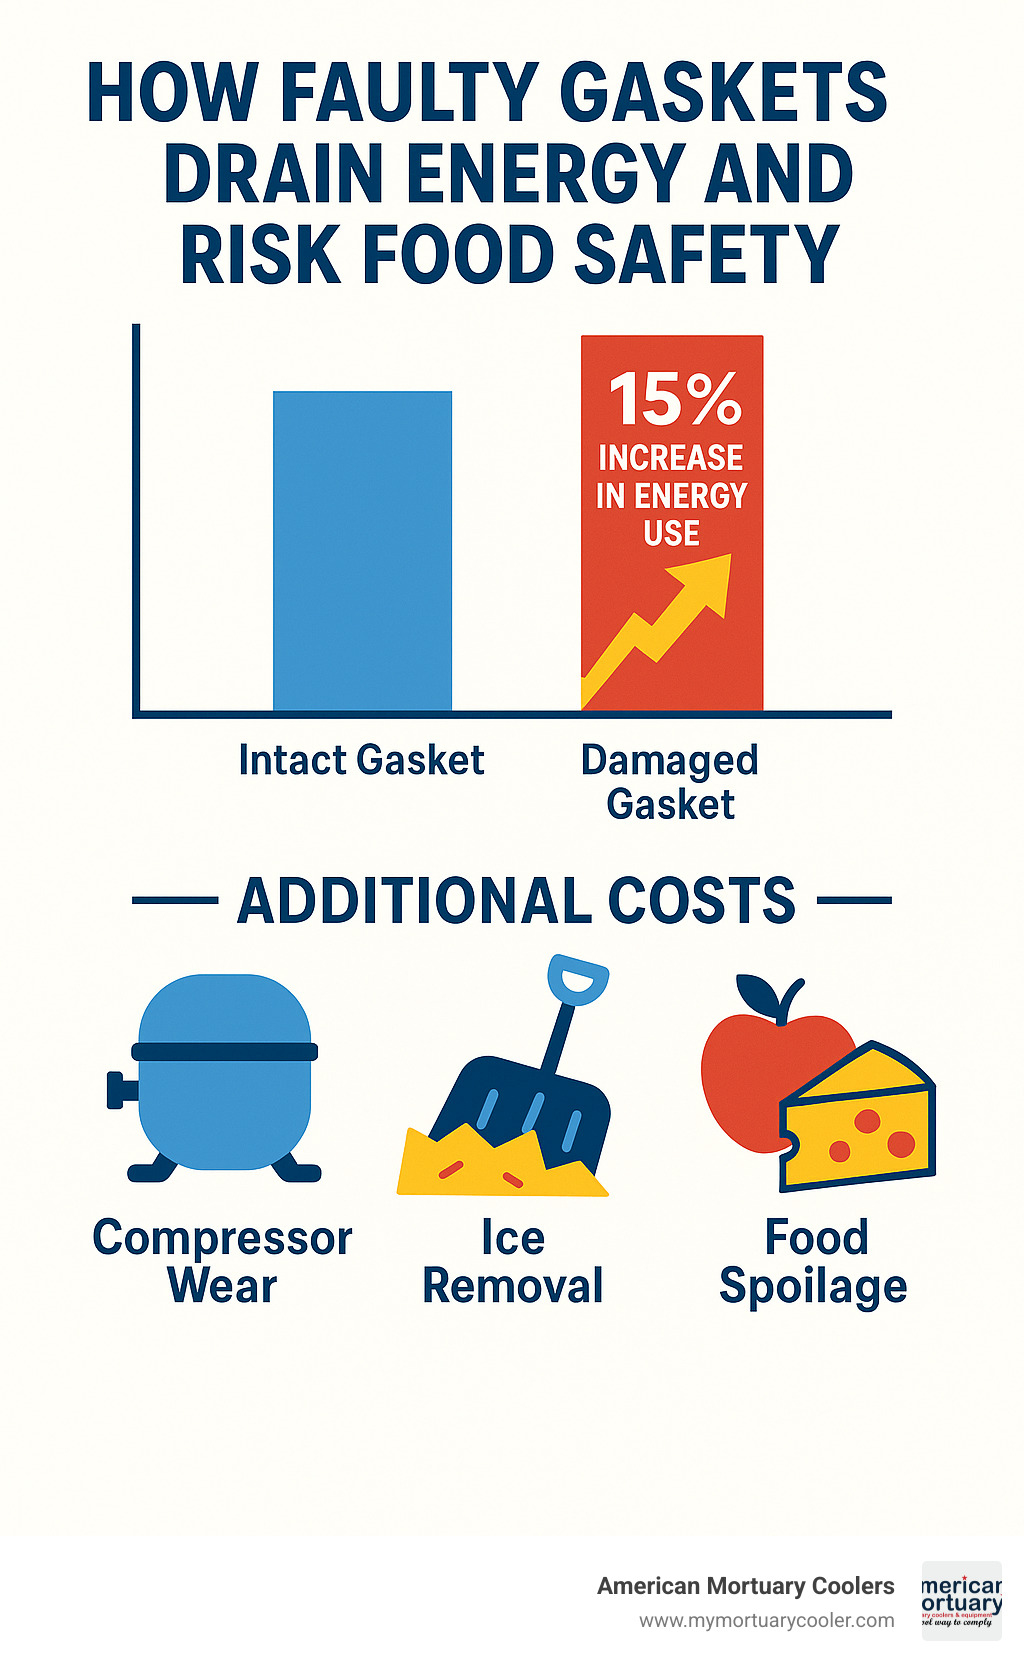
The hidden costs of failing gaskets are staggering. A leaking gasket increases energy consumption by up to 15% as your compressor works overtime fighting air infiltration. We've documented walk-in coolers where energy bills dropped $200-400 per month after gasket replacement, with the gasket cost paying for itself in just 2-3 months.
Energy waste happens because your system constantly battles warm, humid air entering the cooler. Ice buildup on evaporator coils reduces heat transfer efficiency, making the problem worse. Higher ambient temperatures compound this exponentially - a 90°F day is much harder on a leaking system than a 70°F day.
Food safety risks multiply when gaskets fail. Temperature fluctuations create perfect conditions for bacterial growth, while moisture infiltration leads to mold growth and contamination. Condensation can drip onto stored products, and ice formation blocks proper air circulation patterns.
The equipment damage extends beyond just higher electric bills. Overworked compressors fail prematurely, costing thousands in replacement costs. Ice buildup can damage evaporator fans, excessive cycling wears out electrical components, and poor sealing puts stress on door hinges and closers.
In mortuary applications, temperature creep from failing gaskets can compromise the preservation process, creating serious professional liability issues. The same principle applies to any temperature-sensitive storage - prevention through proper gasket maintenance is always cheaper than dealing with the consequences of failure.
Frequently Asked Questions About Gaskets for Walk-In Coolers
After years of helping funeral homes and commercial facilities across Tennessee, Georgia, Illinois, and beyond maintain their refrigeration systems, we've heard just about every question imaginable about gaskets for walk in coolers. Here are the answers to the most common ones that come up during our service calls.
How often should gaskets for walk in coolers be replaced?
The honest answer? It depends on how hard you work your cooler. We've seen gaskets last eight years in a small funeral home that rarely opens their doors, and we've seen others fail after just eighteen months in busy commercial kitchens.
For most applications, plan on replacement every 3-5 years. High-traffic facilities like restaurant kitchens should budget for replacement every 2-3 years, while lighter-use applications can often stretch to 5-7 years.
Several factors affect how long your gaskets will last. Door usage frequency is the biggest one - every time someone opens that door, the gasket flexes and the seal breaks. Ambient temperature and humidity matter too. A cooler in a hot, steamy kitchen works much harder than one in a climate-controlled funeral home.
Cleaning chemical exposure can also shorten gasket life. Some harsh sanitizers break down rubber and vinyl over time. Finally, proper installation and maintenance can easily double gasket lifespan.
Don't wait for complete failure to replace your gaskets. Watch for visible cracking or hardening of the material, frost buildup around the door frame, or difficulty closing the door properly. If your energy bills are creeping up without explanation, worn gaskets might be the culprit.
What warning signs show my gasket has failed?
Your cooler will usually give you plenty of warning before a gasket fails completely. The trick is knowing what to look for during your regular maintenance checks.
Visual signs are often the first clue. Look for cracks, tears, or missing sections of gasket material. Sometimes the gasket develops permanent compression - it won't spring back to its original shape after the door opens. You might also notice discoloration or hardening of the material, especially on older PVC gaskets.
Performance problems are harder to ignore. Frost or ice formation on the door frame or interior walls is a dead giveaway that warm air is getting in. Condensation around door edges is another telltale sign. If your door doesn't close properly or requires excessive force, the gasket has probably lost its flexibility.
Your refrigeration system will also complain about a failing gasket. The compressor runs more frequently to fight the air infiltration. You might notice unusual sounds or more frequent defrost cycles due to ice buildup.
The dollar bill test remains the gold standard for checking gasket performance. Close a dollar bill in the door and try to pull it out. If it slides out easily, your gasket isn't doing its job. The bill should require firm, steady pressure to remove from a properly sealed door.
Can I install gaskets for walk in coolers myself?
Here's some good news: gasket replacement is one of the most DIY-friendly maintenance tasks on a commercial refrigeration unit. No refrigeration license is required - just some basic tools and a methodical approach.
Snap-in dart gaskets are particularly easy to replace yourself. Whether you have single or triple dart systems, the process is straightforward: pull out the old darts, clean the channel, and press in the new ones. Simple screw-on gaskets and door sweeps are equally manageable for most handy folks.
However, some situations call for professional help. If your gaskets have integrated heater wires (common on freezer doors), the electrical connections require more expertise. Complex door systems that require major disassembly are also best left to the pros. And if you find door frame damage during removal, you'll want a qualified technician to assess the situation.
For successful DIY installation, take photos before removing the old gasket - you'll thank yourself later when you're trying to remember how everything fits together. Work in moderate temperatures since gaskets handle better when they're warm. A hair dryer can soften stiff gaskets and make installation much easier.
Have a helper for large gaskets - wrestling with 8 feet of rubber gasket by yourself is an exercise in frustration. Most importantly, test the seal thoroughly before considering the job complete.
Most of our customers successfully install their own gaskets using our detailed instructions. The key is taking your time and not rushing the process. A properly installed gasket should last years, so it's worth doing right the first time.
Conclusion
Taking care of your gaskets for walk in coolers isn't just about fixing a rubber seal - it's about protecting your entire operation. When you invest in quality gasket replacement and maintenance, you're making one of the smartest financial decisions for your refrigeration system.
Think about it this way: a $75 gasket replacement can save you hundreds of dollars every month in energy costs. We've seen facilities where a simple gasket swap reduced their electric bills by $300-400 monthly. That's real money back in your pocket, month after month.
The math is pretty straightforward - faulty gaskets can waste up to 15% of your cooling energy, and that adds up fast. But beyond the energy savings, you're also protecting your compressor from overwork, preventing costly emergency repairs, and keeping your stored products at safe temperatures.
Getting the sizing right is absolutely critical. Remember our corner-to-corner measuring technique, and don't guess on your door's mounting system. A gasket that doesn't fit properly is almost as bad as no gasket at all. Take those measurements twice, and keep your old gasket as a reference until you're completely satisfied with the new installation.
Material choice makes a real difference too. If you're running a high-traffic operation, spending the extra $10 for Santoprene will pay off in longevity. For lighter-use applications, quality PVC will serve you well for years. Either way, you're making an investment that protects much bigger assets.
Here's what we've learned from years of helping funeral homes and commercial facilities: preventive maintenance is your best friend. Those monthly cleanings and quarterly inspections we talked about? They can literally double your gasket's lifespan. It's 15 minutes of work that saves you hundreds of dollars down the road.
At American Mortuary Coolers, we've seen how proper gasket maintenance keeps refrigeration systems running smoothly across Tennessee, Georgia, Illinois, and beyond. Whether you're maintaining a mortuary cooler or a commercial walk-in, the same principles apply - and the same savings are waiting for you.
The best part? Most gasket replacements are totally doable as DIY projects. No special licenses required, just basic tools and a bit of patience. You've got this.
Your next steps are simple: grab a dollar bill and test your current seals, measure your doors using our guide, and source quality replacement gaskets before you actually need them. Don't wait for complete failure - be proactive.
For deeper technical guidance on maintaining your entire door system, check out our comprehensive guide: More info about walk-in cooler doors.
Gaskets for walk in coolers might seem like a small detail, but they're protecting your equipment, your energy budget, and everything you're working to preserve. That's a pretty big job for a strip of rubber - and now you know how to make sure it does that job right.


