Why Every Mortuary Professional Needs a KE2 Controller Manual
The ke2 controller manual is your essential guide to operating one of the most advanced evaporator efficiency controllers in commercial refrigeration. Whether you're managing a funeral home's walk-in cooler or maintaining precise temperatures in mortuary storage, understanding your KE2 controller can save you thousands in energy costs and prevent costly equipment failures.
Quick Reference for KE2 Controller Manual:
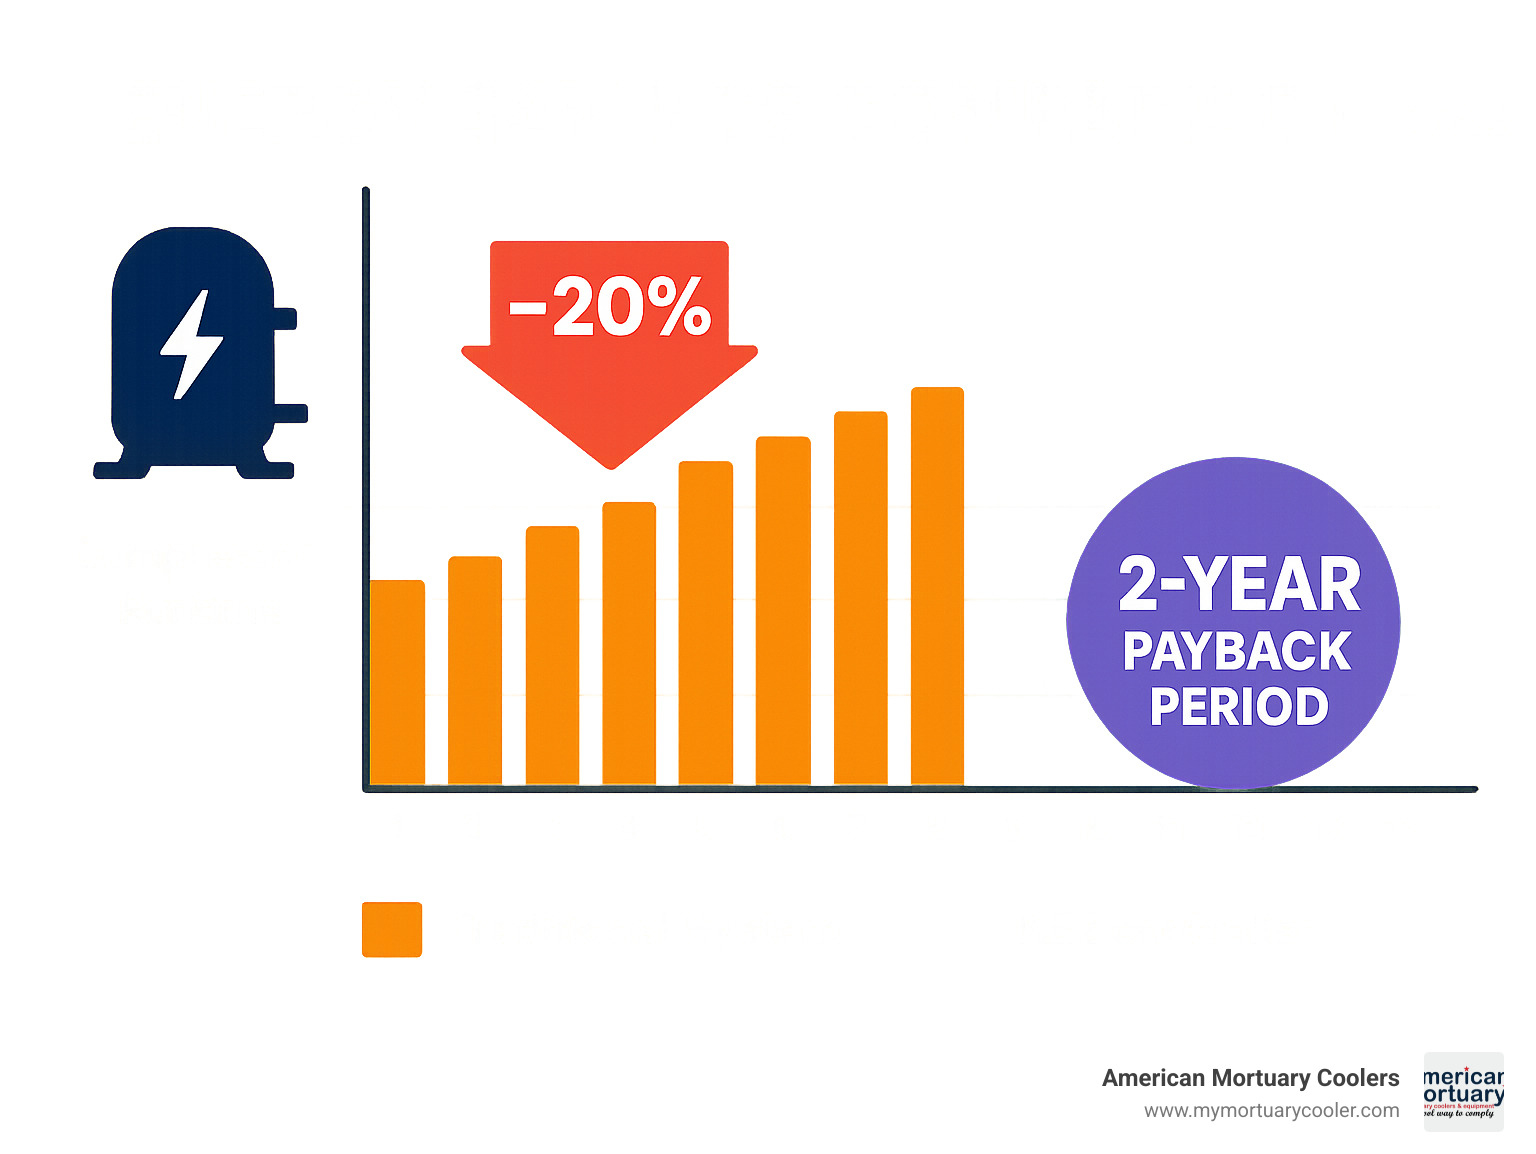
- KE2 Evap - Reduces compressor runtime by up to 20%, 2-year payback period
- Operating Range - Functions from -40°F to 140°F ambient conditions
- Refrigerant Support - Compatible with 20+ refrigerant types including R-404A, R-448A
- Data Logging - Stores 30 days internally, 365+ days with KE2-EM module
- Remote Access - KE2 SmartAccess provides cloud monitoring without IT setup
The KE2 controller replaces traditional thermostats, defrost timers, and fan delays with intelligent algorithms that optimize energy use. As one installation manual notes: "The KE2 Evaporator Efficiency is an electronically operated evaporator controller engineered to save energy in refrigeration systems through precise control of superheat, space temperature, fan cycling, reduced compressor runtime, and demand defrost."
Key benefits include:
- Demand defrost triggers at 90% efficiency instead of fixed timers
- Built-in web interface accessible via smartphone
- Automatic email/text alarm notifications
- Simple bonding for multiple evaporator synchronization
I'm Mortuary Cooler, a national supplier of mortuary cooling equipment with extensive experience helping funeral directors steer refrigeration controls and KE2 controller manual procedures. My background includes supplying custom walk-in solutions nationwide, where proper controller setup is critical for maintaining precise temperatures and reducing operational costs.

Related content about ke2 controller manual:
Why Read This Guide?
At American Mortuary Coolers, we've seen countless funeral homes struggle with inefficient refrigeration systems that drain energy budgets and fail at critical moments. The ke2 controller manual addresses these challenges with proven results: a payback period of approximately 2 years based on a utility rate of $0.09/kWh, after which you'll see pure energy savings.
The controller's impressive operating range from -40°F to 140°F makes it suitable for everything from our custom mortuary coolers to standard walk-in applications across our service areas in Tennessee, Georgia, Illinois, and beyond. Whether you're in our Johnson City headquarters or need support in Los Angeles, this guide will help you maximize your investment.
1. Unboxing Your KE2 Controller Kit
Opening your KE2 controller box feels a bit like Christmas morning – except instead of toys, you're getting tools that'll save you serious money on energy bills. The ke2 controller manual makes it clear that every component has been factory-tested before shipping, so you can trust what you're getting.

The first thing you'll notice is how compact everything is. The KE2 controller unit itself comes with an IP65 enclosure rating, which means it can handle moisture and dust without breaking a sweat. Perfect for those humid morgue environments we work with regularly.
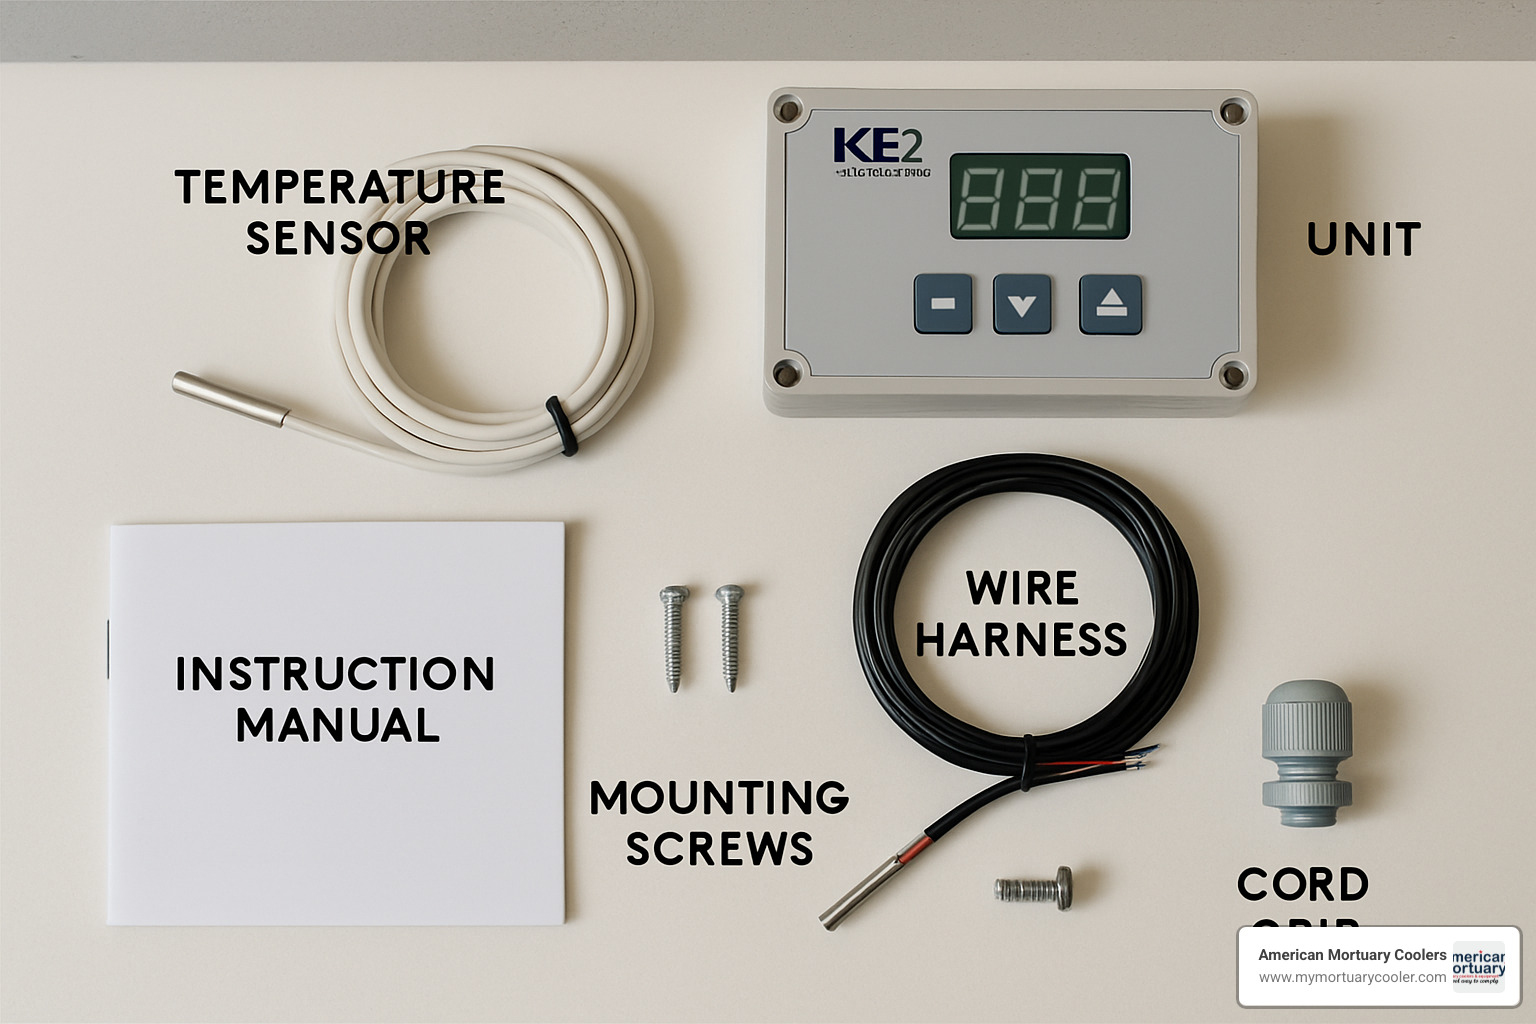
Your kit includes the essentials: a temperature sensor with a 10-foot lead (long enough for most installations), mounting screws and hardware, and a handy cord grip for cable management. There's also a sensor zip-tie to keep everything secure, plus a programming sticker with quick reference info – trust me, you'll want to keep that sticker handy during setup.
For safety, you'll find high-voltage shield screws and a wire harness with pluggable connectors. These pluggable connectors are a game-changer compared to old-school terminal strips. No more wrestling with tiny screws in cramped spaces.
Depending on your specific needs, you might also have ordered optional accessories like a Door Switch for walk-in applications or the KE2 SmartGate for network connectivity. If you're dealing with a complex installation, those wire harness extensions can be lifesavers.
| Feature | KE2 Evap | KE2 Temp + Air Defrost |
|---|---|---|
| Temperature Control | Advanced superheat control | Basic temperature differential |
| Defrost Type | Demand-based at 90% efficiency | Time-based or custom schedule |
| Communication | Ethernet, Modbus, Wi-Fi ready | RS-485 Modbus |
| Data Logging | 30 days internal, 365+ with KE2-EM | Basic alarm logging |
| Applications | Medium/low temp evaporators | Medium temp air defrost only |
| Energy Savings | Up to 20% compressor runtime reduction | Standard thermostat replacement |
ke2 controller manual Part Identification
Let's get familiar with what you're working with. The ke2 controller manual breaks down each component so you won't accidentally mix up parts during installation.
The controller body houses all the smart electronics that make this system work. Unlike cheaper controllers, this one features fully encapsulated electronics, so you can actually install it inside your refrigerated space without worrying about moisture damage. That's a huge advantage when you're working with limited space.
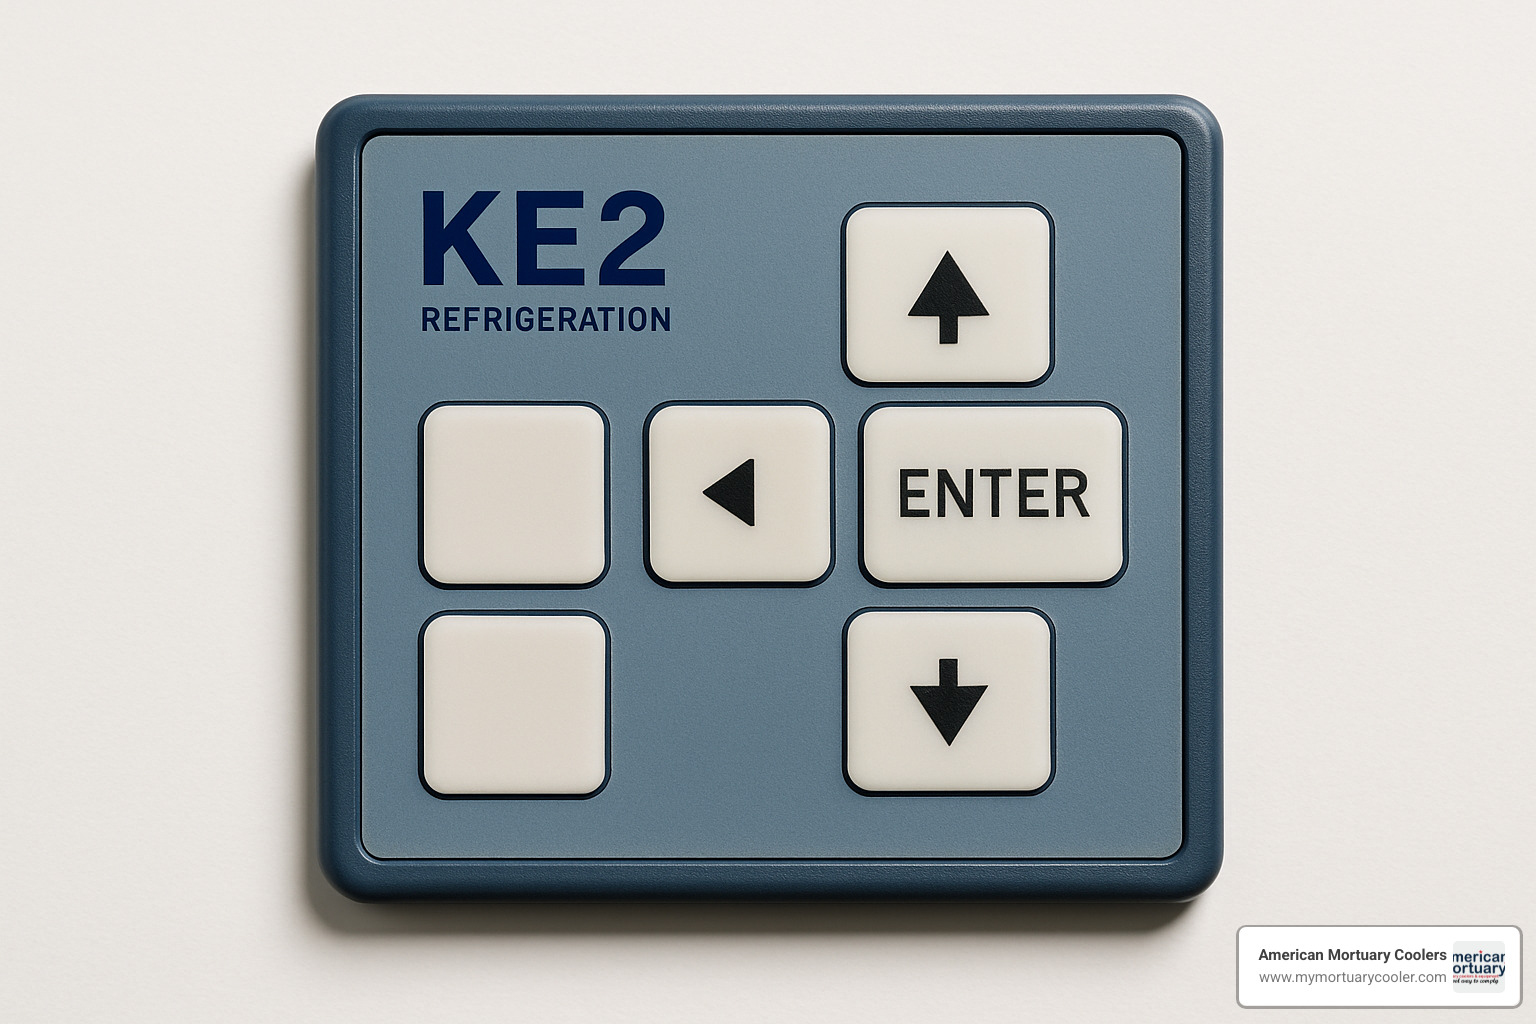
The display bezel gives you a six-button interface for local programming. It's intuitive enough that you won't need to dig out the manual every time you want to make an adjustment. The buttons have a solid feel – they're built to last in commercial environments.
If you're doing a wall-mount installation, the mounting box keeps everything neat and professional-looking. The fuse protection includes MOV-protected fuses for surge protection. Think of it like a surge strip for your refrigeration system – it protects your investment from electrical spikes.
Here's a pro tip from our installation experience: when you're replacing the MOV-protected fuse, don't overtighten it. These protective circuits are more delicate than they look, and overtightening can damage the surge protection that keeps your controller safe.
The terminal strips use those pluggable screw-terminal connectors I mentioned earlier. They make wiring so much easier than traditional terminal blocks, especially when you're working in tight spaces behind evaporator units.
2. Installation Best Practices Using the ke2 controller manual
Getting your KE2 controller installed correctly is like building a solid foundation for your house – do it right the first time, and everything else falls into place. The ke2 controller manual makes it clear that proper sensor placement is the difference between a system that saves you money and one that gives you headaches.
I've watched too many funeral directors struggle with controllers that seemed to have a mind of their own, only to find the sensors were placed in spots that made accurate readings impossible. The good news? Following these proven guidelines prevents about 90% of the installation problems we see in the field.
The secret to perfect return air sensor placement starts with understanding airflow patterns. Mount your sensor at least 8 inches away from the coil surface, using the bracket and self-tapping screw that comes in your kit. The sensor needs to live in the evaporator's return air stream, but keep it away from direct airflow or any heat sources that might throw off the readings.
Here's where the ke2 controller manual gets really smart about coil sensor placement. Instead of guessing where to put it, start a defrost cycle and watch your coil like a hawk. See where the frost disappears last? That's your sweet spot. Usually, you'll find this location in the bottom third of the coil, about 1 to 1.5 inches from the outer edges. This method ensures your defrost cycles end at exactly the right moment – not too early, not too late.
Wire management makes all the difference in long-term reliability. If you need to extend sensor wires beyond 100 feet, stick with 18 AWG shielded twisted pair cable. Keep those sensor wires at least 2 inches away from high-voltage lines, and when you absolutely must cross them, do it at right angles to minimize electrical interference.
The IP65 enclosure rating means your controller can handle harsh environments, but don't skip proper conduit installation. Use liquid-tight cord grips for all external cable entries – your future self will thank you when moisture stays where it belongs.
For more detailed guidance on walk-in installations, check out our comprehensive resource: More info about installing walk-ins. And if you want to dive deeper into advanced configuration topics, KE2 University offers excellent technical resources.
ke2 controller manual Wiring Steps
The wiring phase is where careful attention to detail pays off in years of trouble-free operation. The ke2 controller manual provides clear diagrams, but let me walk you through the connections that matter most for reliable performance.
Start with your high-voltage connections – this is serious business that demands respect. Wire your AC line voltage to terminals L1 and L2, then connect that ground wire to the green ground screw. Don't forget to install the metal shield over your high-voltage connections, and double-check that your voltage selector settings match your power supply. Getting this wrong isn't just inconvenient – it's potentially dangerous.
Your relay outputs are the workhorses of the system. The fan relay handles 10 A inductive at 240 V, while the defrost relay can manage 20 A resistive at 240 V. The solenoid relay gets configured specifically for liquid line solenoid control, giving you precise system management.
Communication wiring opens up a world of possibilities for remote monitoring and system integration. The Ethernet connection uses standard TCP/IP over Cat5e cable, with a maximum run of 330 feet. For building management integration, the Modbus RS-485 connection uses simple A/B terminals. In electrically noisy environments, shielded cables for communication lines aren't just recommended – they're essential.
The controller plays nicely with standard TCP/IP over Ethernet and follows IEEE 802 cabling guidelines. When you're installing multiple controllers, assign unique Modbus addresses to each one. Trust me, preventing communication conflicts now saves hours of troubleshooting later.
3. Programming Key Setpoints with the KE2 Controller
Getting your KE2 controller programmed correctly is where the magic happens. The ke2 controller manual walks you through Introduction Mode, which is basically the controller's way of asking "What kind of system am I controlling?" before it starts doing its job.
Think of Introduction Mode as a friendly conversation with your controller. It needs to know five key things: your room temperature setting to establish the baseline, your defrost type (electric, hot gas, or air), your valve type (thermostatic or electronic expansion), which refrigerant you're using from the 20+ options available, and whether you want SmartAccess cloud connectivity enabled.

Once you're past the introduction, the real programming begins. Your temperature setpoint (tS) is the heart of the operation - this is what temperature you want your space to maintain. The differential (diF) setting determines how much the temperature can swing before the compressor kicks in again. Too tight and your compressor runs constantly; too loose and you get temperature swings.
Here's where the KE2 really shines: compressor starts per hour (CSH). Set this between 6-10 starts to protect your compressor from short cycling. If you set it to 5, you're telling the controller "I don't care about starts per hour," which disables the feature entirely.
The defrost per day (dPd) setting ranges from 0-12 cycles, but remember - this controller is smart enough to do demand defrost. It triggers when your coil efficiency drops to 90%, not just because a timer says so. You can also set up alarm offsets for high and low temperature warnings, giving you peace of mind that you'll know if something goes wrong.
Don't worry about someone accidentally changing your carefully programmed settings. The ke2 controller manual explains that password protection keeps critical setpoints secure while still allowing operators to check system status and adjust room temperature when needed.
Using the ke2 controller manual Menu Tree
Navigating the controller's menu system is straightforward once you understand the layout. The ke2 controller manual organizes everything into logical sections that make sense for field technicians who need to find information quickly.
The Setpoints menu is where you'll spend most of your programming time, handling temperature, defrost, and alarm parameters. Variables shows you real-time readings - think of it as your system's vital signs. When you need to test something or override normal operation, the Manual section gives you complete control over defrost cycles, fan operation, and valve testing.
The Alarms section keeps track of both current issues and historical problems, which is invaluable for troubleshooting recurring issues. If you're running multiple evaporators on one condensing unit, the bonding (bnd) feature synchronizes defrost cycles so they don't all try to defrost at once and overload your system.
Bonding is particularly useful in larger installations. When controllers are bonded together, they communicate to prevent simultaneous defrosts that could damage your condensing unit. You can set this up through the controller menu or use the web interface for easier configuration - especially helpful when you're dealing with multiple units.
The pump-down feature handles system shutdown gracefully, evacuating refrigerant from the evaporator before stopping the compressor. This protects your system during maintenance and extends equipment life.
Manual overrides are your friend during installation and troubleshooting. You can force a defrost cycle to test operation, initiate a system shutdown with proper pump-down, override fan cycling to verify airflow, or test expansion valve operation to ensure proper refrigerant flow. These features turn what used to be complex diagnostic procedures into simple button presses.
4. Remote Monitoring & Troubleshooting
Modern mortuary operations can't afford downtime, and that's where the ke2 controller manual really shines with its remote monitoring capabilities. Gone are the days of finding a failed cooling system only after arriving at work Monday morning to find a crisis waiting.
KE2 SmartAccess transforms how you manage your refrigeration systems. This cloud-based platform connects automatically without the headache of complex IT setup - no port forwarding, no VPN configurations, and no expensive IT consultants needed. Your controller simply connects to the internet and starts reporting back to you 24/7.
The beauty of this system lies in its simplicity. Once connected, you can monitor your mortuary coolers from anywhere using your smartphone, tablet, or computer. The system tracks everything from temperature trends to compressor runtime, giving you the insight needed to catch problems before they become expensive emergencies.
Data logging capabilities are impressive for a controller in this price range. The unit stores 30 days of data internally, which covers most short-term troubleshooting needs. For funeral homes requiring longer-term analysis, the KE2-EM module extends storage to 365+ days. This extended logging proves invaluable for warranty claims, energy audits, and identifying seasonal patterns that affect your cooling costs.
You can access all this information through the KE2 SmartAccess portal, where data downloads as CSV files for detailed analysis. The graphical trending feature makes it easy to spot issues like gradual temperature drift or increasing defrost frequency that might indicate maintenance needs.
Error codes in the ke2 controller manual follow a logical naming system that makes field diagnosis straightforward. SSA (Shorted Sensor Alarm) typically indicates moisture intrusion or physical damage to sensor wiring. OSA (Open Sensor Alarm) points to disconnected or failed sensors. Temperature alarms like HtA (High Temperature) and LtA (Low Temperature) help identify whether your system is struggling to maintain setpoint or overcooling due to sensor placement issues.
For funeral directors managing multiple locations, the pairing lead/lag functionality becomes particularly valuable. This feature allows you to synchronize multiple controllers on shared condensing units, preventing the system damage that occurs when multiple evaporators attempt to defrost simultaneously.
Understanding how your cooling system integrates with compressors and evaporators helps with troubleshooting. Our detailed guide covers these relationships: A Comprehensive Guide to Walk-In Cooler Compressors and Evaporators
Quick Fixes Referenced in the ke2 controller manual
The ke2 controller manual includes troubleshooting procedures that resolve most common issues without requiring a service call. These quick fixes can save you hundreds in emergency service fees, especially during weekend or holiday situations.
Sensor-related problems account for roughly 70% of field issues we see. Start by checking that sensor connections remain tight and moisture-free. Even small amounts of condensation can cause erratic readings. Physical damage to wire insulation often occurs during installation or maintenance, so inspect the entire sensor wire run carefully.
A simple multimeter test reveals sensor health quickly. Most temperature sensors read approximately 10kΩ resistance at 77°F. Readings significantly higher or lower indicate sensor failure. If readings fluctuate wildly, suspect moisture intrusion or internal sensor damage.
Communication loss between controllers and the SmartAccess system usually stems from network connectivity issues rather than controller problems. Verify your Ethernet cable connections first, then check for IP address conflicts on your network. Many facilities use multiple network devices, and address conflicts cause intermittent connectivity problems that frustrate troubleshooting efforts.
When communication issues persist, try the simple solution first: restart the controller by cycling power. This clears temporary network conflicts and reestablishes connections in most cases. Document the time and circumstances of communication failures to help identify patterns.
RTC battery replacement becomes necessary when the red LED indicator starts blinking. This real-time clock battery maintains accurate time and scheduling when power interruptions occur. Replace it immediately to avoid clock drift that throws off defrost scheduling and alarm timing. Use only the specified battery type to maintain warranty coverage.
Manual defrost capability provides immediate relief when automatic defrost cycles fail or when you need to clear heavy frost buildup quickly. Access this through the controller's manual menu or remotely through the SmartAccess portal.
Firmware updates occasionally become available to address specific issues or add functionality. However, these updates should only be performed by qualified technicians familiar with the process. Improper firmware installation can disable the controller entirely, requiring factory repair.
Frequently Asked Questions about ke2 controller manual
What defrost mode should I choose?
Choosing the right defrost mode feels overwhelming at first, but the ke2 controller manual makes it straightforward once you understand your system. After helping hundreds of funeral homes optimize their cooling systems, I've learned that most mortuary applications fall into predictable patterns.
Electric defrost works best for traditional walk-in coolers where electric heaters are already installed. It's reliable, easy to troubleshoot, and perfect for most funeral home applications where you need consistent performance without complexity.
Hot gas defrost offers the most energy efficiency if your system supports it. The controller redirects hot refrigerant gas to melt frost, which is faster and uses less energy than electric heaters. However, your refrigeration system needs to be specifically designed for this method.
Air defrost only works for medium-temperature applications above 32°F. It's gentler on the system but won't handle heavy frost loads in colder environments.
The real magic happens with the controller's demand defrost algorithm. Instead of running defrost cycles every six or eight hours like old-fashioned timers, the ke2 controller manual explains how the system monitors actual evaporator efficiency. When efficiency drops to 90%, it triggers a defrost cycle. This smart approach can cut your defrost frequency by 30-50%, saving significant energy costs over time.
How do I enable KE2 SmartAccess without IT support?
This question comes up constantly, and I understand why. Most funeral directors don't want to deal with complex network setups or wait for IT support. The good news is that enabling SmartAccess is refreshingly simple according to the ke2 controller manual.
Here's what you do: Press and hold the BACK button until "tS" appears on the display. Press the navigation button twice to get to "SA" (SmartAccess). Change the setting from "diS" (disabled) to "EnA" (enabled). Then press and hold ENTER for three seconds to save your changes.
That's it. No port forwarding, no VPN setup, no calling your IT department or nephew who "knows computers." The controller handles all the networking automatically using your existing internet connection.
The system connects to the cloud service on its own and starts providing 24/7 monitoring immediately. You'll be able to check temperatures, receive alarm notifications, and review system performance from your smartphone or computer without any additional setup.
Can I bond multiple controllers on one condenser?
Absolutely, and the ke2 controller manual makes this process much easier than older systems. Bonding becomes essential when you have multiple evaporators sharing a single condensing unit that doesn't have unloading capability.
Think of bonding as teaching your controllers to work as a team. Without bonding, multiple evaporators might try to defrost simultaneously, which can overload your condenser and potentially damage equipment. Bonded controllers coordinate their defrost cycles to prevent this problem.
The process involves accessing the "bnd" menu on your primary controller and selecting secondary controllers from the network list. Each secondary unit needs to confirm the bonding, then you test the synchronized operation to make sure everything works properly.
I recommend using the web interface for bonding configuration on complex installations with three or more controllers. It's much easier to see all your controllers at once on a computer screen than navigating through each unit individually with the small display.
Once properly bonded, your controllers will coordinate defrost cycles automatically, optimize energy efficiency across the entire system, and prevent the kind of equipment failures that can be catastrophic in mortuary applications. The peace of mind alone makes proper bonding worth the extra setup time.

Conclusion
The ke2 controller manual represents a comprehensive guide to one of the most advanced refrigeration control systems available today. At American Mortuary Coolers, we've seen how proper KE2 implementation transforms energy efficiency and system reliability for funeral homes across our nationwide service area.
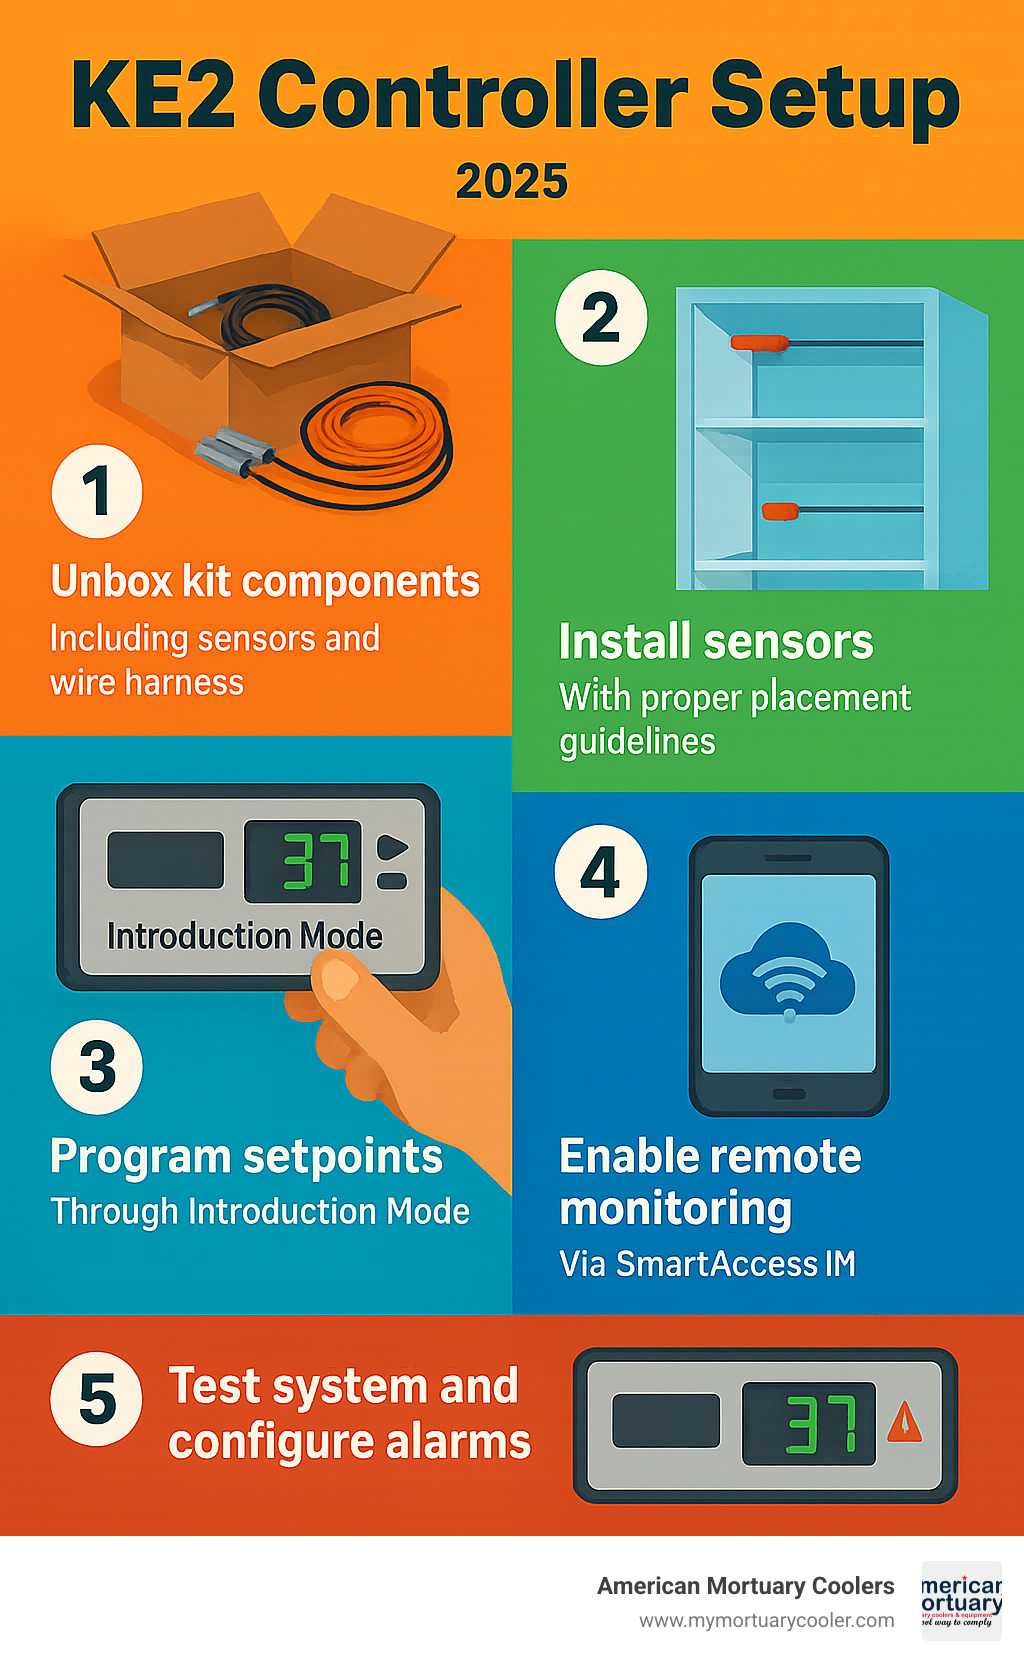
5-Step Summary:
- Unbox and identify all components using the kit checklist
- Install sensors following placement guidelines for optimal performance
- Program setpoints through Introduction Mode and menu navigation
- Enable remote monitoring via KE2 SmartAccess for proactive maintenance
- Test and configure alarms to ensure reliable operation
The energy savings potential is substantial: up to 20% reduction in compressor runtime with a 2-year payback period. For a typical mortuary cooler installation, this translates to hundreds of dollars in annual savings and improved system longevity.
Whether you're located in our Tennessee headquarters region or need support in Dallas, Los Angeles, or New York, our team understands the critical nature of mortuary refrigeration. We deliver custom walk-in solutions nationwide, ensuring that your KE2 controller integration meets the highest standards for reliability and efficiency.
The combination of intelligent defrost algorithms, comprehensive data logging, and cloud-based monitoring makes the KE2 system an invaluable tool for modern mortuary operations. By following this guide and leveraging the detailed ke2 controller manual, you'll maximize your investment while ensuring consistent, reliable performance.
For additional mortuary cooling solutions and expert guidance, visit us at: More info about morgue freezer solutions
Proper installation and configuration of your KE2 controller isn't just about energy savings—it's about ensuring that your critical refrigeration systems operate flawlessly when families depend on your services most.